
Recently it is rapidly gaining popularity among women. Though it has a manly shape, the addition of a ribbon will make this hat go well with a feminine style dress. The featured fabric is PAINT, a new series from Ellen Baker.
Fabric shown for this sample: (Outer fabric, Brim lining fabric)PAINT by ellen baker JG42010-11A
Materials:
□ Fabric (Outer fabric, Brim lining fabric): 110cm×50cm
(Side crown lining fabric, Top crown lining fabric) : 90cm×30cm
□ Fusible interfacing (Medium-weight): 70cm×50cm
(Heavyweight): 30cm×30cm
□ Stay tape: 1m (width 1cm)
□ Grosgrain ribbon: 1.4m (width 2.5cm)

*All Rights Reserved.
We interviewed Anriko about her creation:
Kokka Fabric (KF): What did you think of the fabric you used for this project?
This medium thickness fabric is lovey with a basic color tone. When I first saw it, I immediately thought of making a hat. Depending on the shape or how you coordinate, this fabric could create a masculine look or a feminine feel. It is a good fabric for making fashion accessories.
KF: Can you tell us any special elements or ideas that you incorporated into this creation?
I chose to create a boater hat with a short height and shallow brim. Making a pattern and constructing it is easier with this design. On the other hand, a hat with a large brim is more difficult to make than you think as it requires an appropriate fabric and interlining material selection.
KF: What are some tips for making this hat?
While a heavyweight interfacing is attached to keep the fabric from stretching, please make sure not to extend the stretchable bias portion.
KF: How should we wear this hat in everyday situations?
The shape is masculine, but the cuteness is mixed in by adding a long ribbon. Actually, it goes well with a skirt or a dress.
KF: Thank you very much, Anriko! Here are sewing instructions along with step by step photos from her. Enjoy crafting!
Instructions
1.
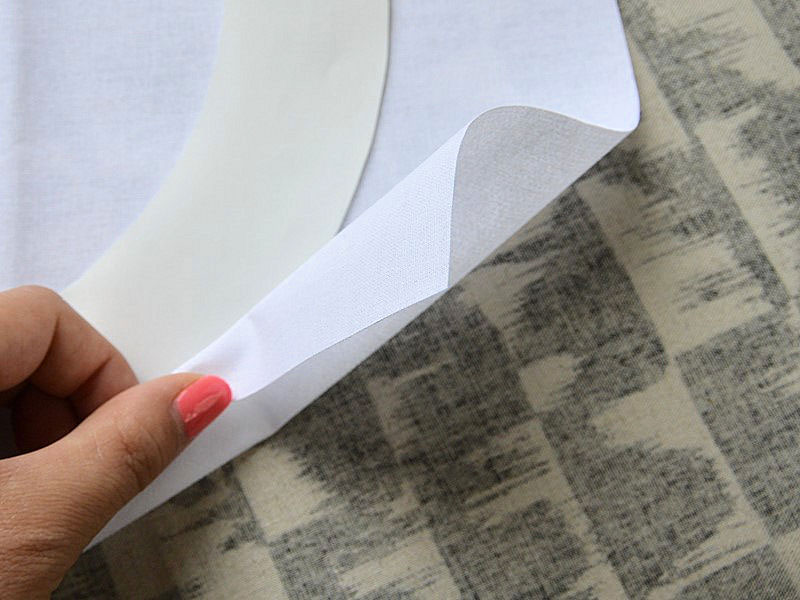
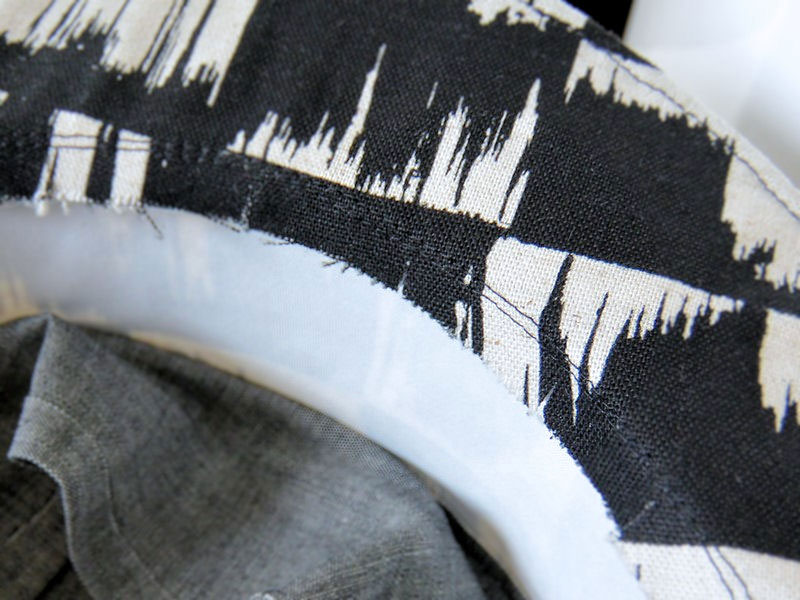
Rough cutting is recommended. Cut the fabric into a rough shape (especially the brim and top). Adhere interfacing and cut to the shape.
2.

The detail is important. When sewing together the top and side, work slowly and make sure that the fabrics are aligned at the presser with the side fabric over the top fabric. This way, you can avoid the top fabric to be stretched and can maintain the shape.
3.
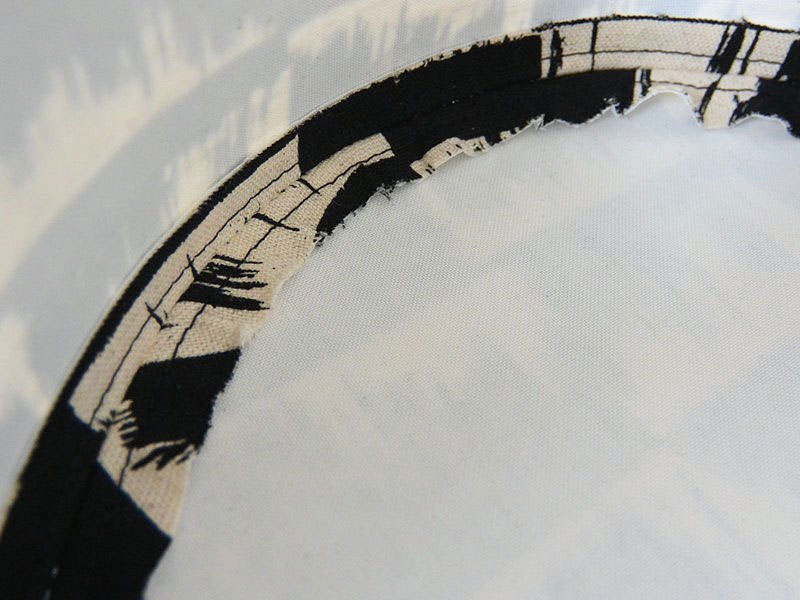
The heavyweight interlining may be attached to the top and side, but you may find the process difficult. For this project, medium-weight interfacing is used. To complement the process, the seam is pressed open and stitching is added so that the corners look sharp.
4.

To align the outer and lining fabrics, hand stitching is used. Since the same pattern is used for the outer and lining fabrics, lining fabric will end up with some excess edges. So you may have the lining fabric exceed over the outer fabric slightly for a clean finish.
5.

Normally, sizing tape is used at the end of the process. To make it easier for the beginners, an easy to follow process is introduced for this project. Of course, you may choose to use the sizing tape, bias binding tape or machine sewing as you like.
6.
Cut a slit on the seam of the brim. Sew up the lining fabric and attach a ribbon to finish.

 Sun visor
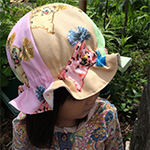 Six-patch hat for kids
 Caramel Pouch