
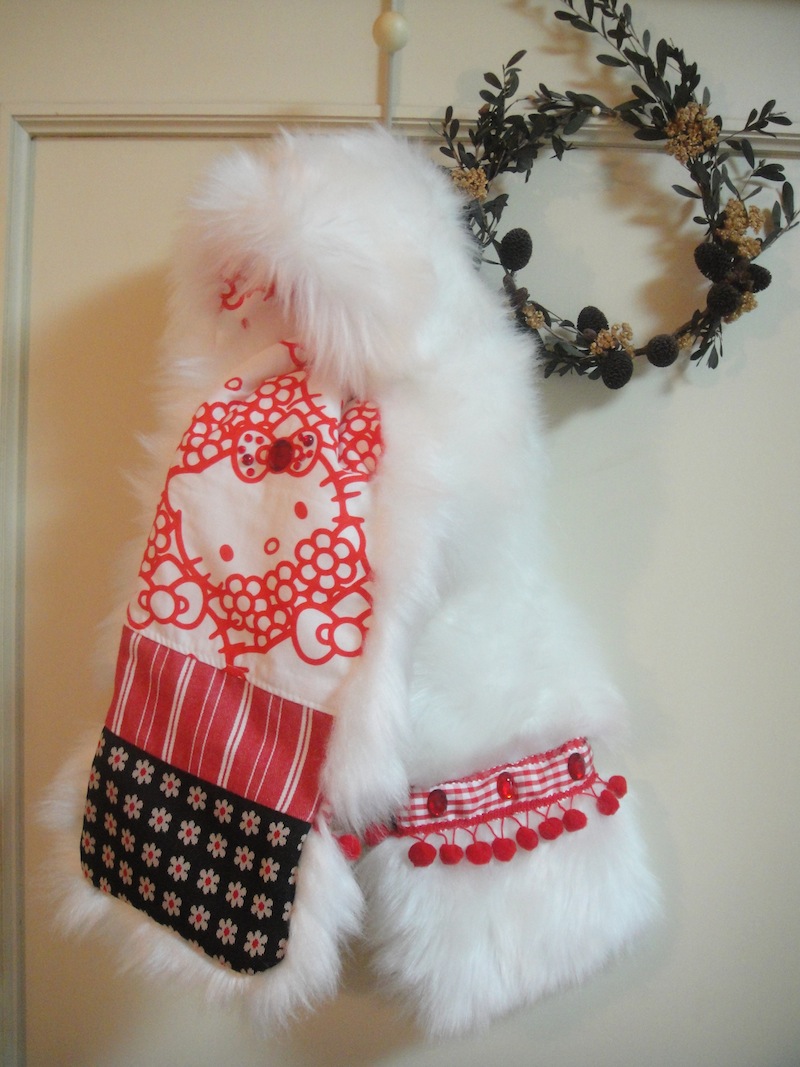
Today’s project is a cute fur scarf with a glimpse of Kitty as a design accent. A hand craft enthusiast, marimari is sharing her creative idea. A warm looking fur will be very useful in a cold weather.
Fabric shown for this sample (for reverse side): Kitty floral bouquet design cotton broadcloth G50183-1
Materials:
Materials:
□ Fabric (Front/outer side – Fur): 70cm×40cm
(Reverse side A): 60cm×40cm
(Reverse side B, C): 20cm×20cm
(Reverse side D, E): 20cm×20cm
□ Quilt batting: 70cm×40cm
□ Ribbon: 40cm (3.5cm width)
□ Pom pom embellishment tape: 40cm (with 1.5cm diameter pom poms)
□ Rhinestones of your choice: about 20 pieces
![]()
We interviewed marimari about her creation:
Kokka Fabric (KF): What did you think about the fabric you used for this project?
Marimari(m): From a series of Kitty’s fabrics, I selected one with a simple color combination in red and white. By mixing it with fur, I thought I could make a Kitty scarf that is cute yet suitable for a grownup woman. I intentionally used Kitty as a backing fabric to enjoy a gap between the front fur and peeking Kitty in the back.
KF:Can you tell us about any special elements or ideas that you incorporated into this creation?
m: The quilt batting adds extra warmth. I was afraid that the Kitty fabric alone may be too simple, so different pieces of fabric are patchworked. As the size of the Kitty was larger than I thought, I added the rhinestones around Kitty’s bow to accentuate her peeking look.
KF:What are some tips for making this scarf?
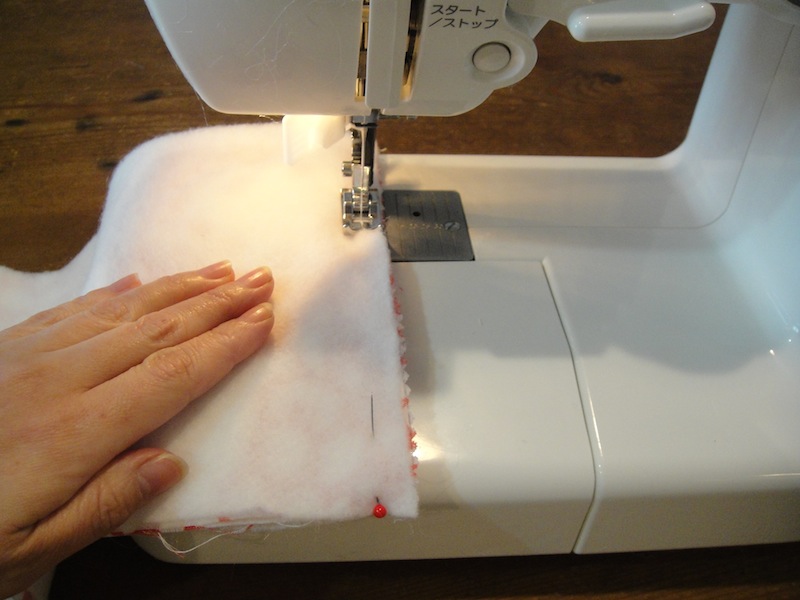
m: When sewing the layered furs, try to push back the extra fur inside the fabric so that it is easier to stitch. It also helps to straighten the fur smoothly when turned over. The fur, quilt batting and Kitty’s (pieced) fabric will all be sewn together at the end. To make this process go easier and aligned, first sew the quilt batting and Kitty fabric together, before you add the fur to sew.
KF: How should we use this scarf in everyday settings?
m: It is a perfect accompaniment for your holiday dress up occasions like Christmas and a New Year’s party. By toning down the colors of your dress, this scarf can be the main motif of your style coordination. Depending on your mood, you can let the Kitty peek on the backside, or bring the backside to the front to show off the Kitty design.
KF: Thank you very much, marimari! Here are sewing instructions along with step by step photos from her. Enjoy crafting!
Instructions: How to make Kitty’s Scarf in Fur
1.

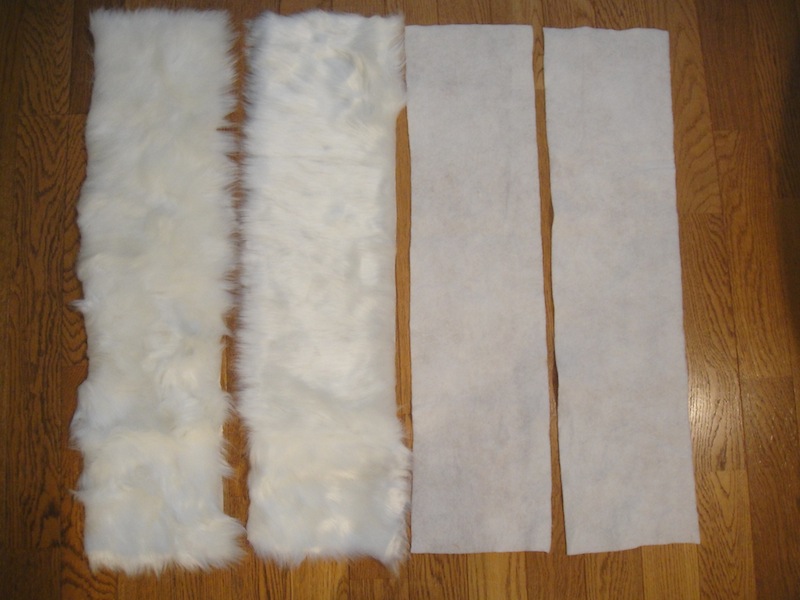
Place the pattern over and cut the fabric and quilt batting. When cutting the fur, it is easier if you try to cut only the backside of the fur fabric.
2.
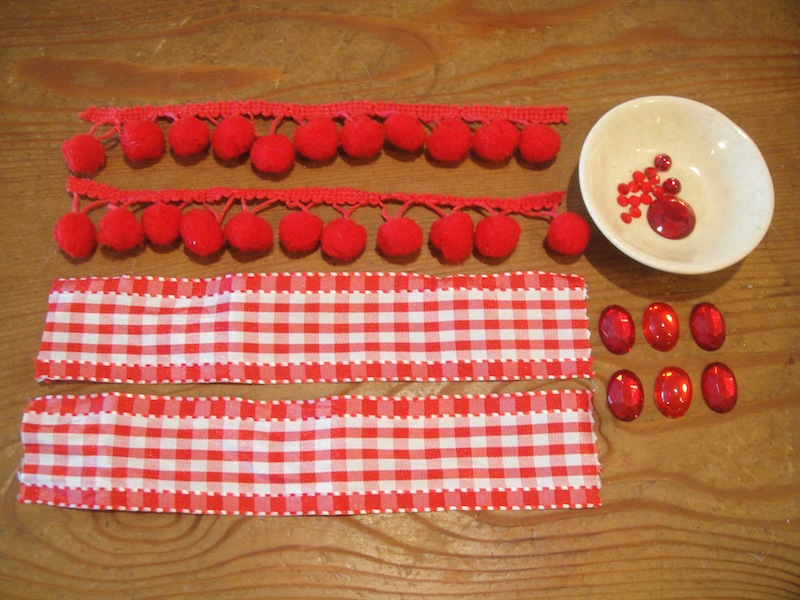
Prepare the pom pom embellishment tape, ribbon and rhinestones.
3.

Reverse side fabric A (17cm x 8cm) and Reverse side fabric B (17cm x 12cm), and another size Reverse side fabric A (17cm x 12cm) and Reverse side fabric B (17cm x 8cm) are placed and sewn together with front/outer sides facing each other.
4.

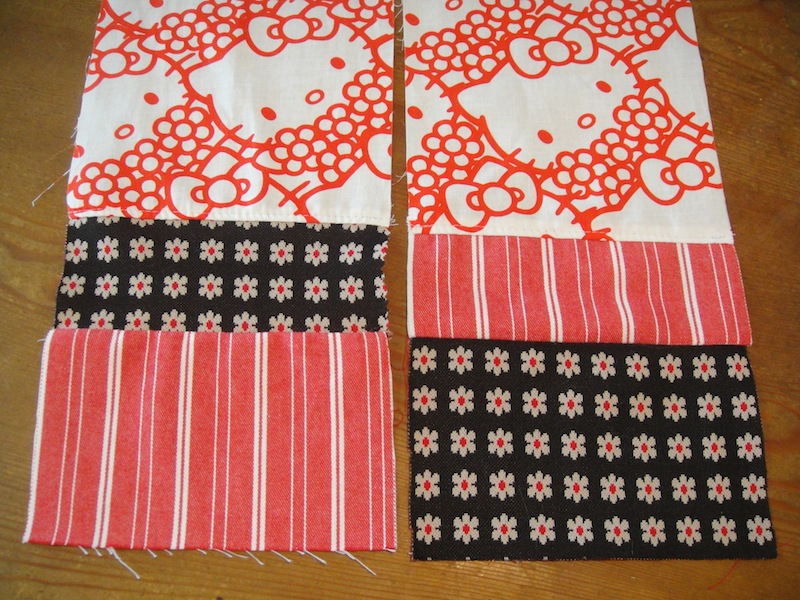
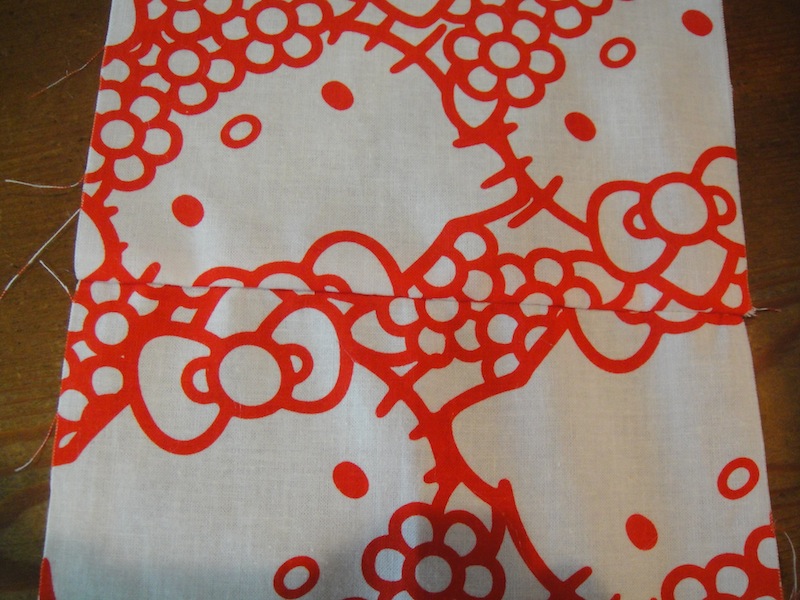
Place and sew together the pieced-together fabric from step 3 and Kitty fabric, with front/outer sides facing each other. Please be careful with the direction of Kitty’s face. Check the top and bottom of the faces, and sew the fabric to the bottom side of the face. The picture on the bottom shows after three pieces of the fabrics are pieced together.
5.
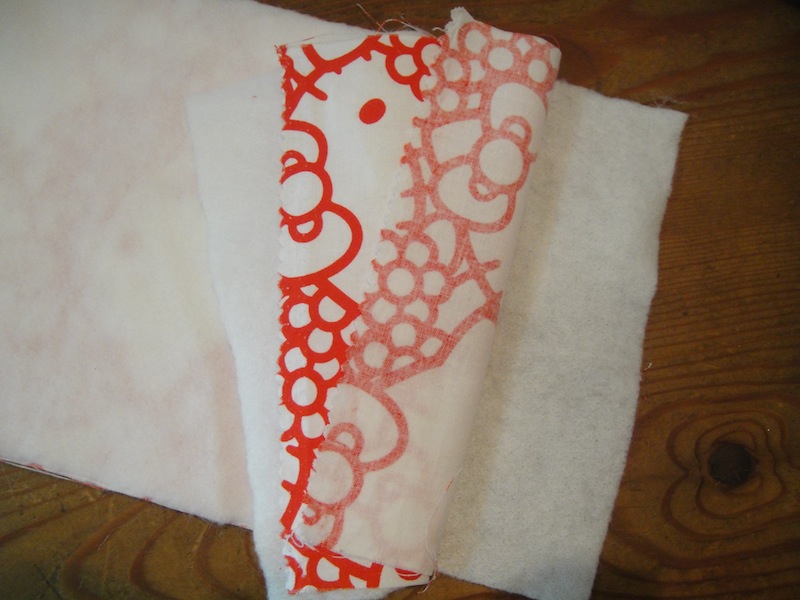
Place the pieces in the following order: quilt batting, Kitty fabric (front/outer side facing on top), Kitty fabric (reverse side facing on top) and another quilt batting. Pin them and sew together. The bottom picture shows after the four pieces are all sewn together.
6.

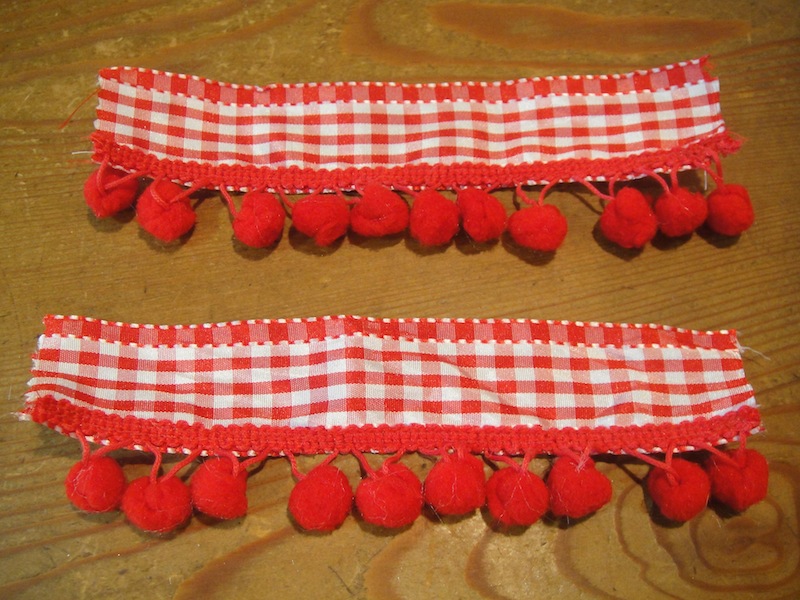
Place the pom pom embellishment over the ribbon. Change the sewing thread to red and sew them together.
7.
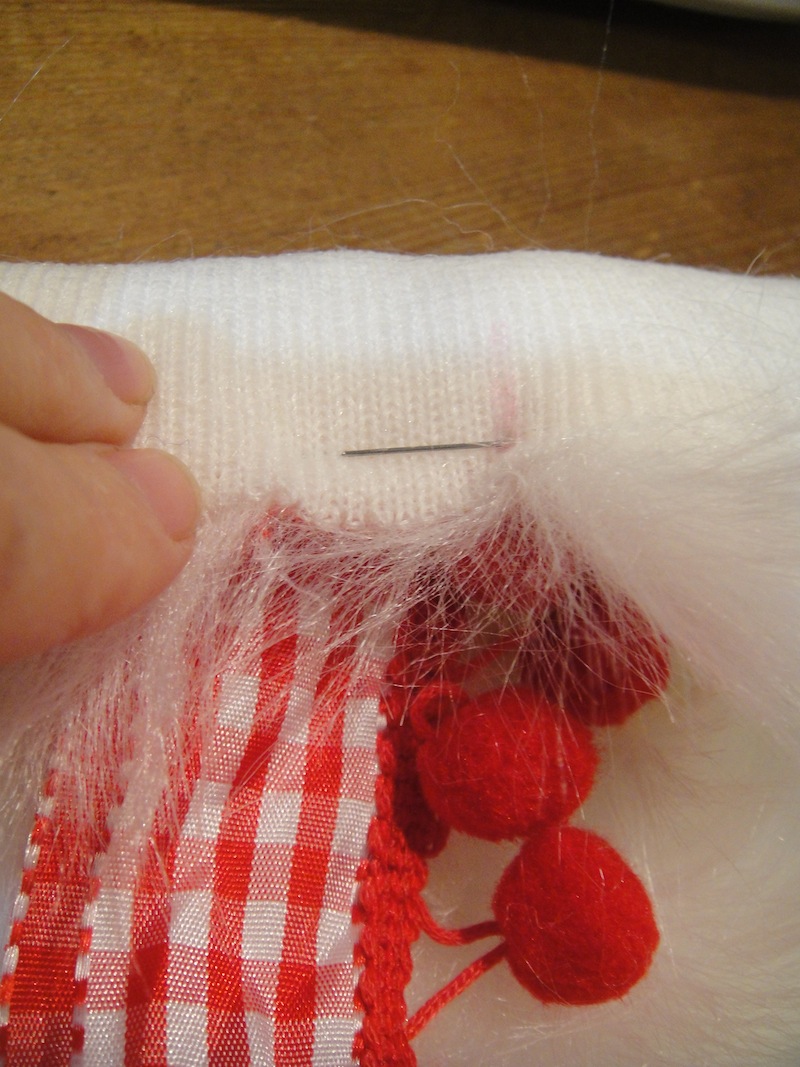

Place the ribbon over the fur, with the bottom of the ribbon at 10cm from the edge of the fur. Run a stitch over both top and bottom of the ribbon. Marking ribbon’s location on the back of the fur first and pin the ribbon will make this process go easier.
8.

Facing the front/outer sides with each other, sew together the fur.
9.
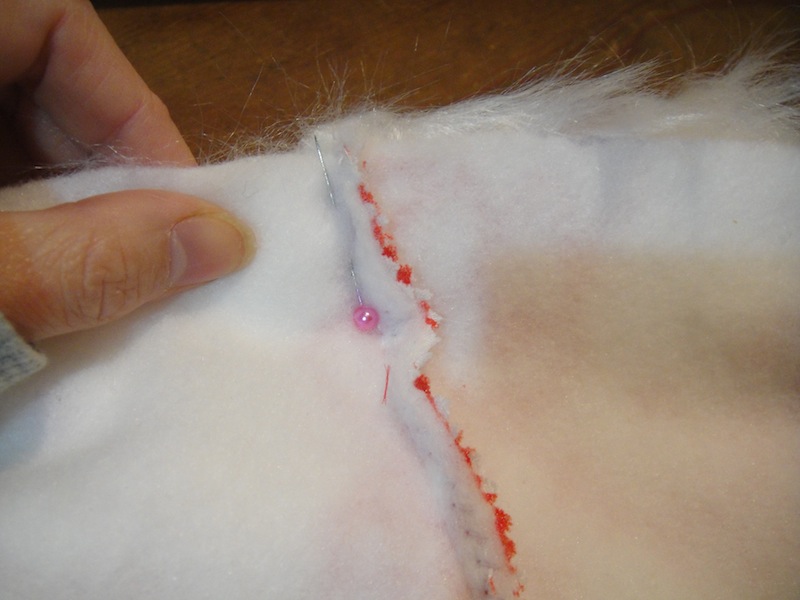
Securely pin together the fur fabric from Step 8 and pieced-together fabric from Step 5, aligning the stitch lines. Place and align the edges of both fabrics and pin them all around.
10.
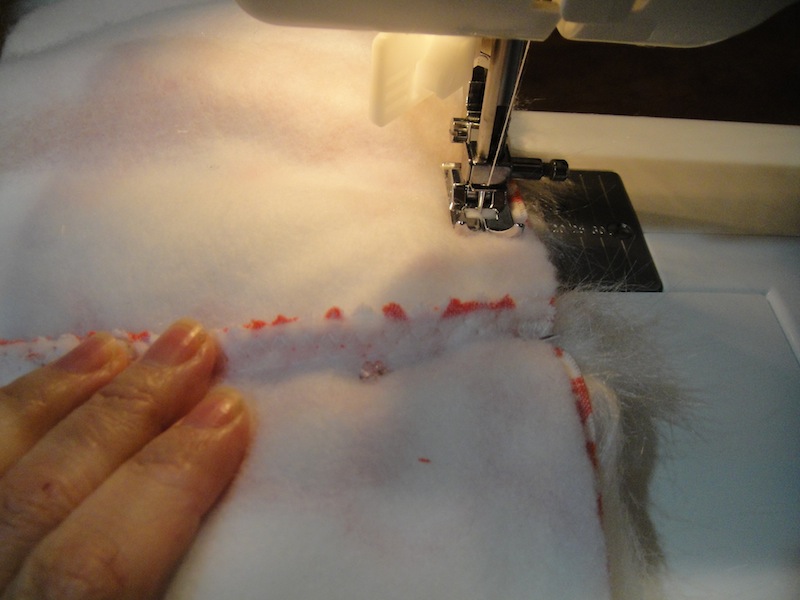
Sew around the edges, leaving an opening for turning.
11.
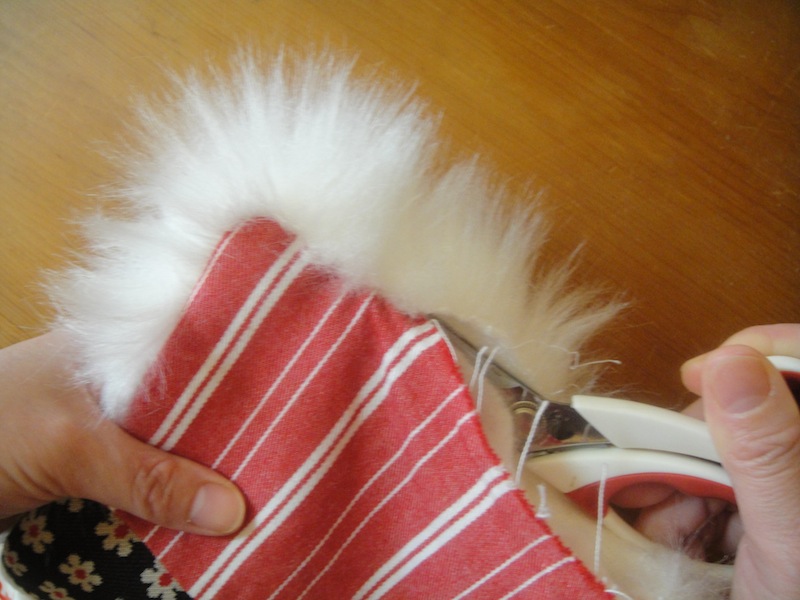
Turn it inside out, using an opening for turning. Align the corner with a pointy tool like a pair of scissors.
12.


Close the opening with a blind stitch. Using a stiletto, pull out the fur and straighten the look.
13.

Using a glue gun or a craft adhesive, place the rhinestones over the ribbons on the front.
14.
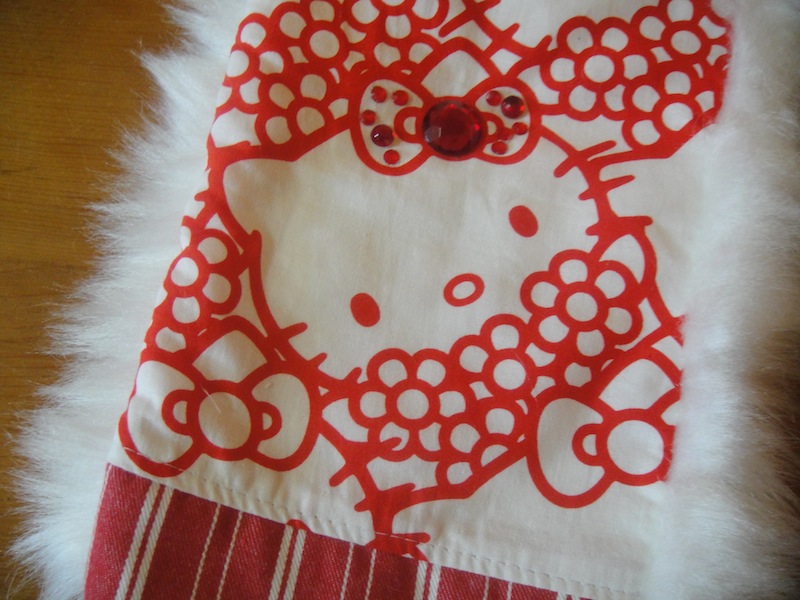
To complete, using a glue gun or a craft adhesive, place the rhinestones on Kitty’s bow on the reverse side and make sure the stones looks balanced. The key is to embellish the bottom Kitty so that it can be seen when worn around the neck.

 Kitty’s Bucket Shaped Organizer Bag
 Patchwork Style Lovely Vanity Case – Sewing Instructions
 Lesson bag in kitten design fabric