
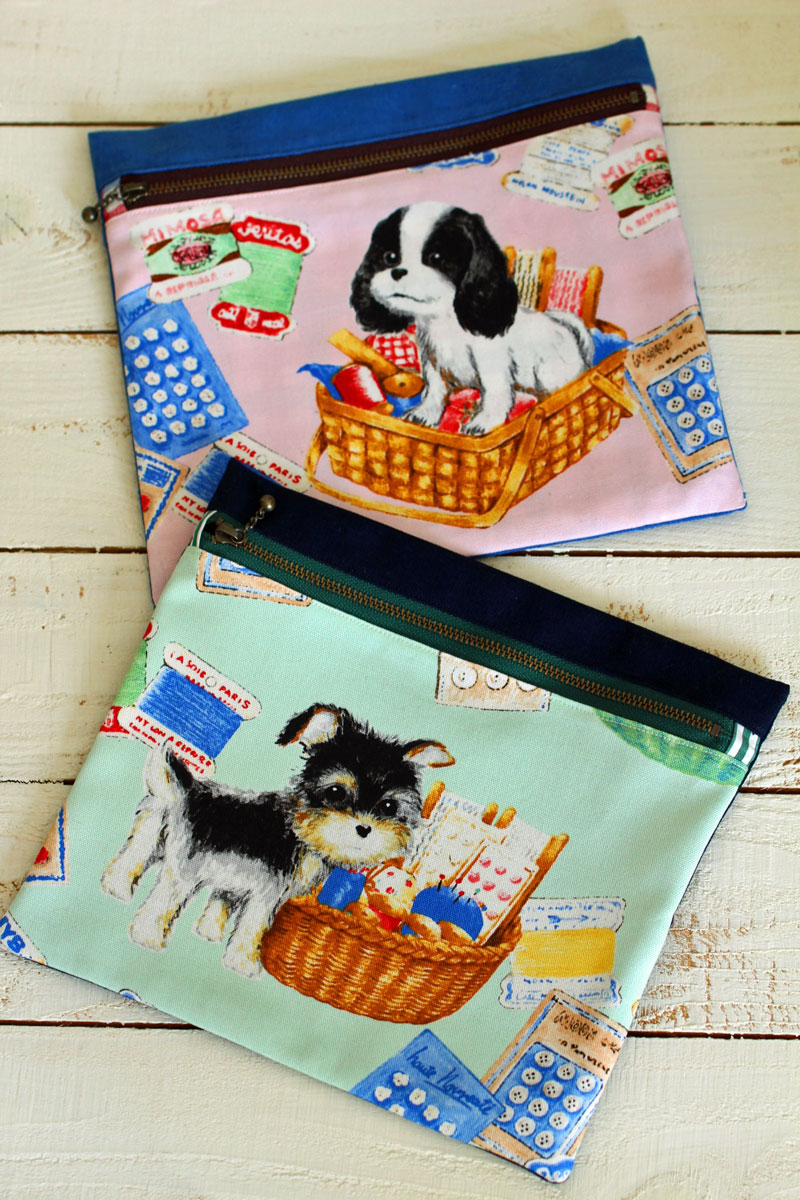
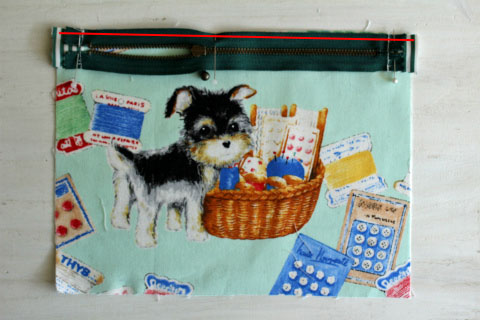
The project is a flat pouch in print fabric with lovely puppies that make you want to hug them.
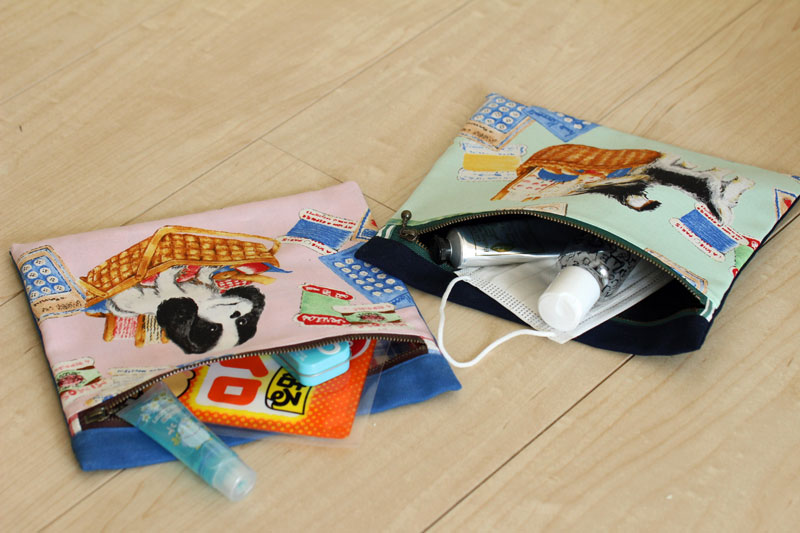
Featuring an outer front zipper, the accent is a stripe fabric, slightly peeking from the edge of the zipper. The bag will be very useful in organizing such small items that often get lost in the bag, like a face mask, mini disposable heating pad and hand cream!
Fabric shown for this sample: (Pink) H11400-403 (A)
(Green) H11400-403 (B)
Materials (for one pouch):
□ Fabric (Front outer fabric): 30cm×20cm
(Back outer fabric): 30cm×30cm
(Lining fabric): 50cm×30cm
(Zipper side fabric): 10cm x 5cm
□ Zipper: One piece (20cm long)
We interviewed Kanae about her creation:
Kokka Fabric (KF): What did you think of the fabric you used for this project?
I decided to make a flat pouch because I wanted to create something that you can really appreciate: a lovely large design of a puppy. Every single one of the four puppies is so cute that it makes you want to create four individual pouches featuring each of them.
KF: Can you tell us any special elements or ideas that you incorporated into this creation?
I paid special attention to the color combination, even treating a zipper as one of the colors. Overall color balance was considered so that the combination would not look odd when the zipper is opened.
KF: What are some tips for making this pouch?
The process for side stitches is slightly different. You may find it confusing just by reading the instructions, however by learning this method, you can shorten the sewing time and it is very convenient.
KF: How should we use this pouch in everyday situations?
It is a flat pouch, yet it holds a lot, allowing you to organize random items in a bag.
KF: Thank you very much, Kanae! Here are sewing instructions along with step by step photos from her. Enjoy crafting!
Instructions
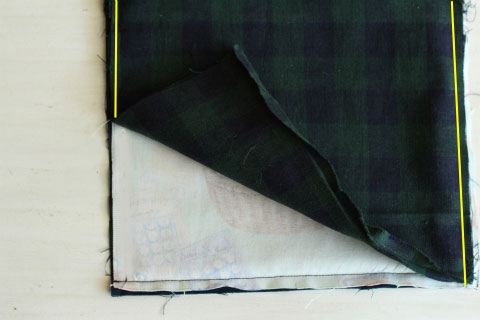
1.
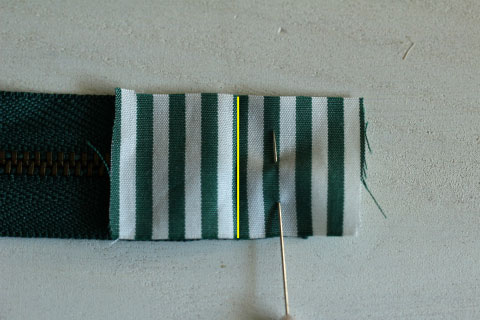
Fold the long end of the side fabric in half. Place the crease line (yellow line) at 5mm from the end of the zipper metal. Sew along the yellow line shown on the picture.
2.
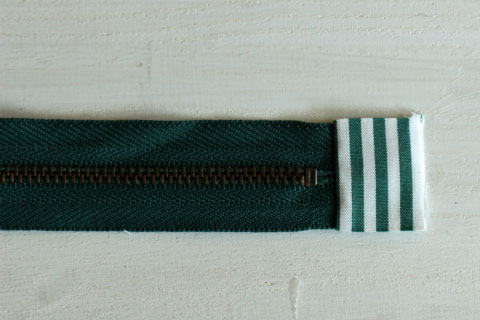
The side fabric is folded back. Repeat the process on the other side.
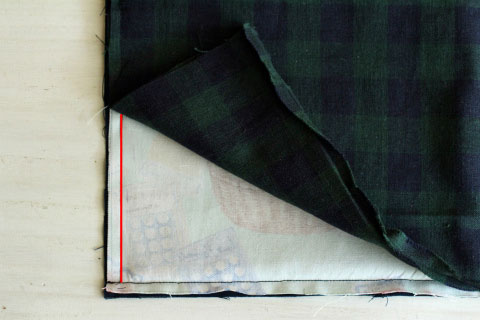
3.
With the front sides facing each other, place the zipper with side fabrics over the outer fabric. Sew the top at 5mm from the top edge (red line). Place the same size lining fabric over and sew the top at 7mm from the top edge. *Cut off the excess side fabric to align the side.
4.
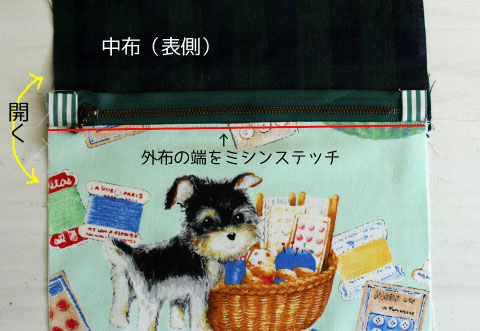
Open up the lining fabric. Align the shape using an iron. Press the outer fabric along with the zipper on the bottom and run stitches. Repeat the process on the other side of the zipper. Place the zipper in between the outer and lining fabrics and sew.
5.
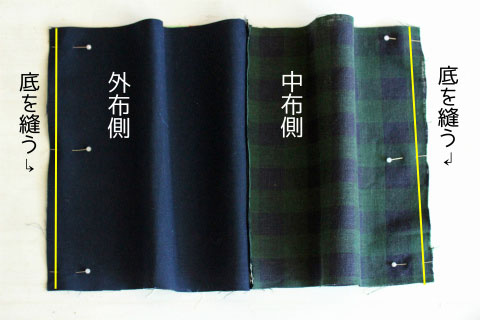
Sew together the outer fabrics and lining fabrics at the bottom respectively.
6.

The length of the fabric at the front and back is different. The longer side looks loose as in the picture. After sewing the bottom, press the seam with an iron.
7.
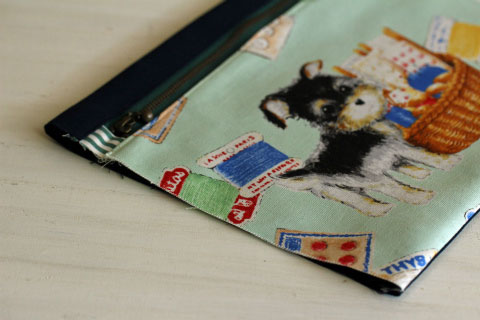
Turn it inside out and using an iron, align the shape by matching the bottoms of the outer fabric and lining fabric.
*Make sure that the top portion above zipper (dark blue portion in the picture) appears evenly. Crease with an iron first, refold and then iron again. In this process, the folds on the outer fabric switches from the mountain fold to valley fold, so make sure to align the crease line.
8.
Sew both sides.
9.
Avoid the lining fabric (the unsewn part becomes the opening for turning), sew only the side of the outer fabric (red line in the picture). Cut the corners diagonally and turn it inside out using the opening for turning.

 Trapezoid Pouch
 TOTE Bag with a Mini Pouch
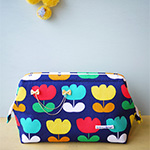 Pouch with a wired-clasp opening