
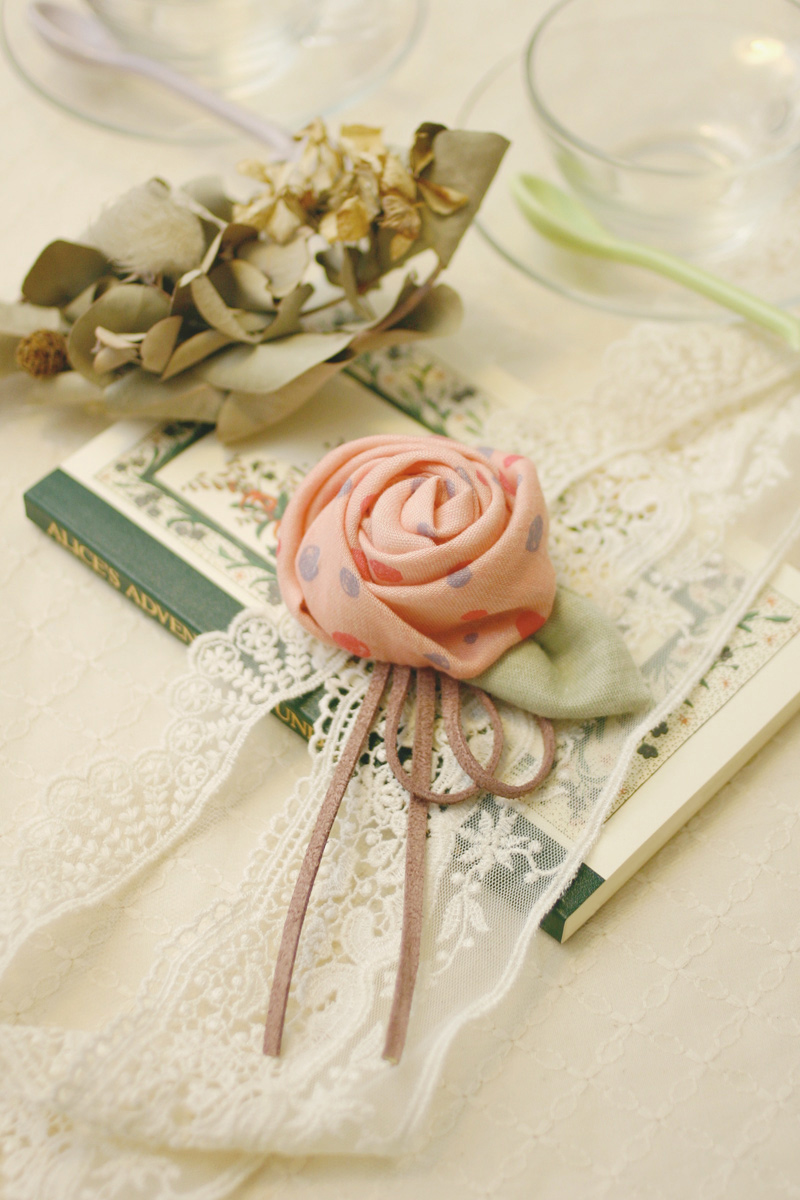
We are introducing a rolled rose corsage created by titocetera, who runs handmade*titocetera*, a web store featuring handmade everyday goods. random dot from the Joielinne series of fabric is selected for this project. Incorporating the softness of this chambray double gauze, a gentle look corsage was created. The well thought out process makes it possible for you to make this by hand. Romantic styling photos featured in this column are also the works of titocetera.
Fabric shown for this sample:(Rose)Joielinne P27000-700 (A)
(Leaf, Base fabric)Joielinne P27010-10 (C)
Materials:
□ Fabric(Rose): 70cm×10cm
(Leaf, Base fabric): 20cm×20cm
□ Interfacing: 10cm×10cm
□ Suede Tape: 50cm (0.5cm width)
□ Broach pin: One piece (3.5cm length)
We interviewed titocetera about her creation:
Kokka Fabric (KF): What did you think of the fabric you used for this project?
titocetera (tc): When I saw this soft touch fabric in gentle color tones, I thought of something with a tender nuance. So I came up with a corsage incorporating the fluffy texture of double gauze fabric.
KF: Can you tell us any special elements or ideas that you incorporated into this creation?
tc: Gauze is a fabric that is smooth to sew, and that is why I chose a corsage that only requires a simple set of sewing notions and hand stitching to make. There is no complicated process and it is a piece that is fun to make for anybody. Using a thicker interfacing for the base allows hand stitching to go smoothly.
KF: What are some tips for making this corsage?
tc: For assembling some pieces, adhesive is used. You can take time to make it by using craft adhesive or use a glue gun to make the process go faster with shorter drying time. Since the body and the base are pieced together at the end, allow some spaces around the edge when gluing pieces together so that it will be easier to sew them together. Instead of using a suede tape, a lace or a ribbon can create a cute look. You may substitute layering thinner pieces of interfacing or use a cardboard paper in lieu of thicker interfacing.
KF: How should we use this corsage in everyday situations?
tc: You can wear it on your clothing or put it on a bag. It can also work as tassels for curtains. Though I chose to make a corsage with a broach pin, you may attach a chain or a piece of hair elastic to make a hair accessory. It is very versatile and the possibilities are endless.
KF: Thank you very much, titocetera! Here are sewing instructions along with step by step photos. Enjoy crafting!
How to make Rose corsage in a double gauze fabric
1.
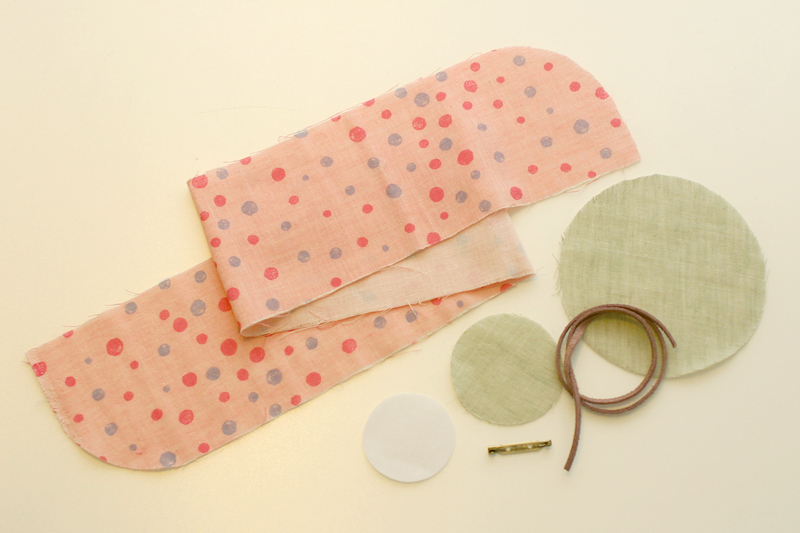
Cut the fabric.
2.

First, make a rolled rose part. With reverse side facing up, fold the bottom right round corner to the top and run rough stitches (5-7mm width) at 3mm from the edge. The first stitch should be a backstitch to secure the thread.
3.
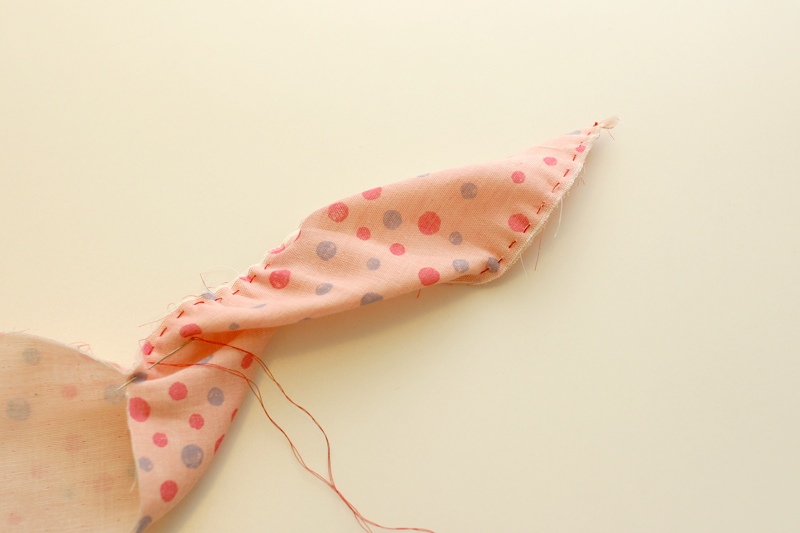
When you reach the round corner, place the top side along the bottom side and run rough stitches all the way to the end. The piece looks twisted along the way, and keep sewing without misaligning it. The twist will create a fluffy look of the petals later.
4.
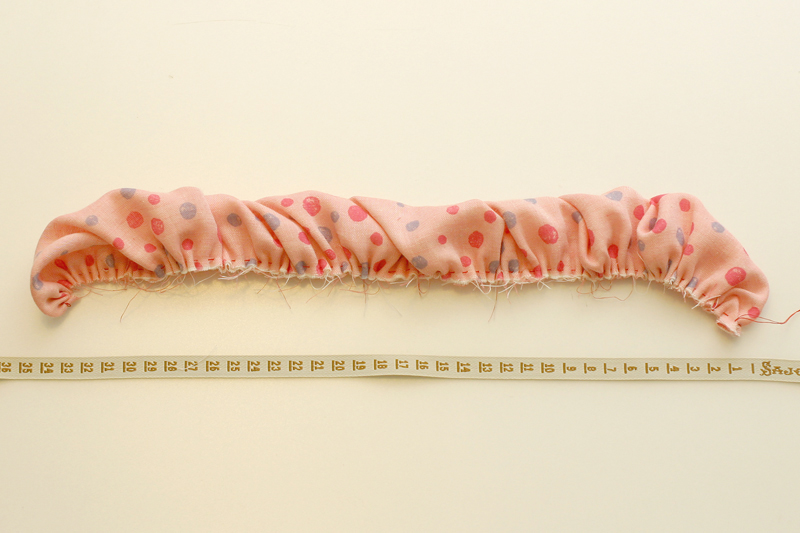
Once you finish stitching to the end, pull the thread and make the length to 35cm creating gathering in between.
5.
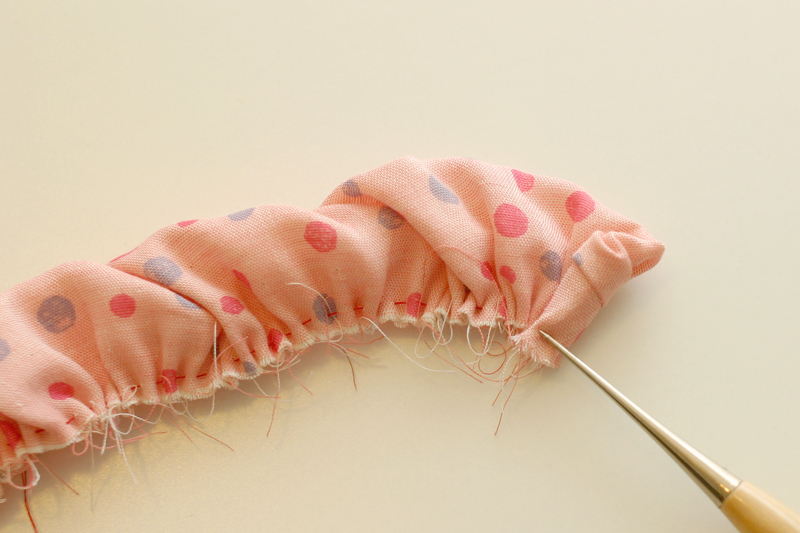
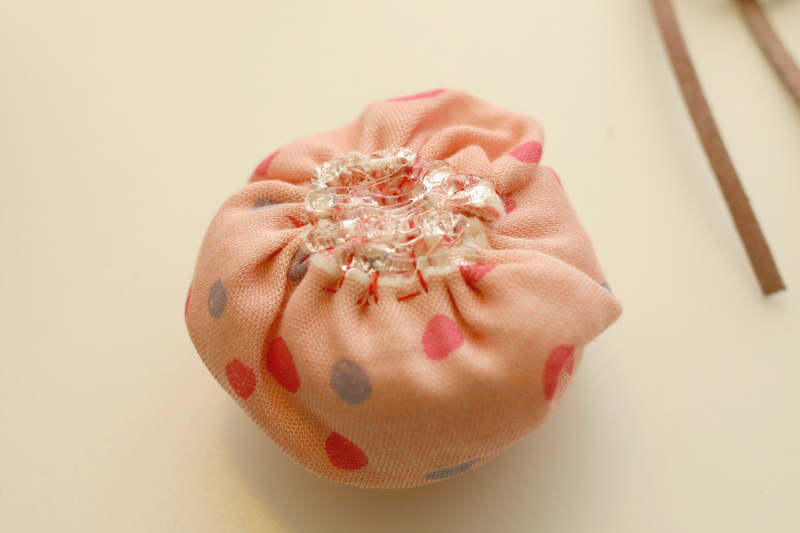
Start rolling it up from the end. Try not to squish the fluffiness and roll it up and sew to secure at the end.
6.
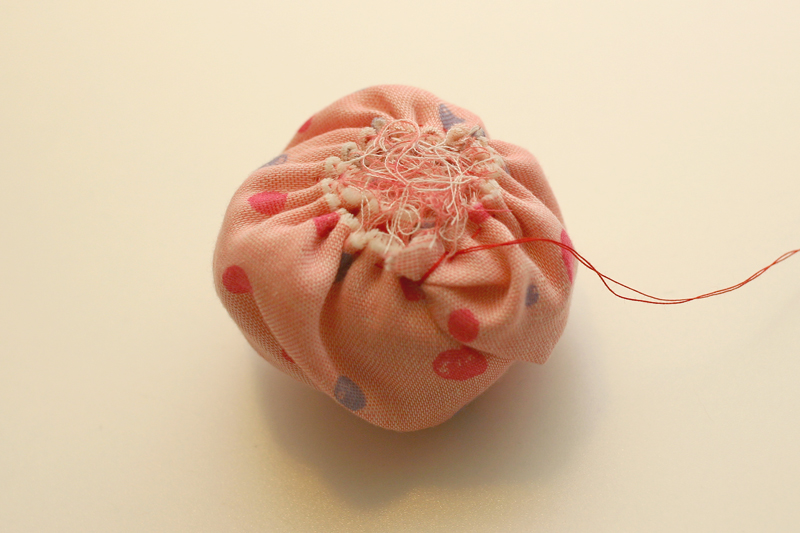
For the bottom portion, sew from the center outward and secure the stitch to finish the rolled rose.
Keep the stitches inside the rough stitch line to avoid appearing in the front.
7.

Next, make a leaf. Fold the leaf fabric (round 12cm piece) in four, and run rough stitches at 3mm from the edge.
8.
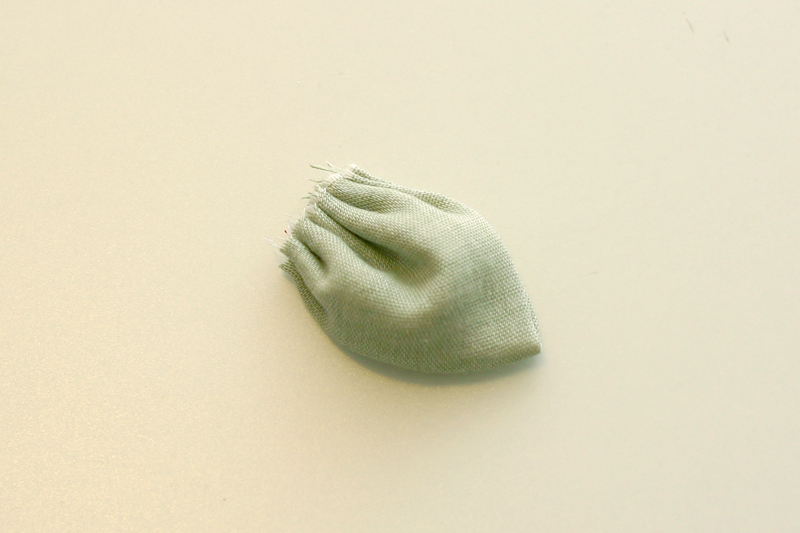
After sewing, pull and secure the thread to finish the leaf.
9.
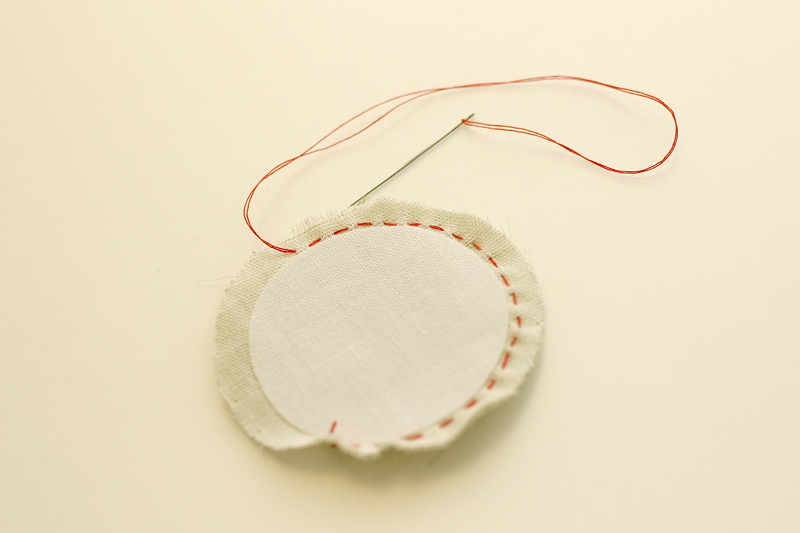
Make a base. Place and adhere an interfacing in the center of the back of a 6.5cm round base fabric. Run small stitches at 2mm around the interfacing.
10.
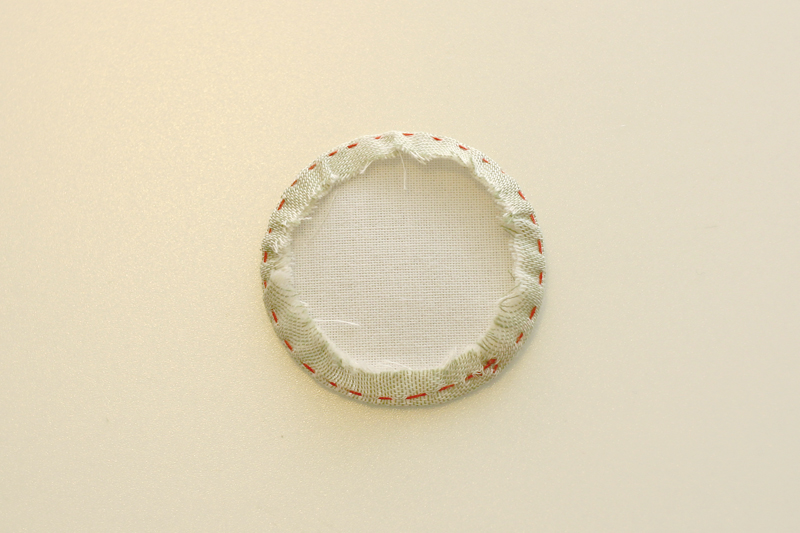
After sewing, pull the thread and fold the seam allowance inward and press with iron.
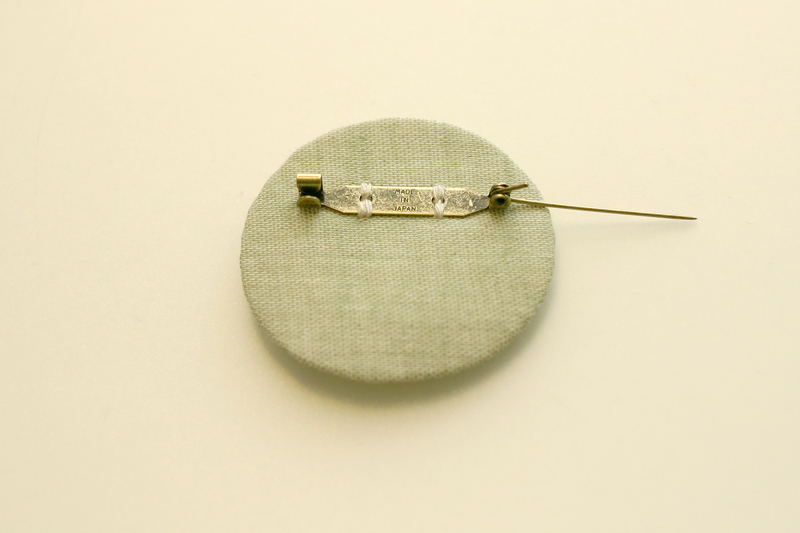
11.
Attach a broach pin in the front/outer side slightly above the center line. Before sewing, glue it lightly to the fabric for easy sewing and to make it secure and strong.
12.

Put all the pieces together at the end. Turn the base around and place the leaf and cords that are cut into four even pieces. Glue them using an adhesive inside the seam allowance.
13.
Put glue in the bottom center of the rolled rose and attach it to the center of the base. Keep the glue in the center as excess glue on the base and seam allowance will make it difficult to sew later.
14.
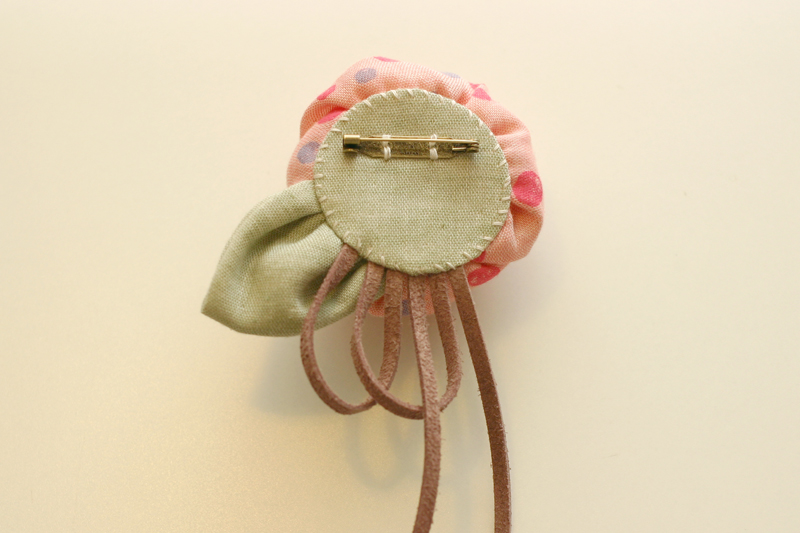
Sew together the base and rose. The areas around the cord and leaf may be difficult to sew, but please make sure that the rose is securely attached to the base.
15.

Fluff up the petal to finish.
16.

To put together pieces quickly and securely, a hot bond (glue gun) is recommended. Instead of sewing the rose onto the base, you may substitute the process by putting the glue on the base and securely place the rose on top, making sure it stays in a nice shape. Since the glue dries fast, the key is to work on this process quickly.

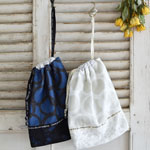 Fluffy Drawstring Bag in Double Gauze Fabric
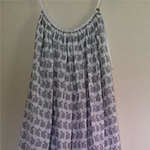 Cami dress in double gauze fabric
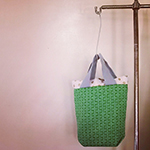 Green Bag in Double Gauze Fabric