
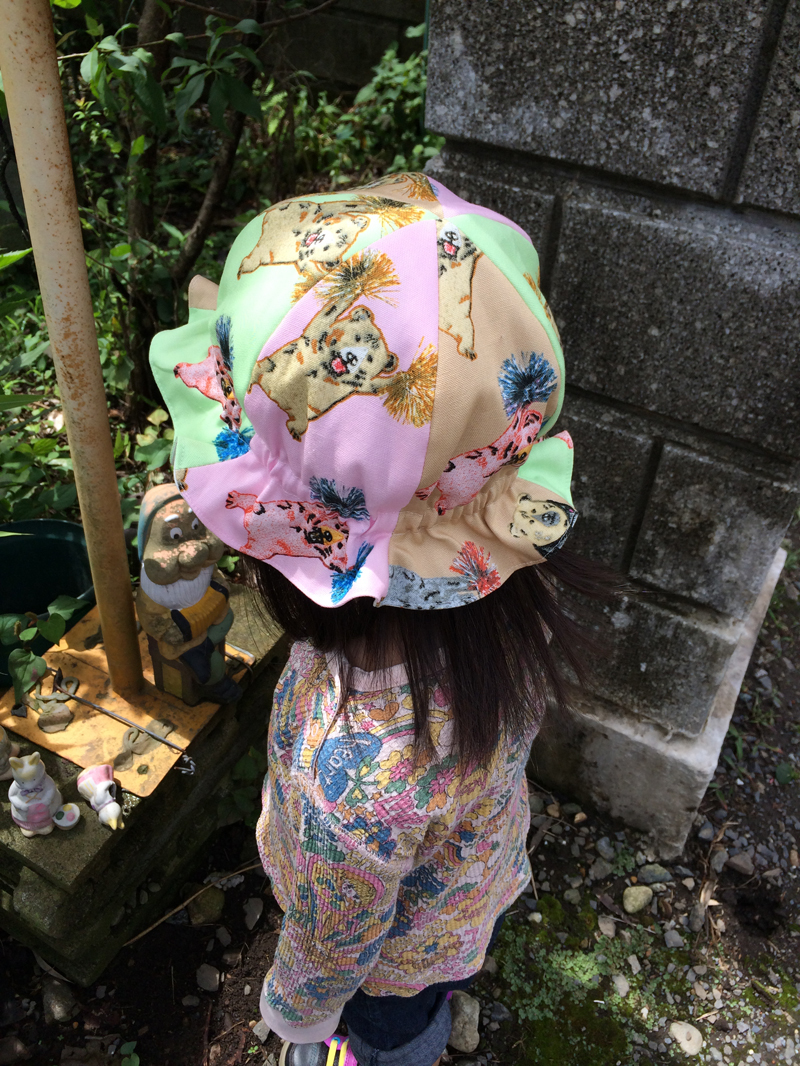
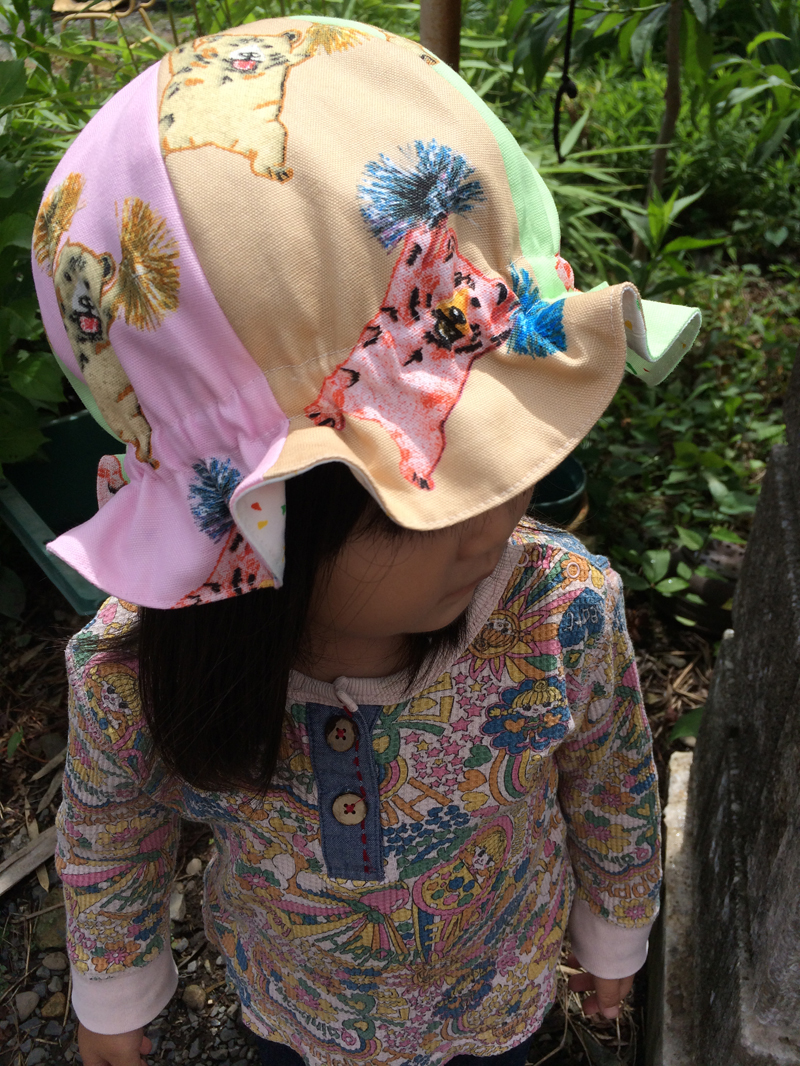
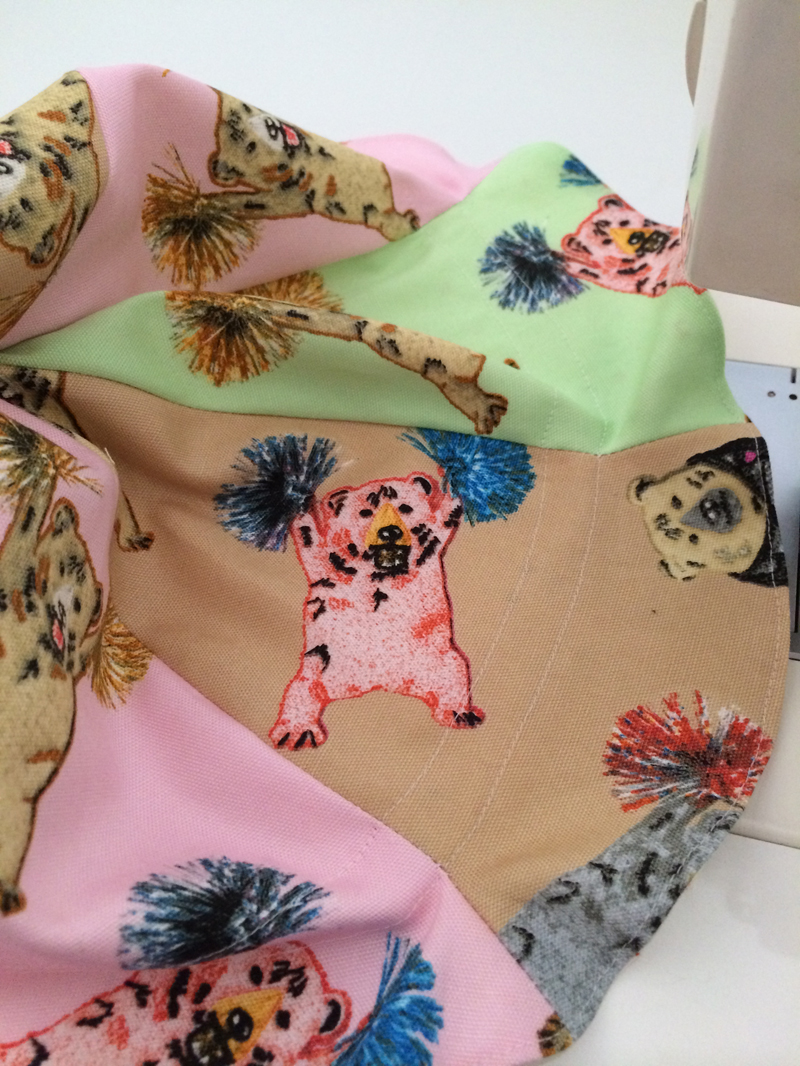
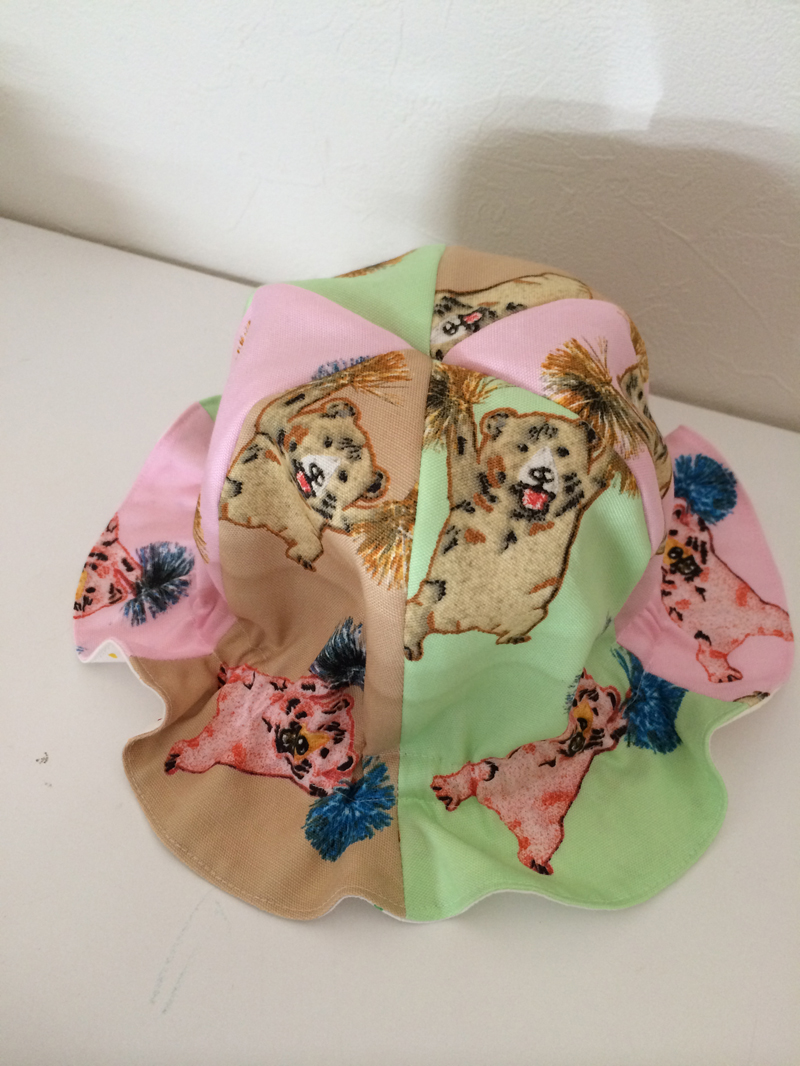
Today’s creation is a six-patch hat made with Cheering Bear fabric from the pokefasu series. On this fun fabric, playful bears with pompons are randomly scattered. The groaning bear motif, with its mouth wide open, is perfect for a kid’s item. The idea filled popular artist, Masumi Saito, aka sinafuku, is here to introduce her work.
Fabric shown for this sample: pokefasu Cheering Bears JG45100-1 (A) (B) (C)
Materials:
□ Fabric: (Outer fabric A, B, C) 40cm×30cm each
(Lining fabric) 100cm×30cm
□ Elastic Tape: 60cm (1cm width)
We interviewed Masumi about her creation:
Kokka Fabric (KF): What did you think of the fabric you used for this project?
Since the look of the groaning bears is so realistic, I intentionally wanted to make an item for babies and kids.
KF: Can you tell us any special elements or ideas that you incorporated into this creation?
This series comes in a pretty color lineup and I used all three to create a color combination that looks like a circus tent. The brim is long and fluttering. This way it will not hang over your eyes and not be bothersome.
KF: What are some tips for making this hat?
When sewing six pieces of fabrics together, pay extra attention on the top side for a clean finish. Don’t skip on ironing in key process steps.
KF: How should we use this hat in everyday situations?
The hat is reversible. If you change the fabric for each side, you can enjoy a different look depending on your mood for the day!
KF: Thank you very much, Masumi! Here are sewing instructions along with step by step photos from her. Enjoy crafting!
How to make Six-patch hat for kids
1.
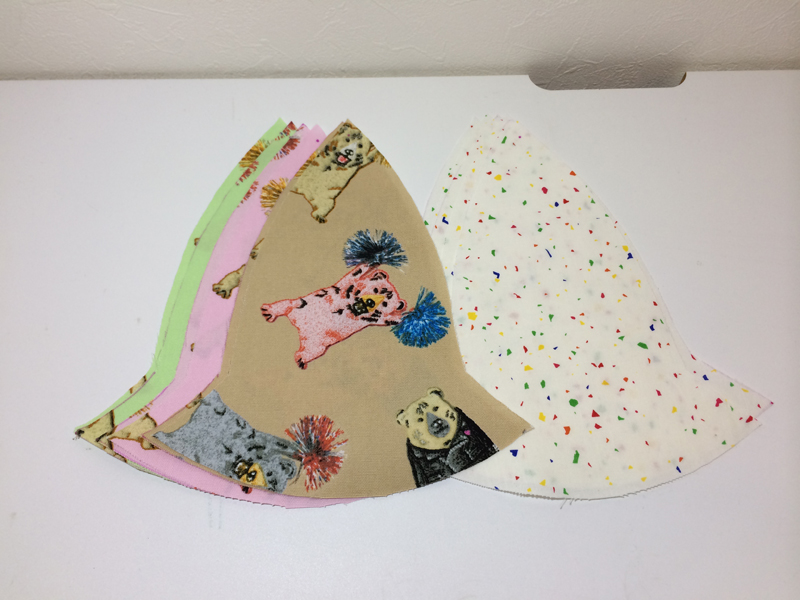
Cut the fabrics – six pieces each of outer fabric and lining fabric.
2.
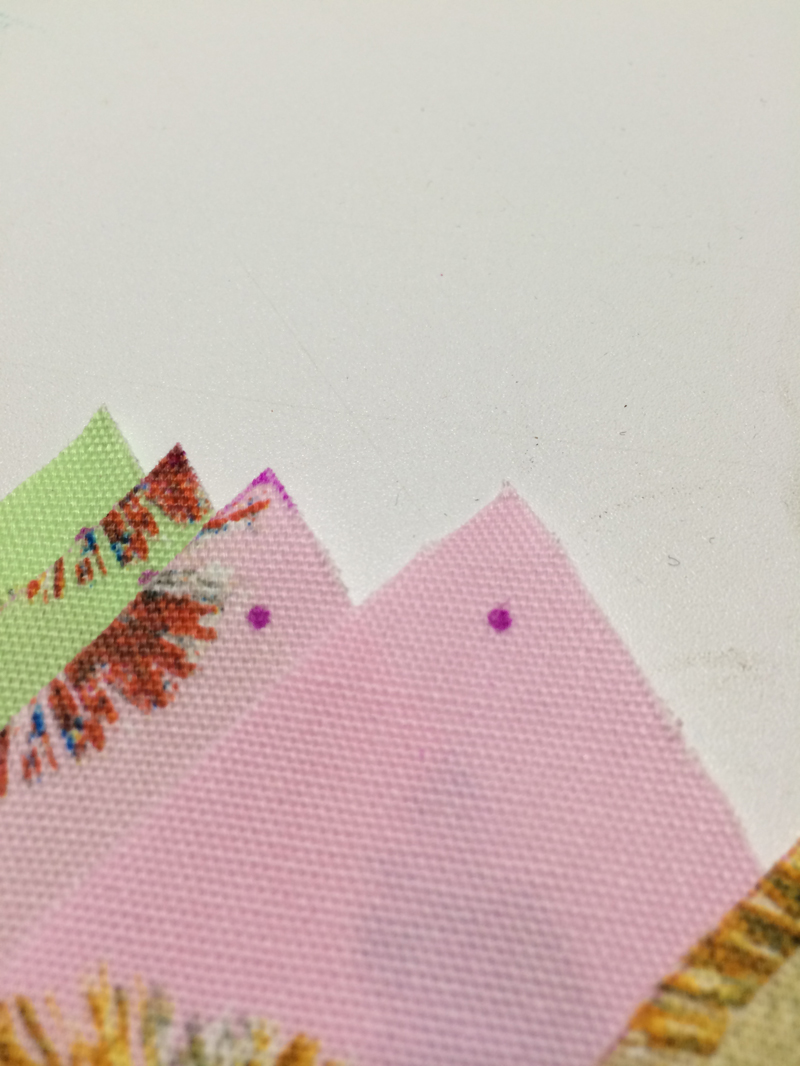
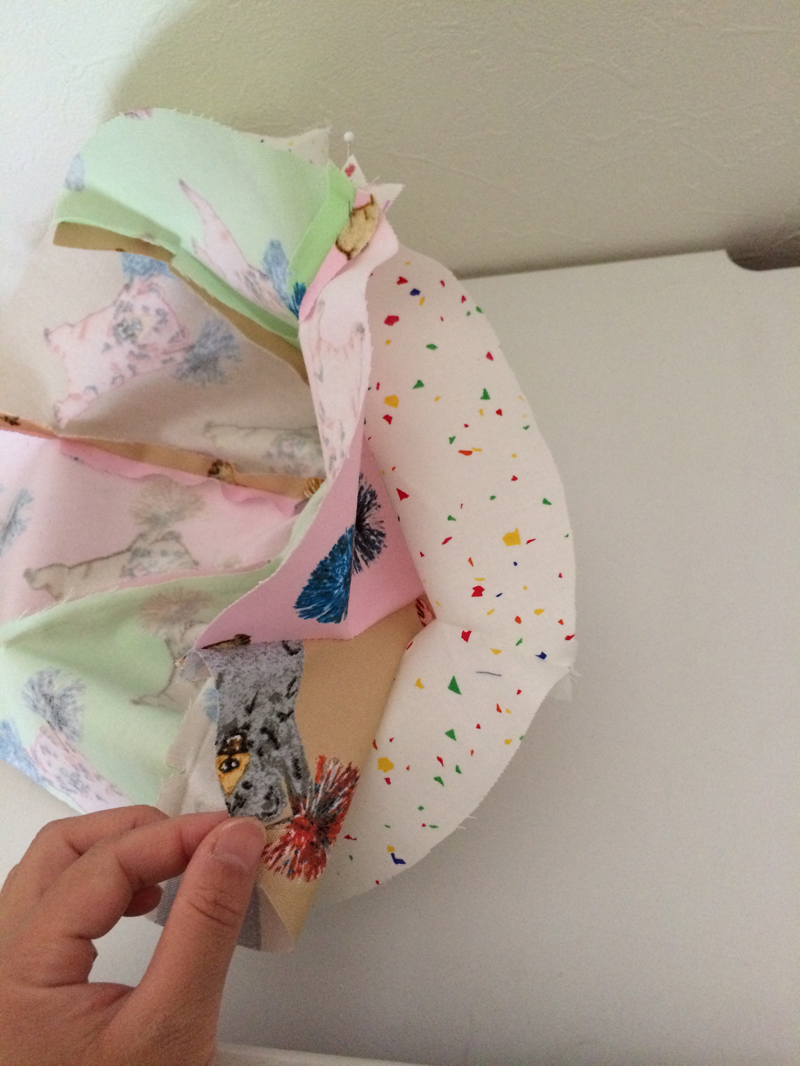
Mark the top of the hat. (where 1cm seams meet)
3.
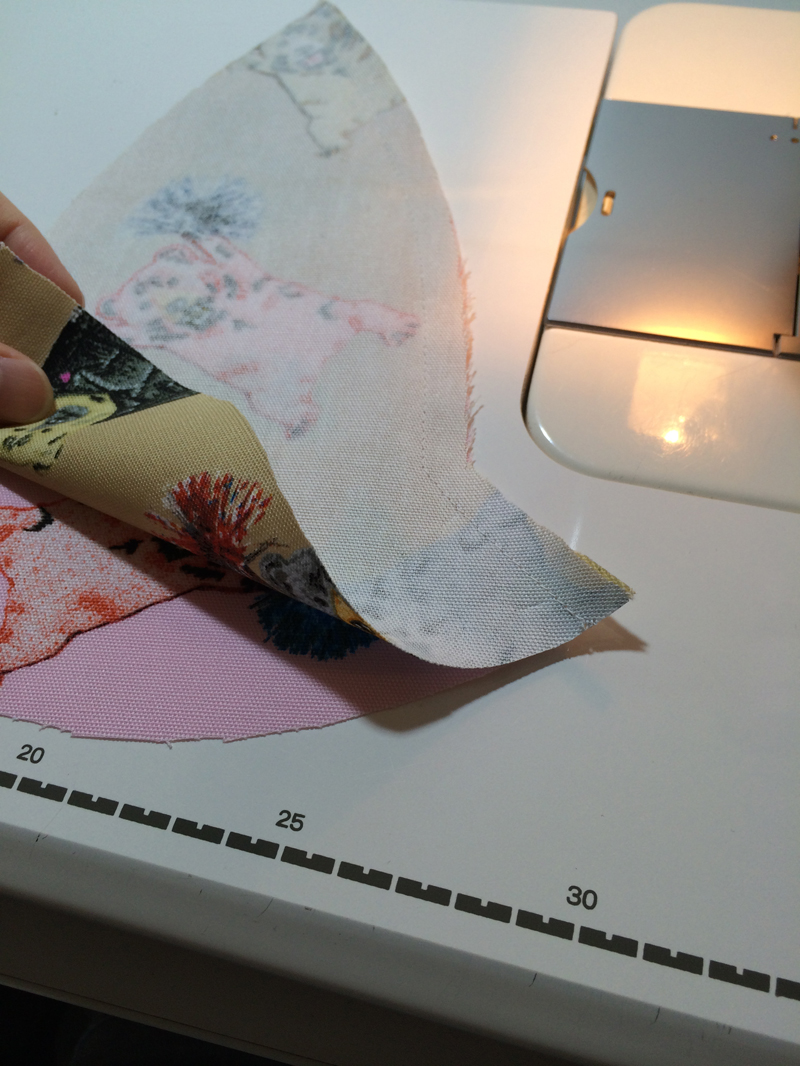
With front/outer sides facing each other, piece together the fabrics with 1cm seam. The stitch line should start from the mark that was identified in Step 2.
4.
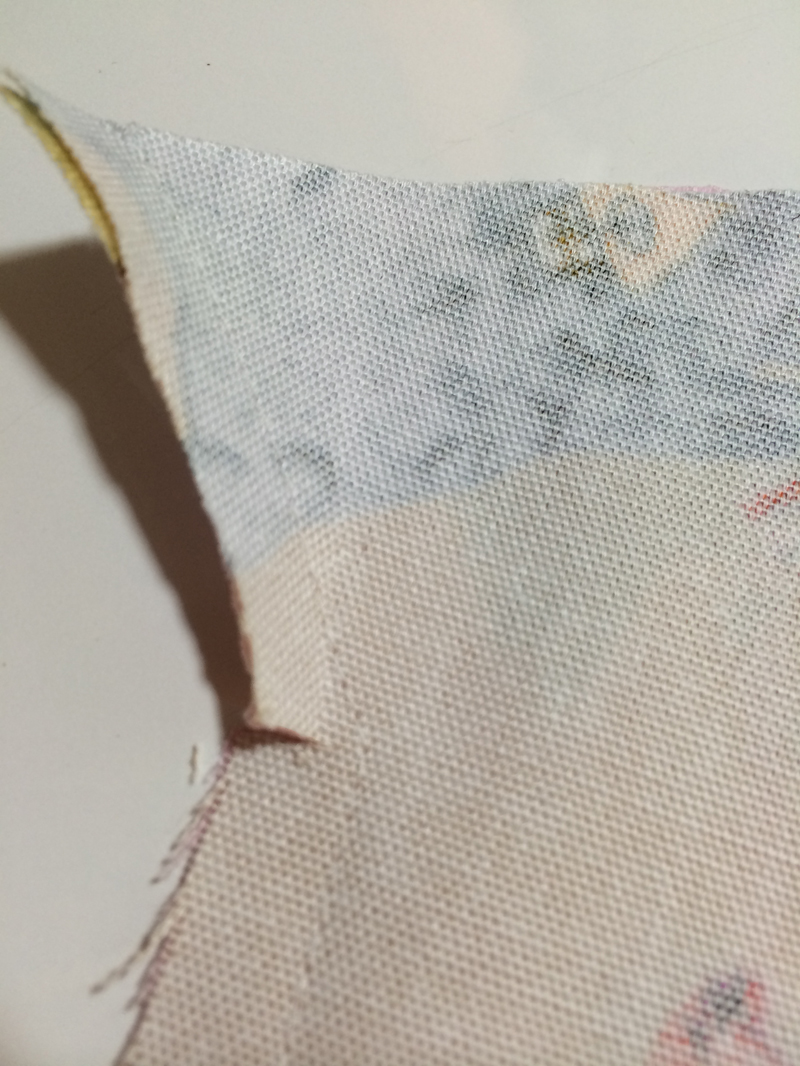
Press the seam open with an iron. It is easier to open if you cut a slit where the brim starts.
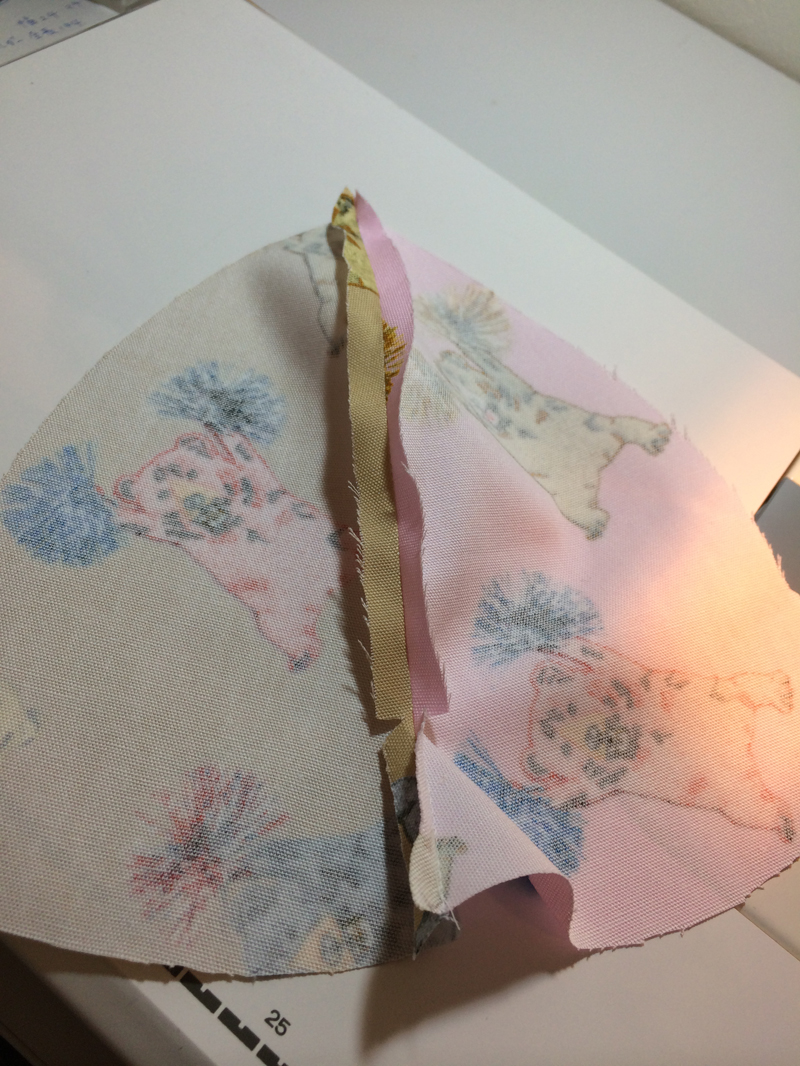
5.
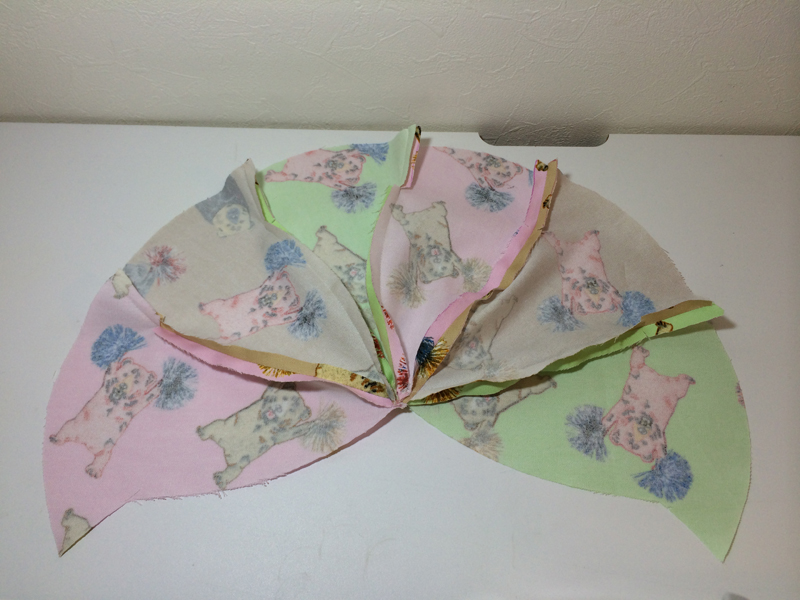
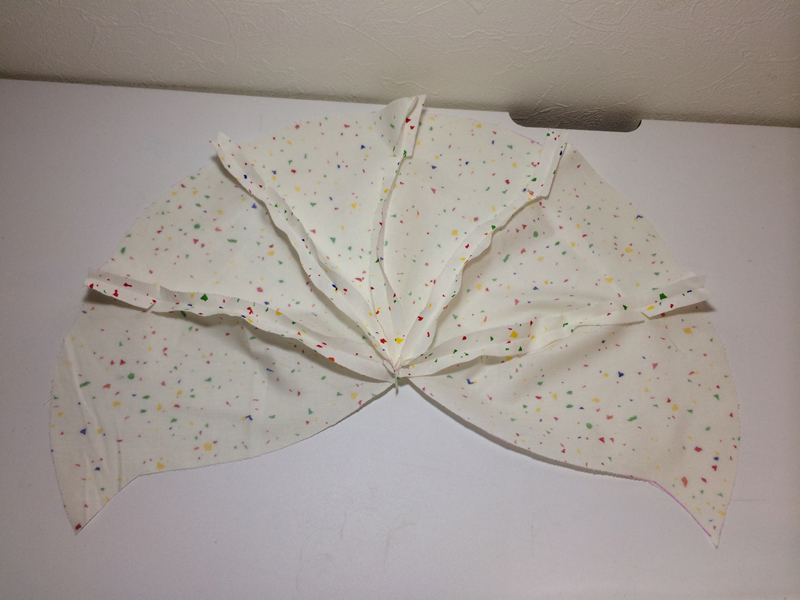
All six pieces of fabrics are sewn together.
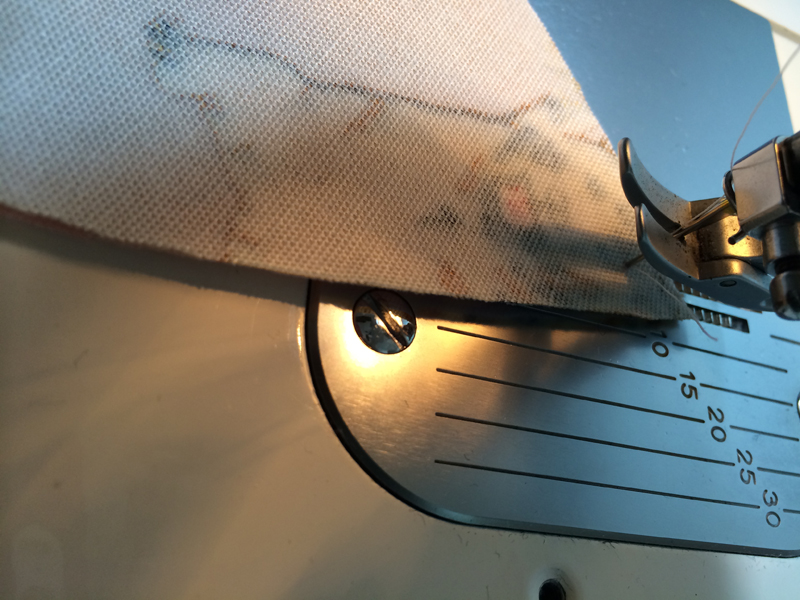
6.
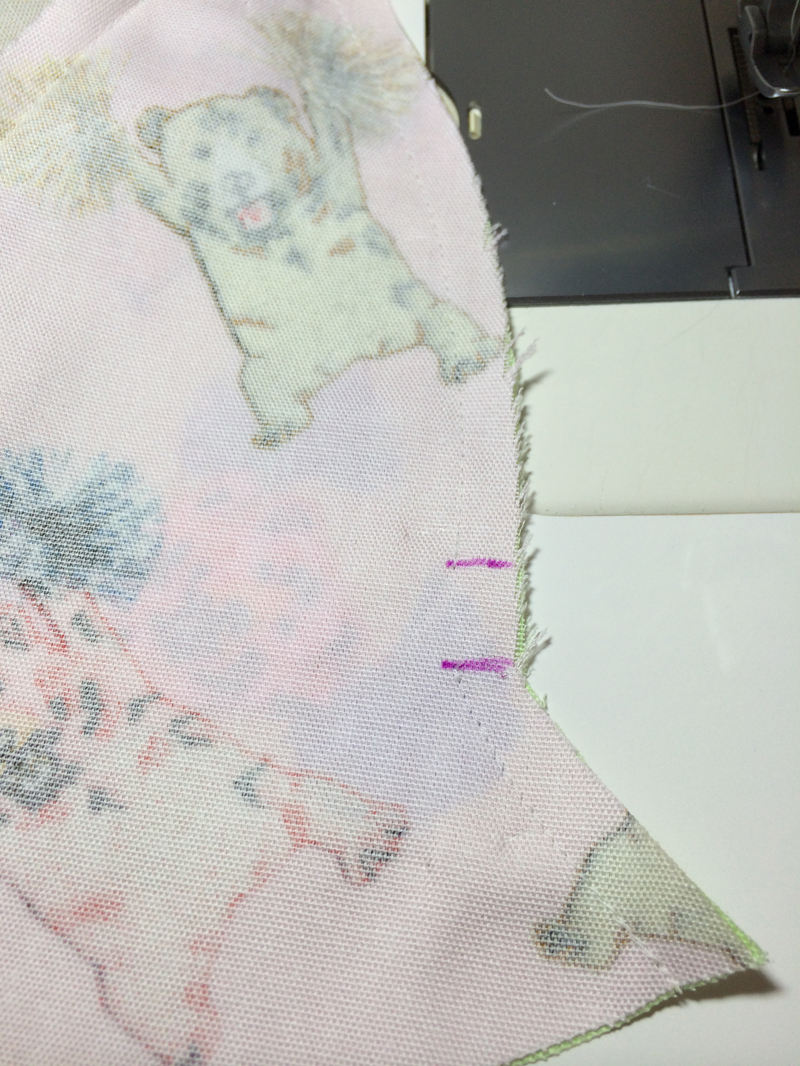
When piecing the fabric #1 and #6, leave 1.5cm unstitched from the start of the brim. For the lining fabric, leave about 8cm opening for turning.
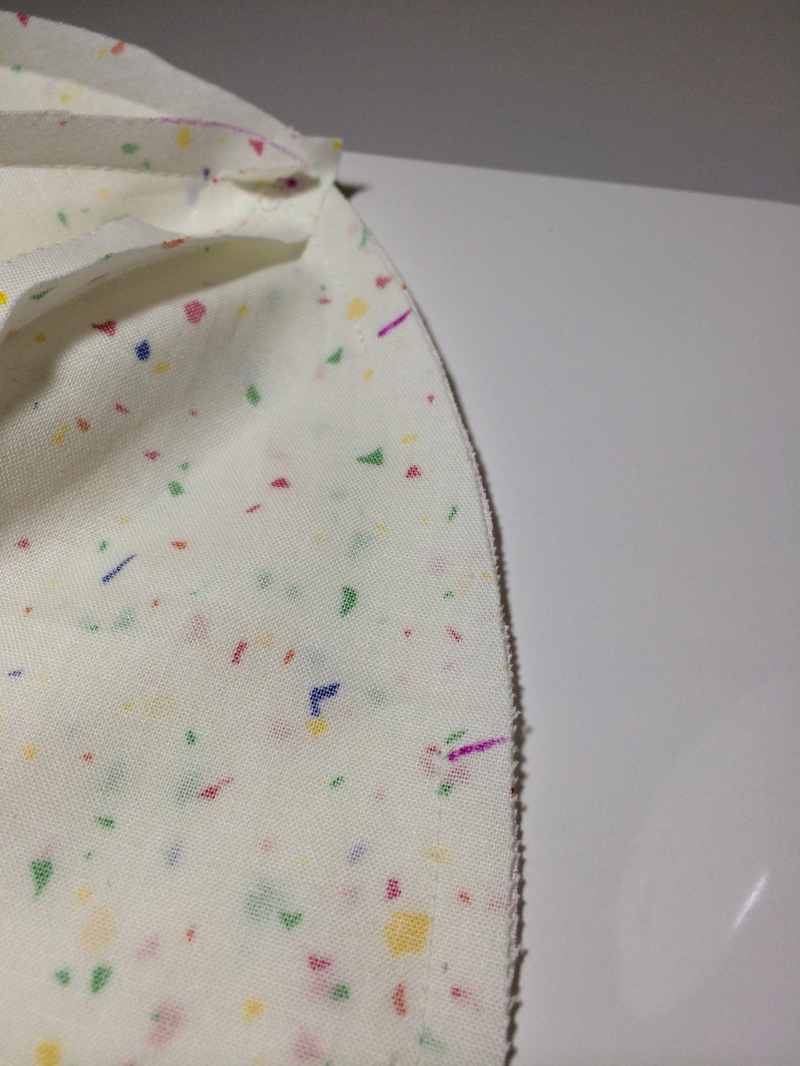
7.
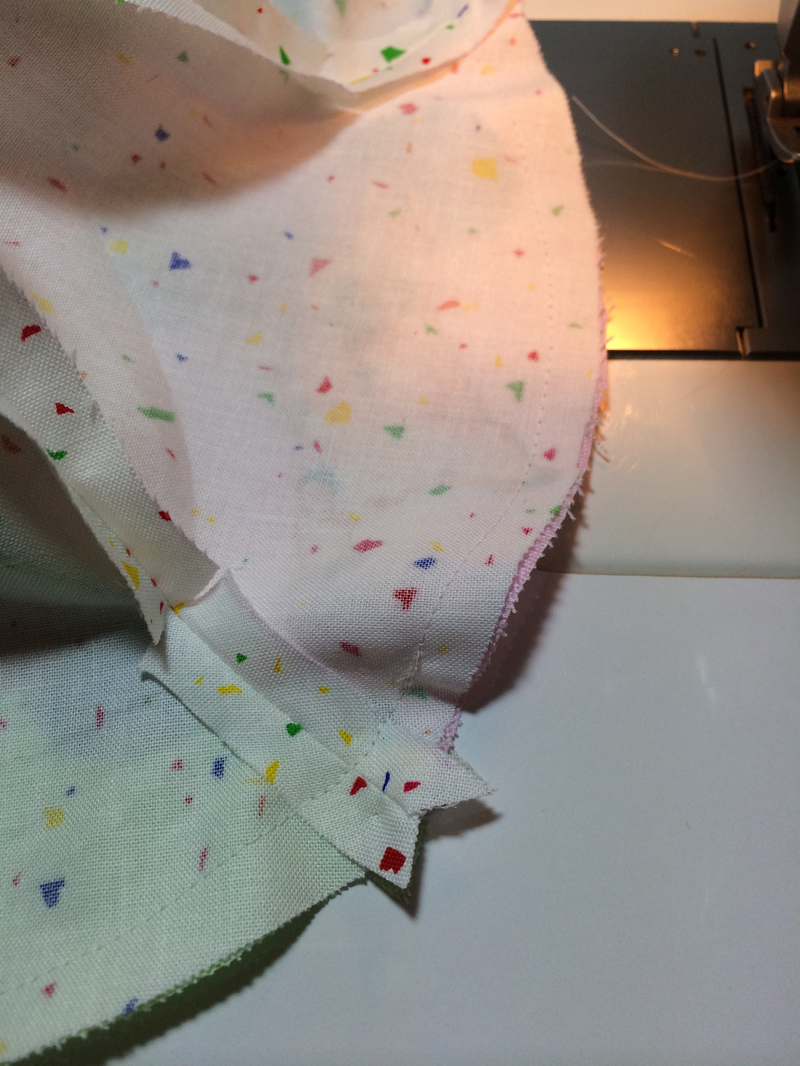
With front/outer sides facing each other, sew together the outer hat fabric and lining hat fabric, sewing around the brim with 1cm seam.
8.

Cut the seam from Step 7 to 5mm.
9.
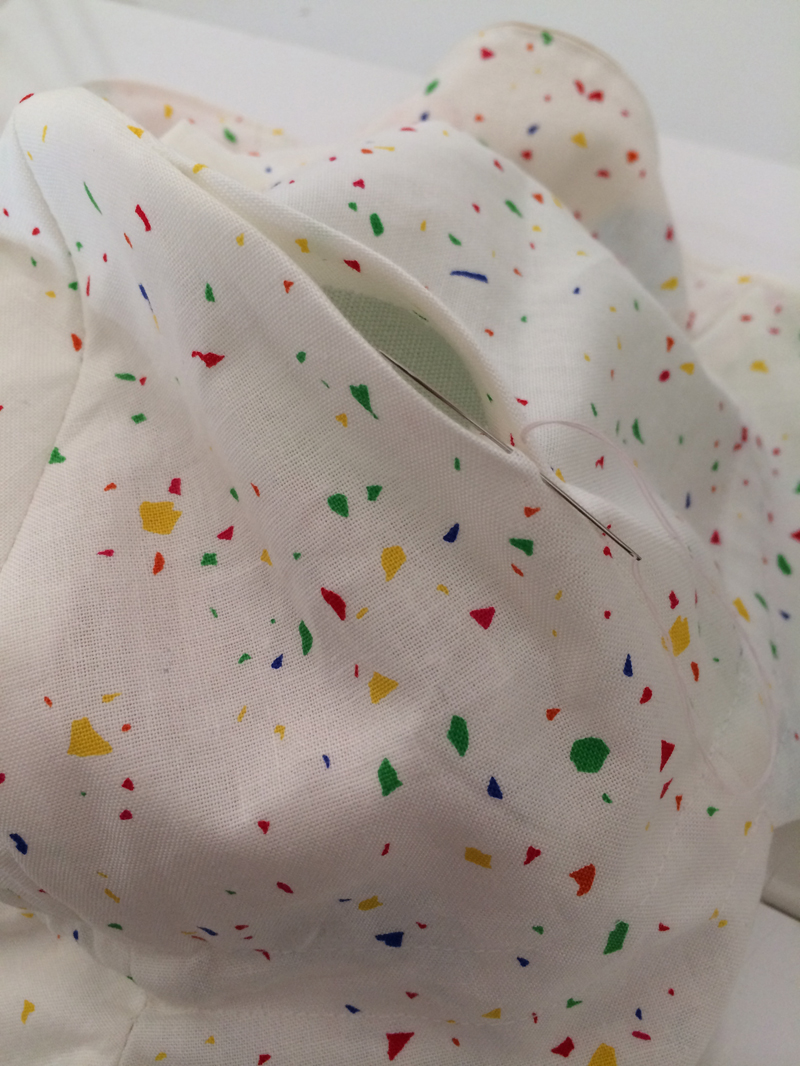
Turn the hat inside out using the opening. After straightening the shape, close the opening.
10.

Run a topstitch on the edge of the brim.
11.
Sew the area where elastic tape is put through.
12.
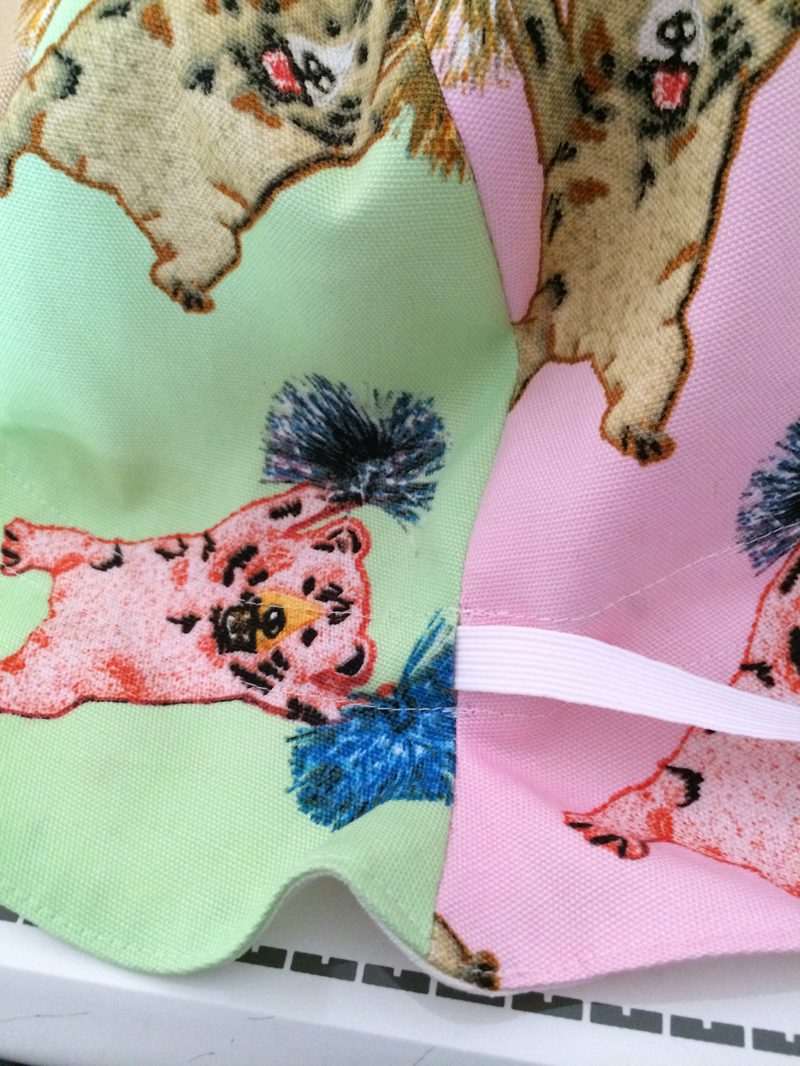
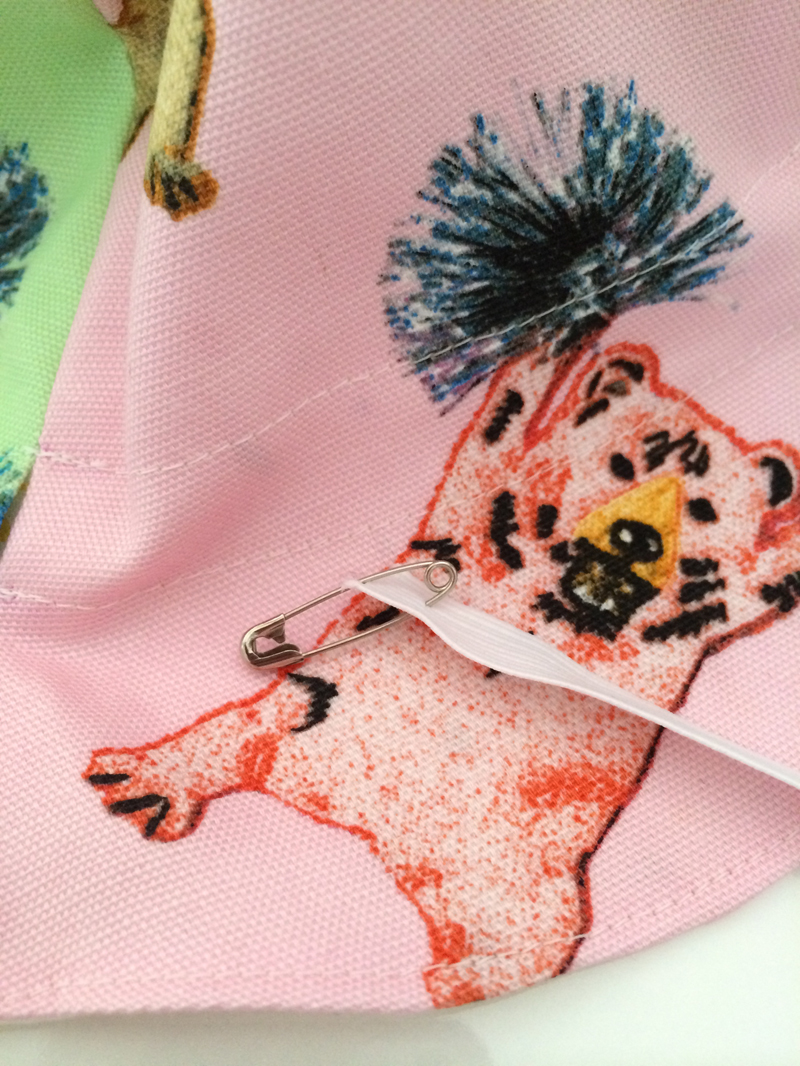
Put through the elastic tape to finish! For convenience and ease, use a safety pin to avoid the tape from slipping.

 Sun visor
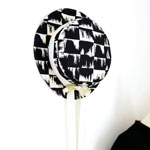 Boater Hat
 Two-Way Skirt