
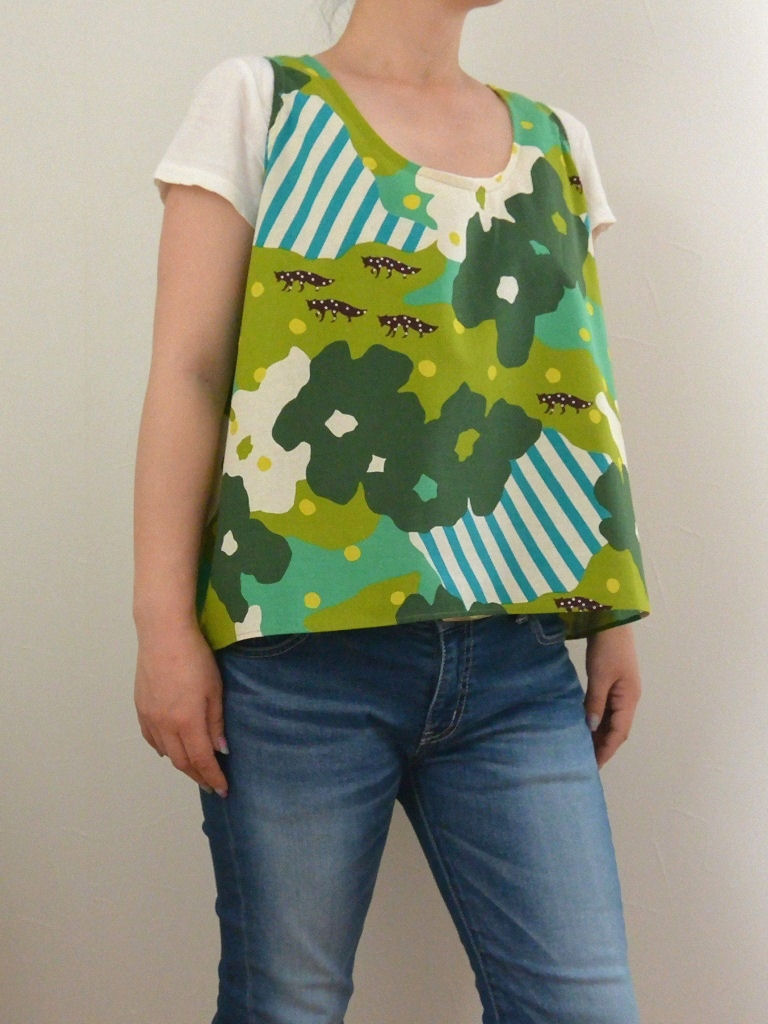
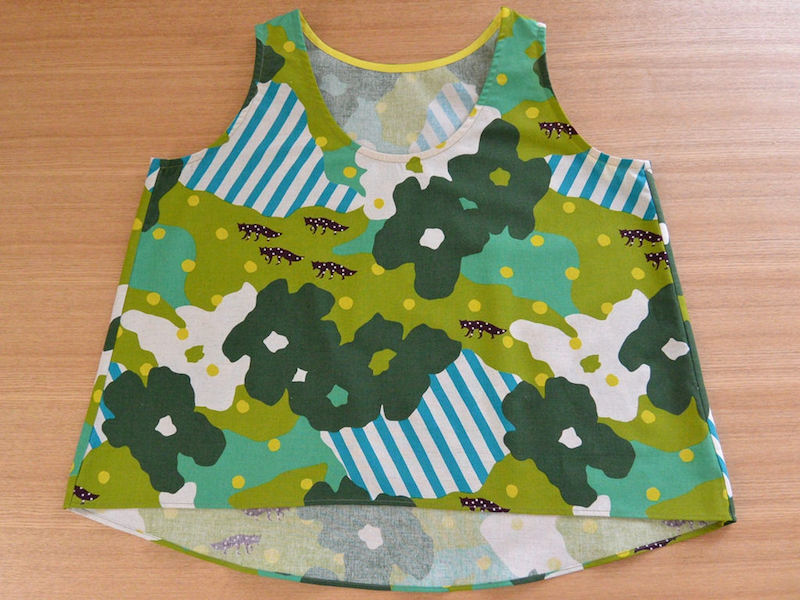
Handy to own, especially for the upcoming season, a short length tank top is today’s project. The fabric, a 150cm-wide Camouflage from echino 2015 collection, features a group of foxes seen in and out of bright greens. The creator of today’s handiwork is Anriko.
Fabric shown for this sample: echino camouflage JG-95220-20 (A)
Materials:
□ Fabric: 150cm×70cm
□ Double fold bias tape: 2m x 1.25cm wide
We interviewed Anriko about her creation:
Kokka Fabric (KF): What did you think of the fabric you used for this project?
While it’s echino’s popular cotton linen fabric, it has a double width and the material is broadcloth. This is perfect for someone like me, who loves to make clothing. Using its wide width to the fullest extent, I adjusted the look of the flared hem so that the front body and back body can be laid out and cut side by side on the pattern. The fabric length you need is only the length of the shirt.
KF: Can you tell us any special elements or ideas that you incorporated into this creation?
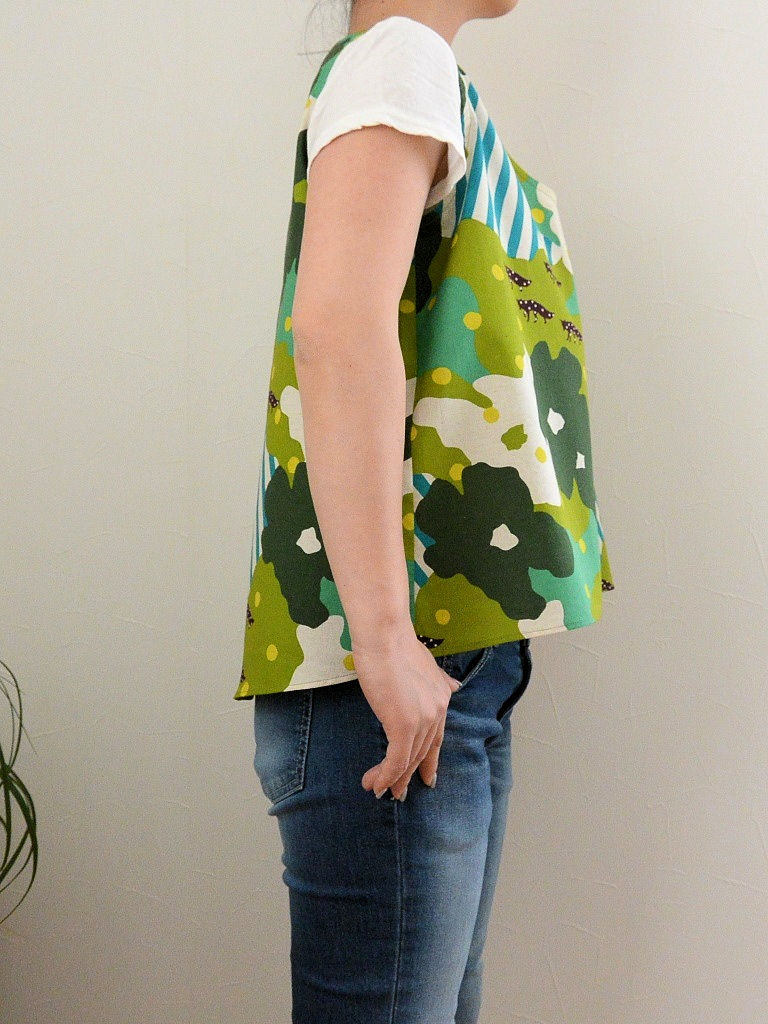
From my everyday wardrobe, I cherry-picked the elements to create the pattern. It has a slimmed-down look from the shoulder to the chest, and flares out to the hem. The back is long enough to partially cover the hip, while the front is short. It looks lovely from the side and covers the shape of the body at the same time.
KF: What are some tips for making this tank top?
I tried to make the sewing process as simple as possible. For the neckline and armhole, commercially available bias tape is used. It will have a softer finish if you make your own bias tape using the same fabric. Having said that, the commercial product is stronger and stays solid even after repeated laundering. For materials like knits and something soft, I prefer to use the readily available bias tape.
KF: How should we wear this tank top in everyday situations?
You will need to wear an inner shirt as the neckline is wide, however it is designed to not look too open. In the midst of summer, you can wear it by itself without a t-shirt inside. Depending on what you wear underneath, this top can be worn for many seasons. I find this type of “add a layer to a t-shirt” clothing very handy.
KF: Thank you very much, Anriko! Here are sewing instructions along with step by step photos from her. Enjoy crafting!
Instructions
1.

With front sides facing each other, sew together the front and back bodies at the shoulder and sides. After sewing, apply zigzag stitches. Press the seam to the back body side using an iron.
2.
Double fold the hem for 5mm and run stitches. Both front and back hems are curved. It is a wide curve with less seam, so rough stitches with gathering is not necessary. It should not be too difficult to finish this part.
3.

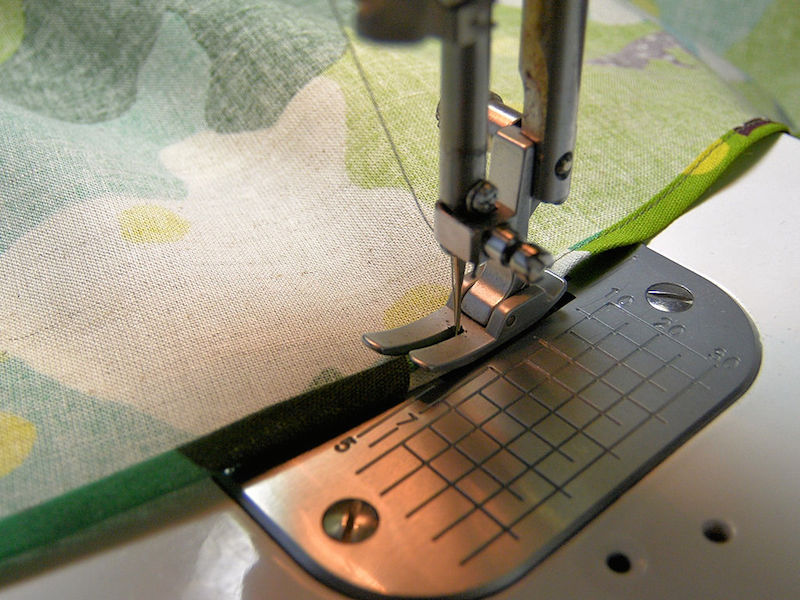
Apply the bias tape to the neckline and armhole. Place the opened bias tape over the outer fabric to sew.
4.
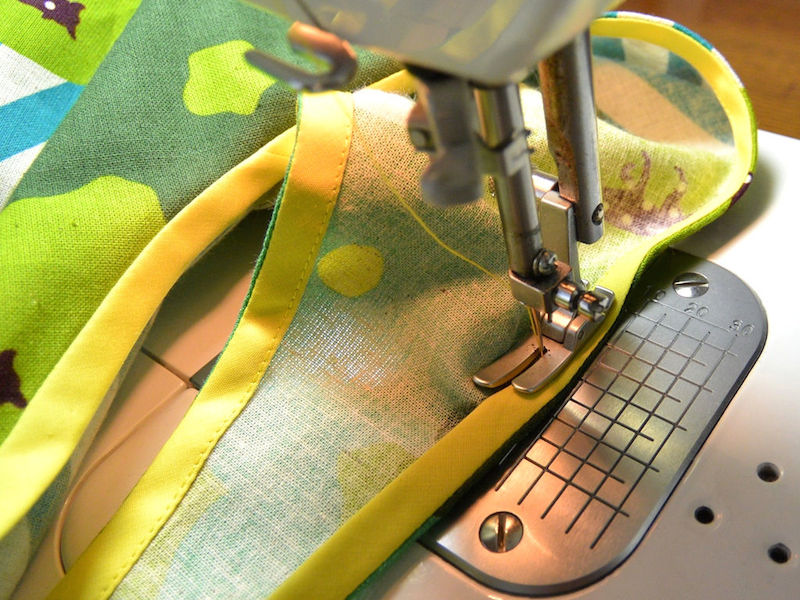
Wrap the seam around with the tape and run stitches to finish. During this process, make sure to keep the fabric in balance without being twisted. After sewing, the outer fabric may look pushed up, but it will become flat once ironed afterwards. Yellow tape was matched to one of the colors in the design. When sewing, change the color of the thread based on the tape and fabric. For this, use yellow for the top and green for the bottom.
5.
It’s finished!

 Shoulder Tuck Blouse
 Cami dress in double gauze fabric
 Tunic Style Dress