
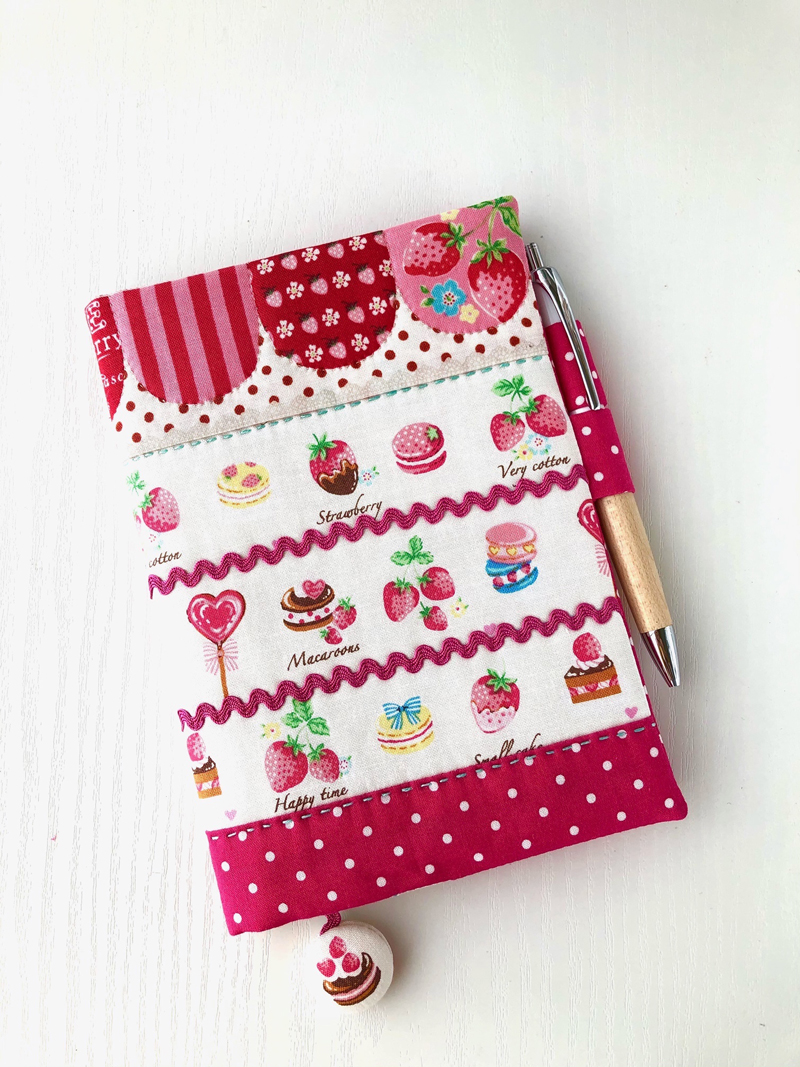
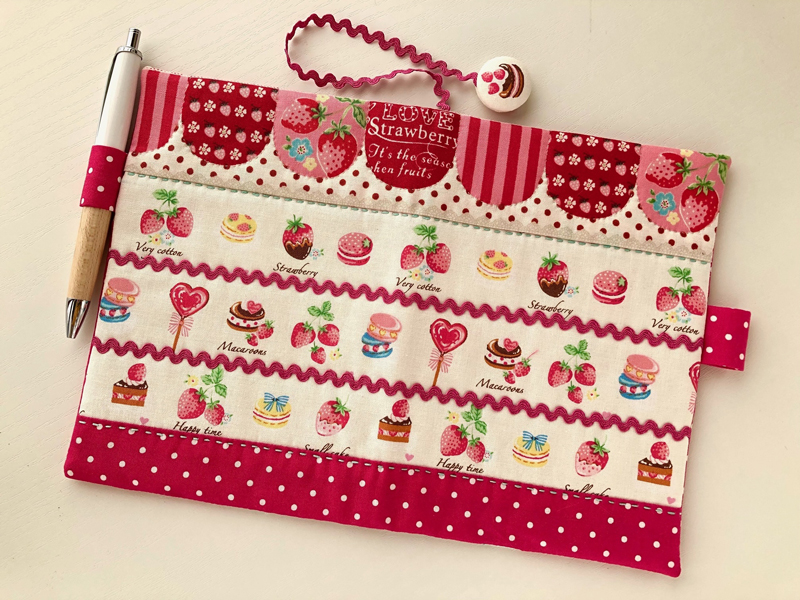
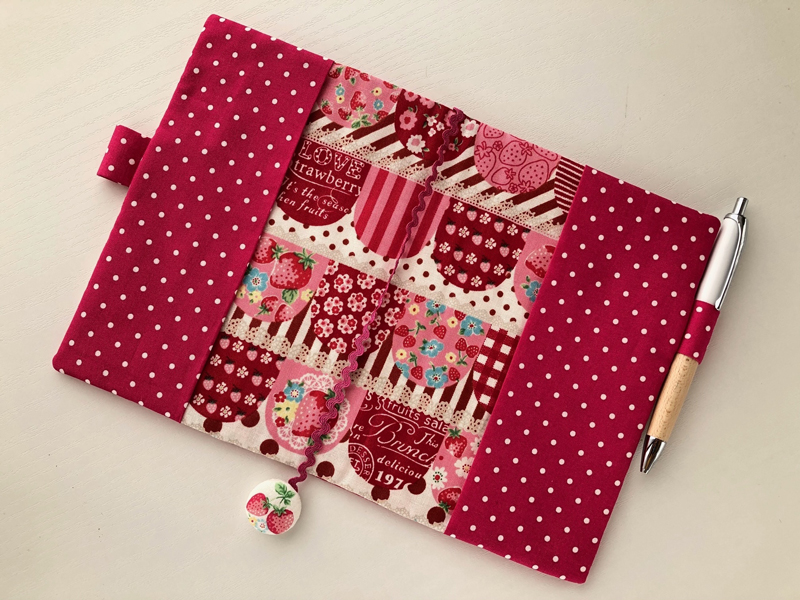
This cute notebook cover with a pen holder and bookmark is enhanced by quilting around the patchwork pattern. The delicious-looking design of strawberries and cakes is from the “Very Cotton” series, a 100% cotton sheeting fabric.
Fabric shown for this sample:(Outer Fabric A, Lining Fabric) LOA-59020-2D
(Outer Fabric B, Button Fabric)LOA-59020-1A
Materials:
(Outer Fabric B, Button Fabric): 30cm x 20cm
(Outer Fabric C, Facing, Pen Holder): 35cm × 35cm
□ Rick Rack Tape: 80cm (0.3cm wide)
□ Fusible Quilt Batting (light weight): 27cm x 19cm
□ Fusible Interfacing (light weight): 12cm x 2.5cm
□ Core for Fabric Wrapped Button: Two pieces (2.4cm diameter)
□ #25 Embroidery Thread
Size:19cm (l) 13.5cm (w-when closed)
We interviewed Ayumi about her creation:
Kokka Fabric (KF): What did you think of the fabric you used for this project?
I love all of the Very Cotton series as they are colorful and cute. With strawberries everywhere, it became even cuter. The scalloped border has a pattern that looks like it has already been patchworked, creating plenty of presence without any additional effort. Each small cake pattern is very lovely, and I immediately came up with the idea of making a fabric covered button.
KF: Can you tell us any special elements or ideas that you incorporated into this creation?
With pen holders on both sides, the pages do not open when the pen is inserted. It prevents the cover from opening in your bag. I also added a charming fabric covered button at the end of the bookmark as an accent.
KF: What are some tips for making this cover?
The quilt batting should be as thin as possible. Cut the seam allowance to 5mm before turning the cover over for a clean finish.
KF:How should we use this cover in everyday situations?
This design suits a thin notebook that you can find at a dollar store. The handmade cover can turn the generic notebook into your own. May your favorite notebook be filled with exciting plans…
KF:Thank you very much, Ayumi! Here are sewing instructions along with step by step photos from her. Enjoy crafting!
Instructions
1.

Cut the necessary parts.
2.
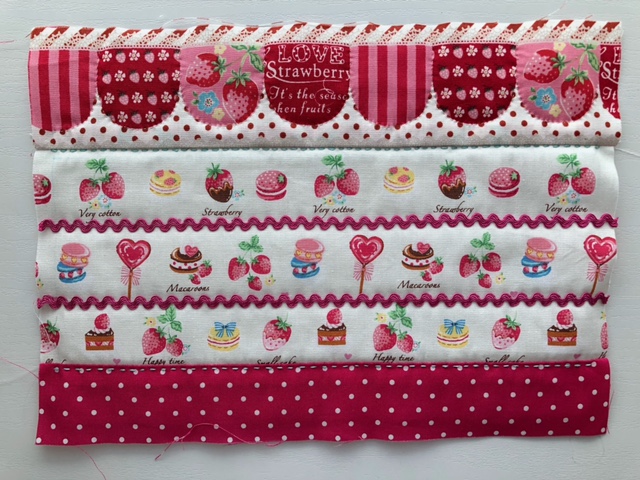
With the front sides facing each other, sew together the outer fabrics A, B and C. Adhere fusible quilt batting. Sew a rickrack tape (29cm each) along the pattern. Apply running stitches using three strands of embroidery threads.
3.
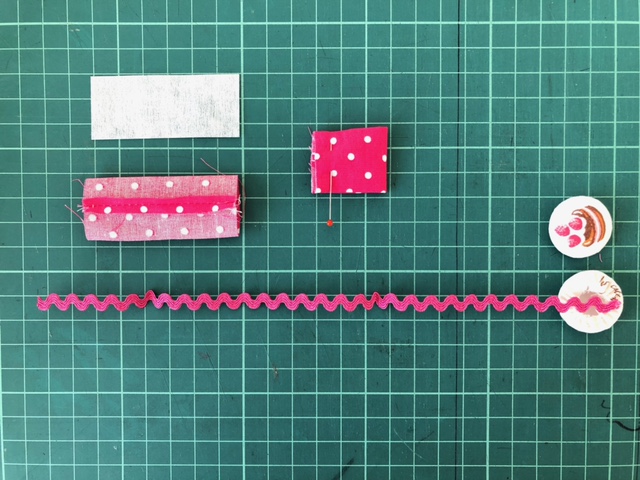
With the front sides facing each other, fold the pen holder fabric. Sew at 5mm from the edge. Turn it over. Place the fusible interfacing inside and iron to adhere to the fabric. For a fabric covered button, apply rough stitches around the perimeter of the fabric. Place the button inside and sew to tighten the fabric. Make two fabric covered buttons. Place the tip of the 22cm rickrack blade in-between and sew to attach, then sew together two buttons.
4.
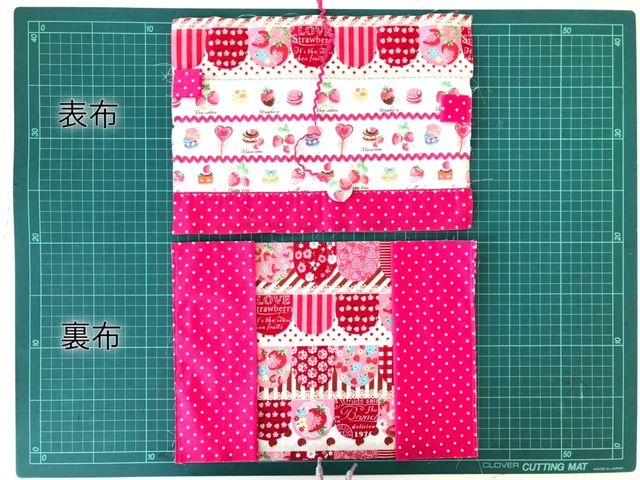
Baste the pen holder and bookmark to the outer fabric. Fold the pen holder in half and place the loop inward. Baste the left pen holder at 5cm from the top and right pen holder at 8cm from the top. Baste the bookmark at the top center of the outer fabric. With the front sides facing outside, fold the facing in half. Place the folded facing on the lining fabric with the loop facing inward and baste to the fabric.
5.
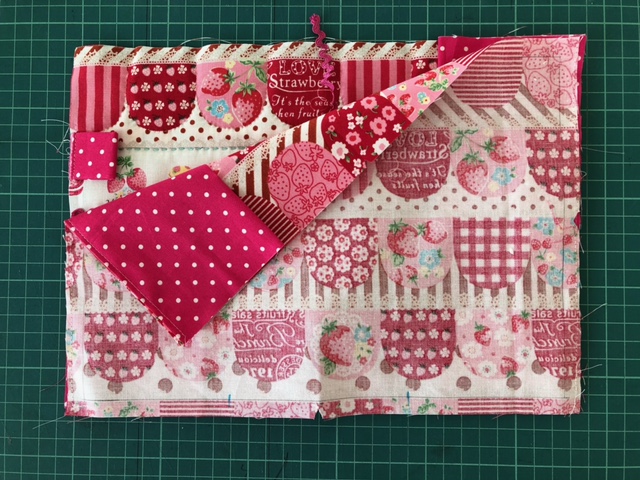
With the front sides facing each other, sew together the outer and lining fabrics, leaving an opening for turning.
6.
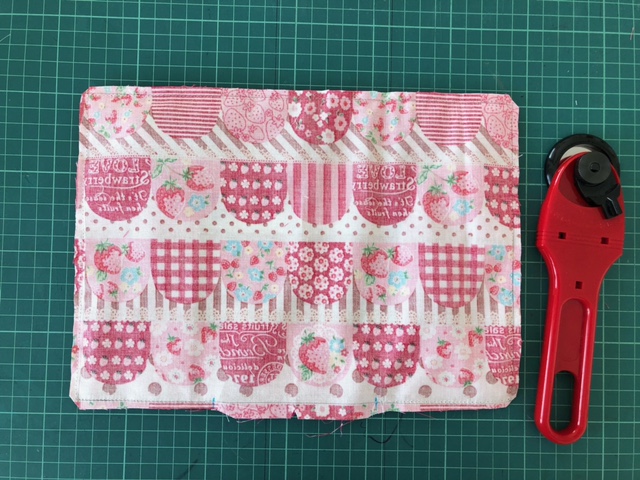
Cut off excess seam to make it 5mm from the stitch line. Cut off the corner into triangles and turn it over. Fold the seam of the opening inward. Close the opening to complete.
◎Sewing Instructions (PDF format / A4 size)

 Notebook Cover
 Patchwork Style Lovely Vanity Case – Sewing Instructions
 Square Bag with Gusset – Sewing Instructions