
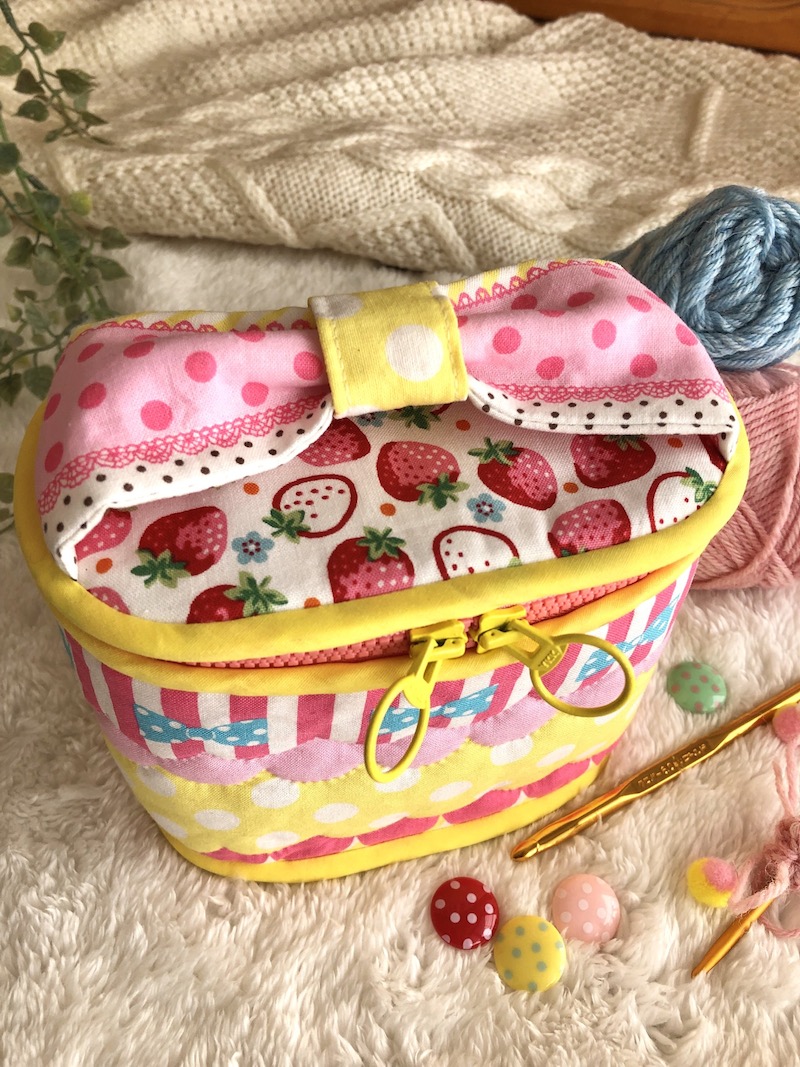
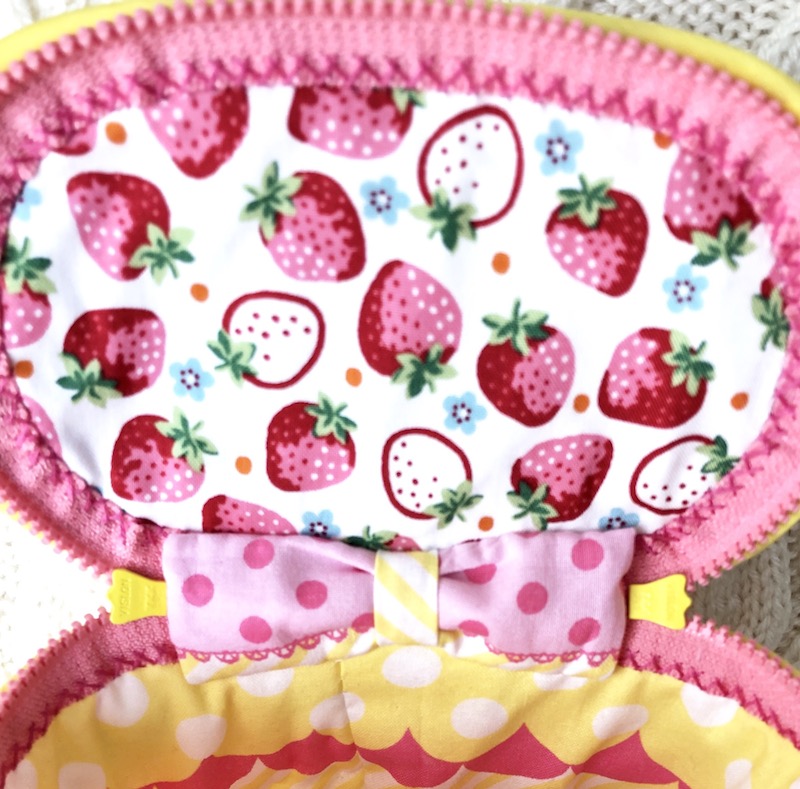
A lovely color combination of yellow and pink is enhanced with strawberry motifs. Fans of sweet items will absolutely adore this vanity case! Patchwork style is created by hand quilting along the fabric’s motifs. The featured fabrics are from the Yumekawa Mix series for the main panel and ribbon, and the Very Cotton series with strawberry design for the lid and bottom.
Fabric shown for this sample: (Main Panel, Ribbon) Yumekawa Mix LO-49000-2B
(Lid, Bottom) Very Cotton LO-49010-1A
Materials:
□ Fabric(Main Panel, Ribbon): 60cm×50cm
(Lid, Bottom): 40cm×20cm
□ Fusible Quilt Batting (heavy weight): 50cmx25cm
□ Fusible Quilt Batting (light weight) : 20cmx10cm
□ Fusible Interfacing: 25cmx20cm
□ Double Slider Zipper: 35cm long x One piece
□ Double Fold Bias Binding Tape: 2cm wide x 1.4m
□ #25 Embroidery Thread
Size: 12cm (l) 16cm (Bottom-longest side) 10cm (Bottom – shortest side)
We interviewed Ayumi about her creation:
Kokka Fabric (KF): What did you think of the fabric you used for this project?
The border design is filled with various lovely elements like scallops, stripes and dots in beautiful color tones. It allows you to create many parts out of this single fabric. What is nice is that you don’t have to worry about the color combination as it has a perfect blend of colors.
KF: Can you tell us any special elements or ideas that you incorporated into this creation?
A thick quilt batting is added for hand quilting along the motifs. It makes cute dimensional scallop patterns, like a patchwork.
The ribbon made out of the border design is added on the lid, also serving as a handle.
KF: What are some tips for making this case?
1. Make sure to choose a solid and thick quilt batting so that the bag stays stable.
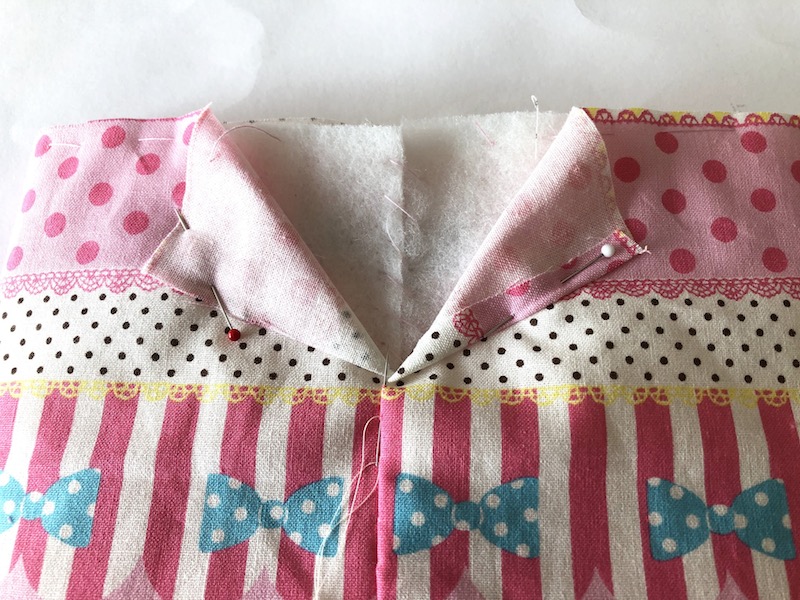
2. Baste the pieces first, when sewing the main panel and bottom together. It is important. For the areas around the curve, adding slits on the seam will create a clean finish.
3. Align the center first, then baste, when attaching the zipper. When putting it on the lid, place it slightly inward.
KF: How should we use this case in everyday situations?
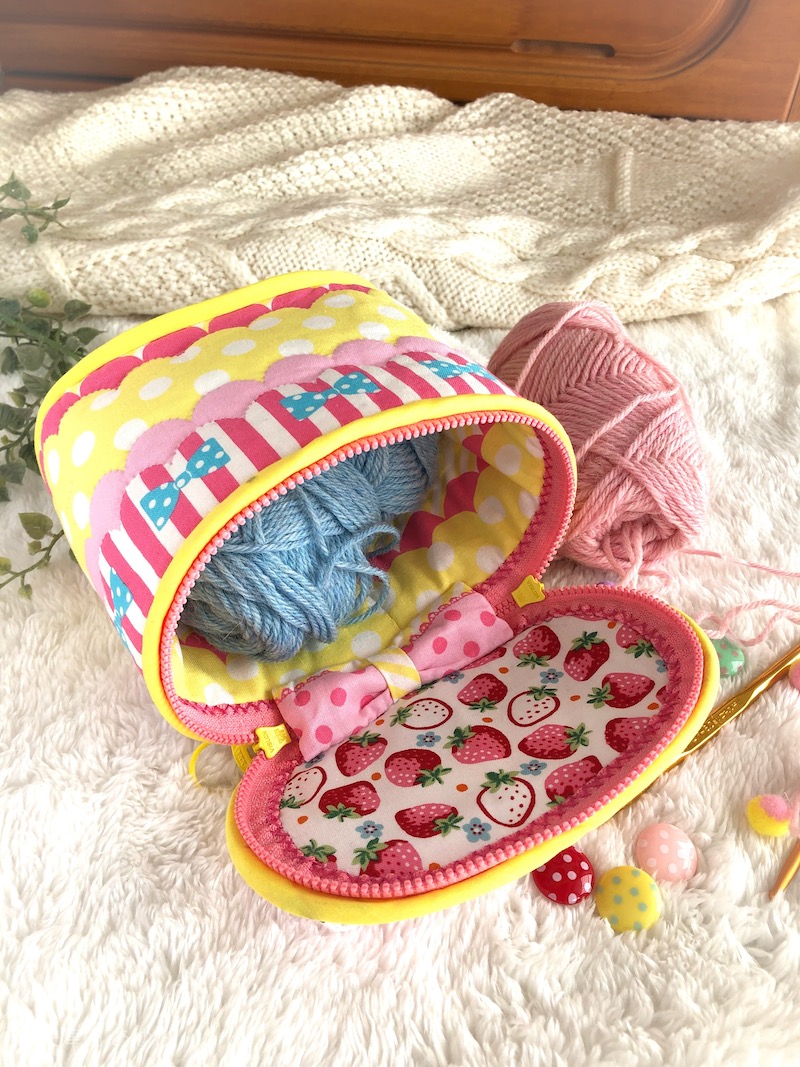
It is the perfect size as a cosmetic case. This time, I thought it would be well-suited for knitting supplies, as you can pull out the yarn when working on your knitting piece.
KF: Thank you very much, Ayumi Here are sewing instructions along with step by step photos from her. Enjoy crafting!
1.
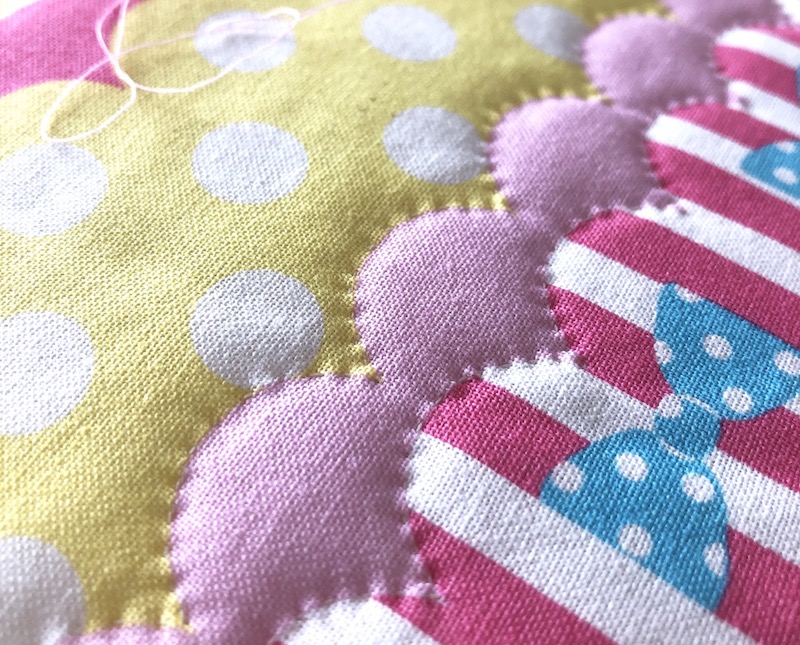
Make the main panels. Adhere fusible quilt batting on the outer fabric. Apply quilting along the printed pattern.
2.
With the front sides facing outside, baste the top and bottom of the quilted outer fabric and lining fabric. With the front sides facing each other, fold the outer fabric in half and sew the short ends, avoiding the lining fabric. Put the ends of the quilt batting and sew together with overseam. Fold in the seam of short end of the lining fabric and sew with overseam.
3.
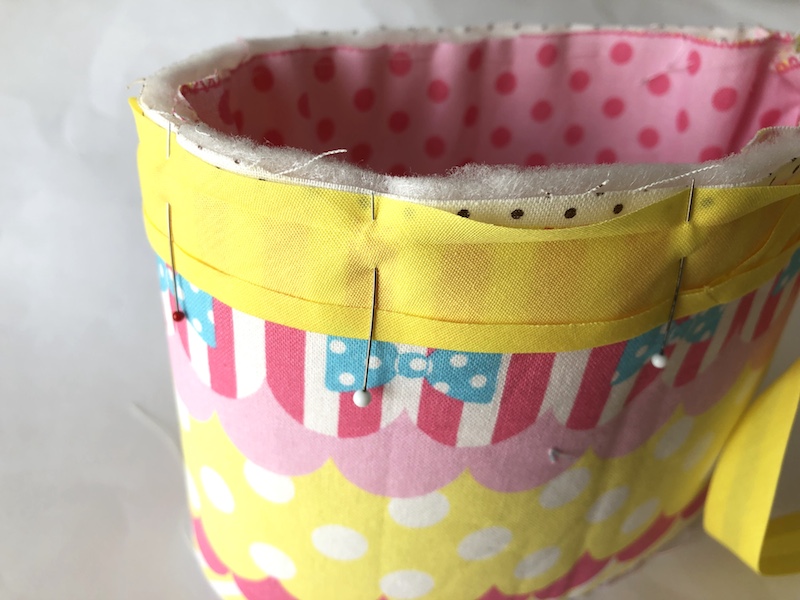
With the front sides facing each other, attach the bias binding tape at the top opening side.
4.
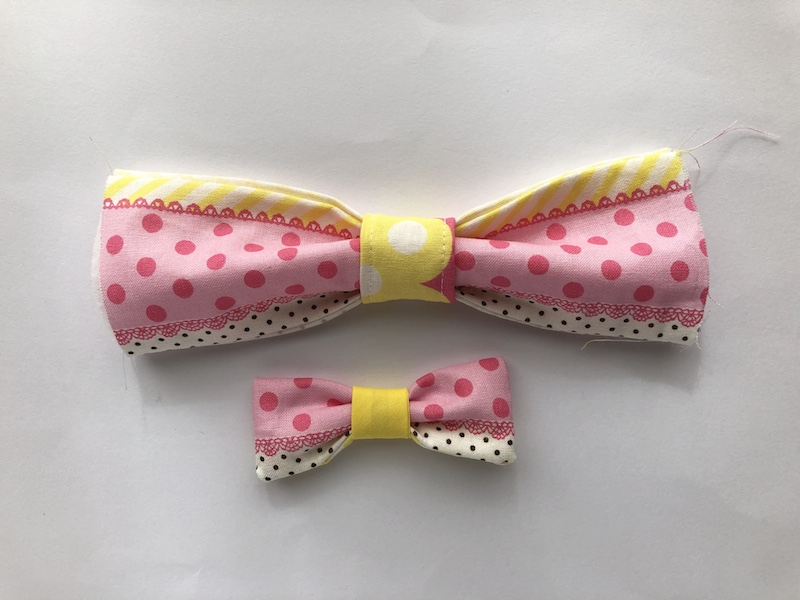
<Ribbon – Large> With front sides facing each other, sew together the long ends of the main portion. Adhere fusible quilt batting (light weight) on the main portion outer fabric. Turn it over (leave both ends unfinished). Adhere fusible quilt batting (2.5x8cm) on the band (5x8cm). Fold both ends of the piece and sew. With the front sides facing each other, sew the end, turn it inside out to make a loop. Put the loop over the center of the ribbon, align the shape and sew to secure.
<Ribbon – Small> With front sides facing each other, fold the main portion in half and sew, leaving an opening for turning. Turn it inside out and close the opening for turning. Put the band around the main portion and sew to secure.
5.
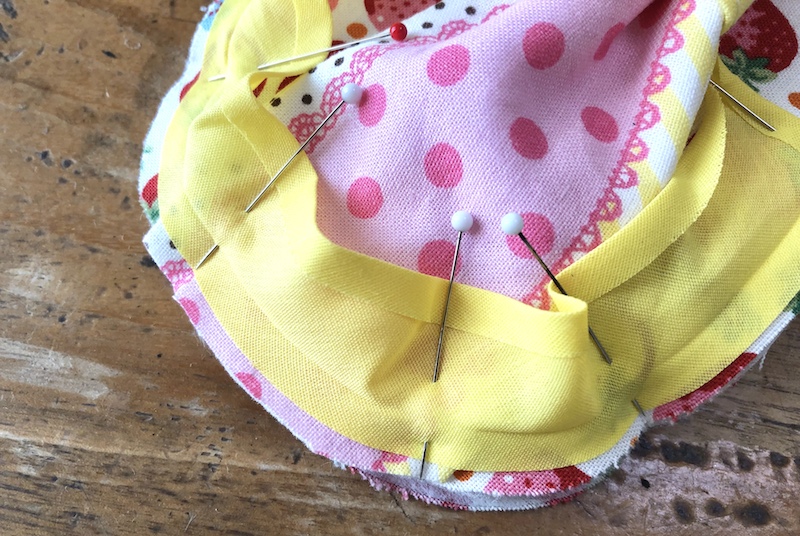
Make the lid and bottom. For four pieces of cut fabric, adhere fusible quilt batting (heavy weight) on the back of the outer fabrics. Adhere fusible interfacing on the back of the lining fabrics. With the front sides facing outside, layer the fabrics with quilt batting and fusible interfacing and baste together. Place the ribbon (large) on the lid and baste both ends. Apply piping over the basting thread using the bias binding tape.
6.
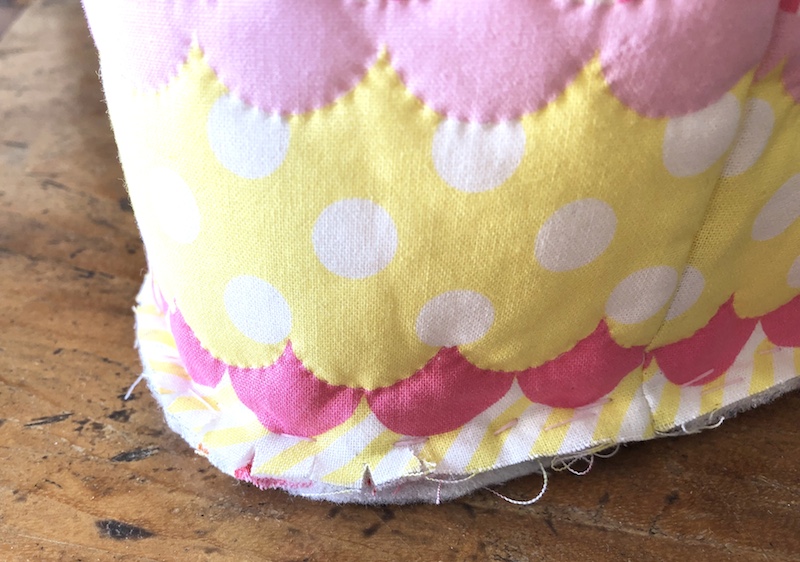
Sew together the bottom and main panel. Align main panel’s front and back center with the center of the bottom. Place pins to hold and baste the pieces. Make slits along the curve.
7.
Attach the zipper. Align the center of the zipper and front center of the main panel and baste the pieces. For the lid, also align the centers and baste. Close the zipper to make sure it is properly attached. Attach the zipper using blind stitches. Attach the edge of the zipper to the lining fabric using the cross stitch. Using overseam, piece together the main panel with piping and back center of the lid. Place and attach the small ribbon where the pieces are sewn together.


 Vanity Style Pen Case
 Multi-Purpose Case – Sewing Instructions
 Accessory Case