
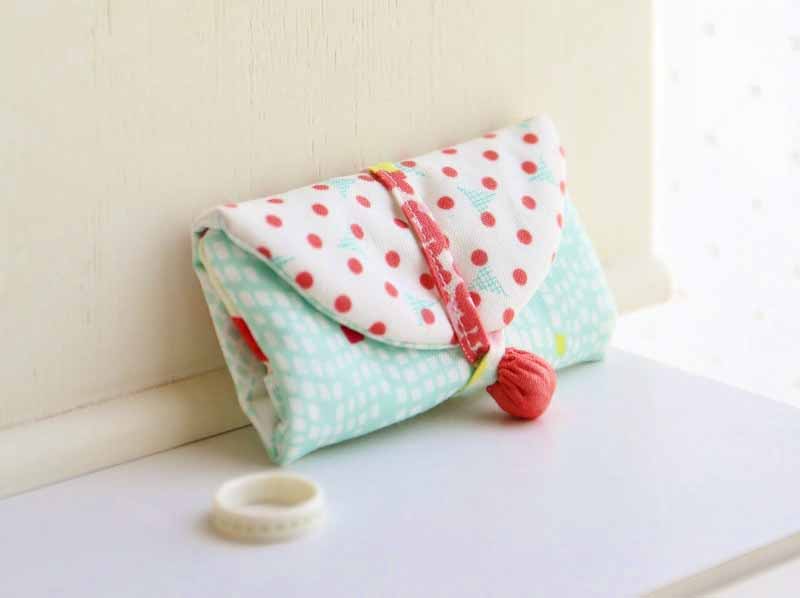
A palm size small accessory case is today’s project. Mioko Sugino, a popular hand craft artist, aka the famous blogger komihinata, is introducing a cute case using the colors of Irome, a fabric inspired by the Japanese four seasons.
Fabric shown for this sample: Irome HFG-101(a)
Materials:
□ Fabric: (Outer fabric – top, Loop) 10cm×15cm
(Outer fabric – bottom) 10cm×10cm
(Lining fabric) 10cm×20cm
(Pocket) 10cm×10cm
(Cord) 5cm×20cm
(Embellishment for cord) 5cm×5cm
□ Fusible quilt batting: 10cm×20cm
□ Snap: One set (0.7cm diameter)

We interviewed Mioko about her creation:
Kokka Fabric (KF): What did you think of the fabric you used for this project?
Mioko Sugino (MS): With small prints, it is a perfect fabric for making something small! It was so much fun to come up with fabric combinations as any Irome would work with each other. Even a small part uses the Irome.
KF: Can you tell us any special elements or ideas that you incorporated into this creation?
MS: I used a layered flap, instead of a zipper, to keep items inside from falling out. While the catch for the closing is made with fabric, it is secure. Quilt batting can protect the accessories and make a solid case even with a thinner fabric.
KF: What are some tips for making this case?
MS: For a delicate look, the cord attached on the exterior is very thin. If you find it difficult to sew, you may widen it or use a ribbon instead.
KF: How should we use this case in everyday situations?
MS: With the same fabric, you can make a stylish cosmetic case or scrunchy. Matching items may draw attention from your friends♪
KF: Thank you very much, Mioko! Here are sewing instructions along with step by step photos from her. Enjoy crafting!
How to make an accessory case
1.
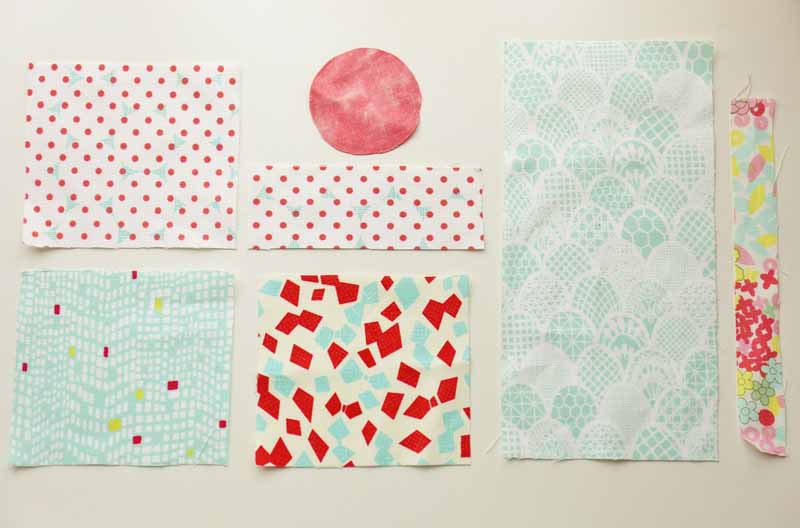
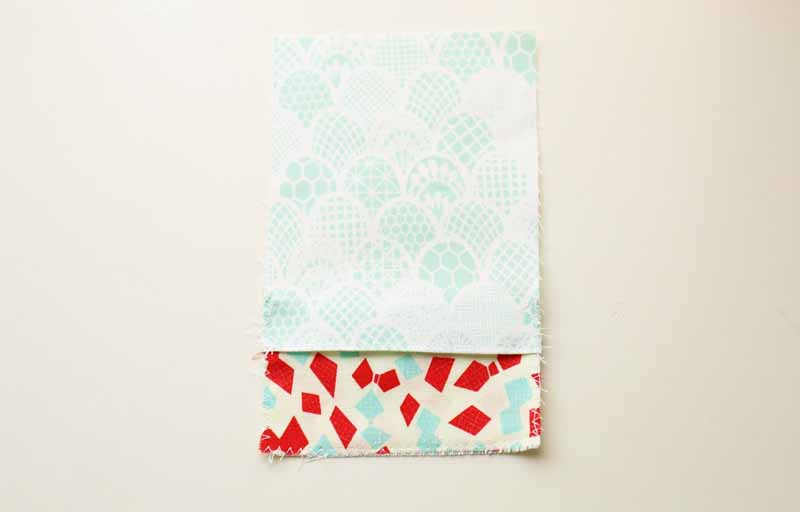
Cut the fabrics. This project uses all six spring colors from Irome.
2.


With outer sides facing each other, sew together the top and bottom of the outer fabric. Press the seam open.
3.
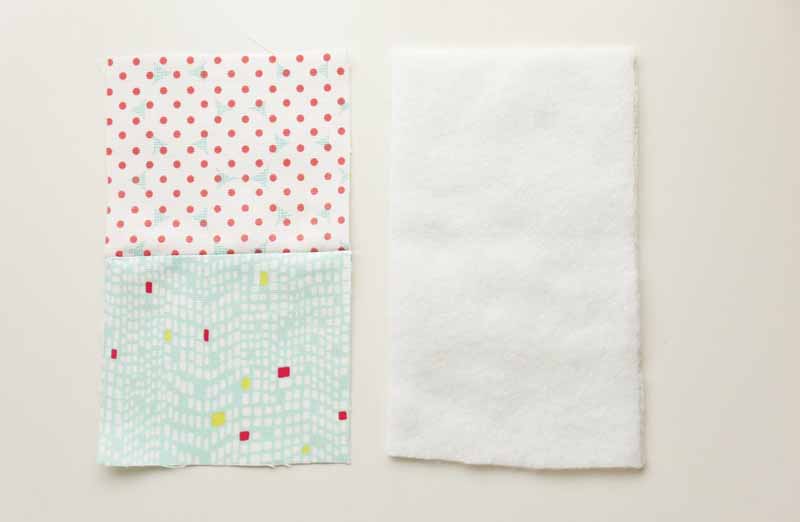
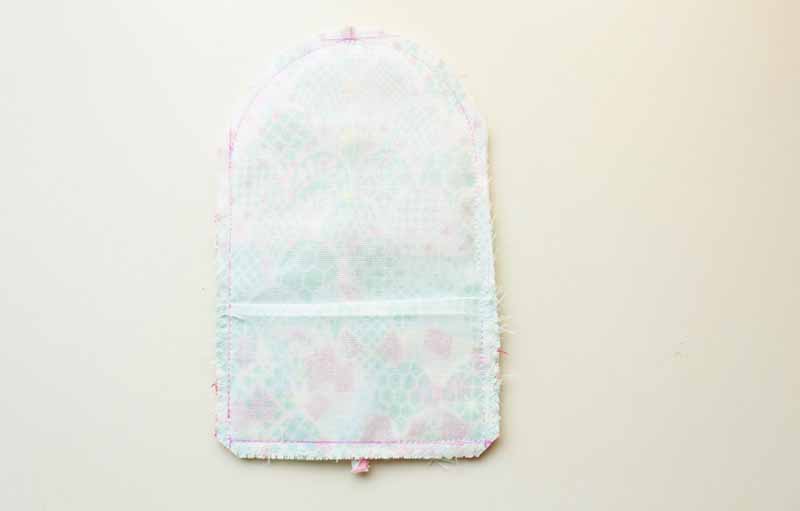
Adhere the fusible quilt batting to the reverse side of the outer fabric.
4.
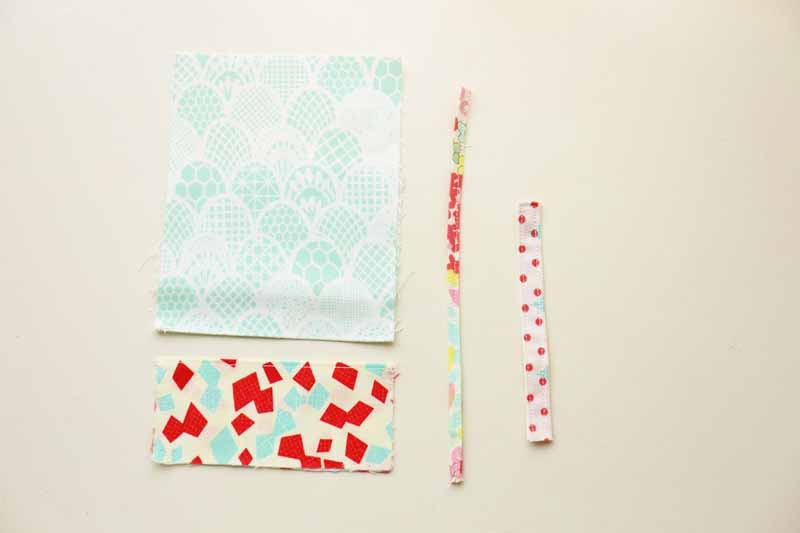
With outer sides facing outside, fold the lining fabric, pocket and cord in half and press with iron. Run a stitch at the top opening. Fold the loop in four.
5.

Using the fold line from step 4, align the bottom of the lining fabric with bottom of the pocket fabric.
6.
Where it is layered, run zigzag stitches.
7.

On the back of the lining fabric (shown left in photo), draw a stitch line at 0.5cm width. Draw a 5cm radius curve on both sides. Baste the cord and loop to the outer fabric (shown right in photo)
8.
With outer sides facing each other, put together the outer fabric and lining fabric and sew together leaving an opening at the top for turning.
9.
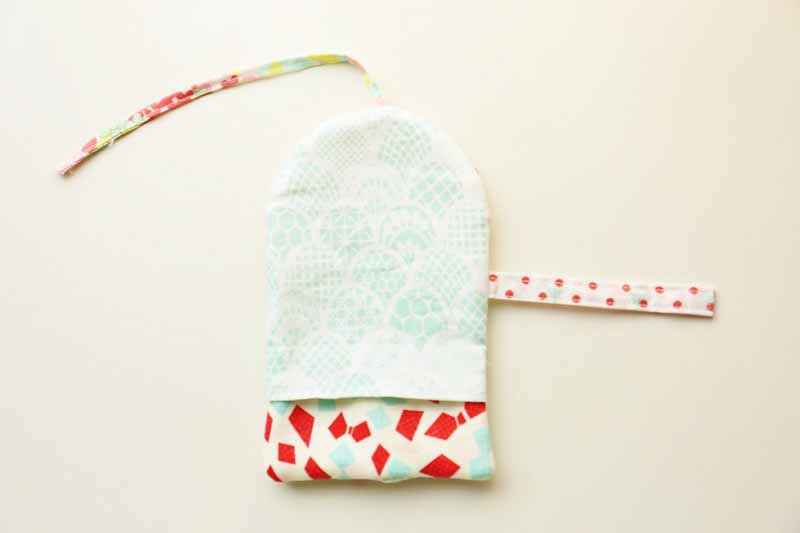
Cut off the excess curve, and turn it over. Close up the opening.
10.
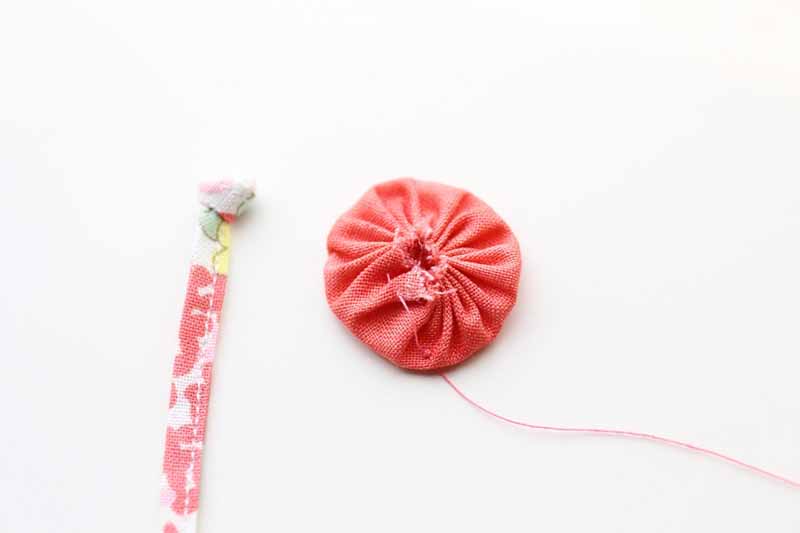
Fold the edge of the cord embellishment for 0.5cm. Sew with rough stitches at 0.2 – 0.3cm from the edge. Once you sew all the way around, leave the thread without cutting it. Tie a secure knot at the end of the cord.
11.
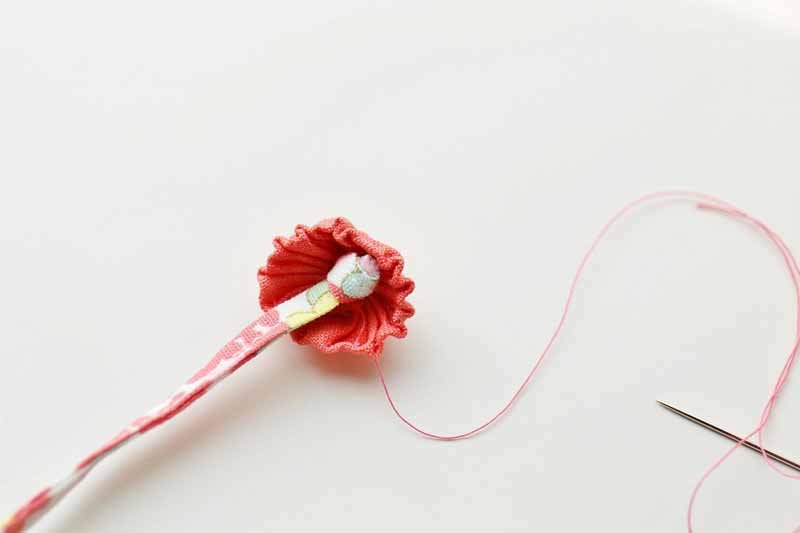
Wrap around the knot with cord embellishment. Pull the string and sew it so the thread will cross over.
12.
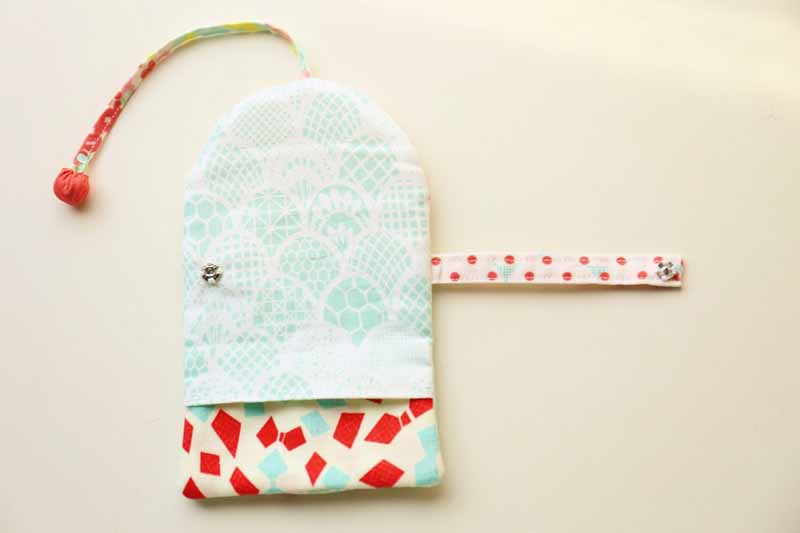
Attach the snap onto the case and cord to finish.

 Vanity Style Pen Case
 Patchwork Style Lovely Vanity Case – Sewing Instructions
 Eyeglass case made with echino glass design fabric