
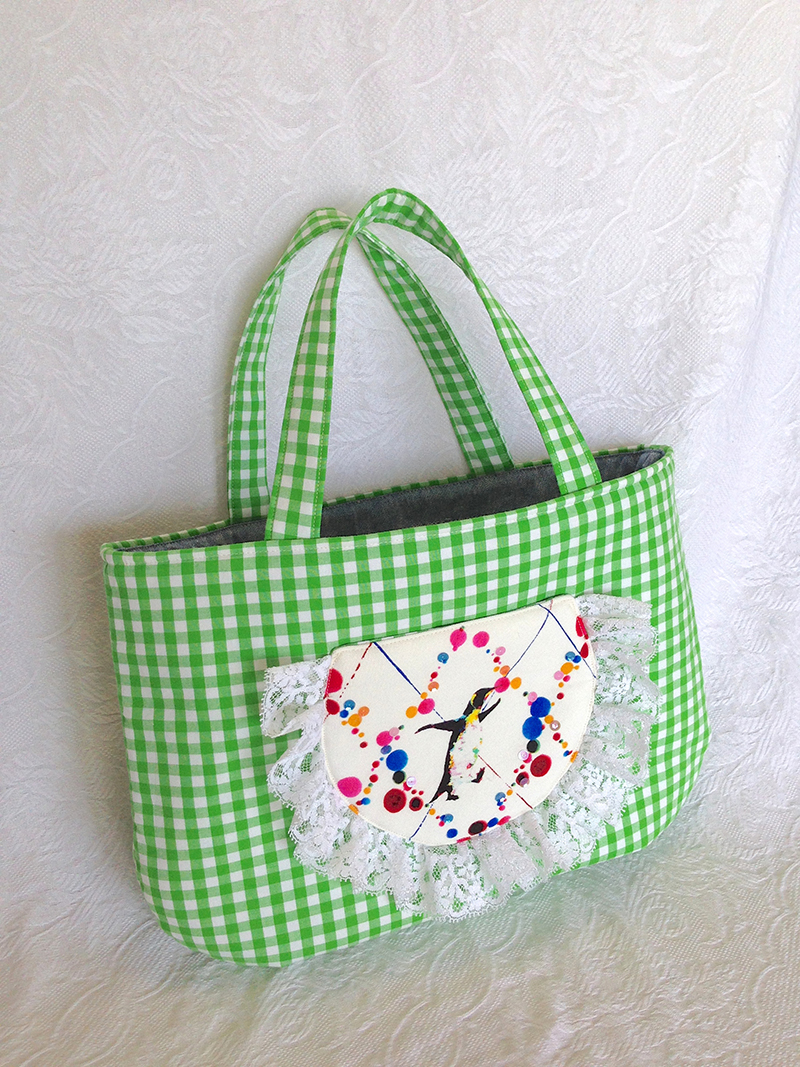
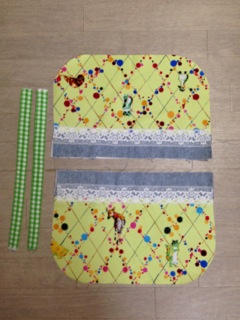
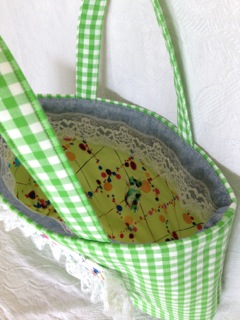
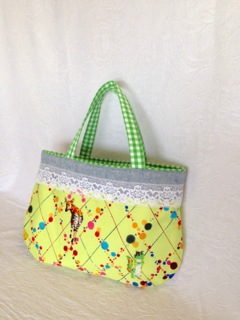
A diamond check pattern connected with colorful hand drawn dots combined with colorful animals…..this bold design fabric by Niji$uke is intentionally transformed into a romantic piece embellished with lace. Yumi Kanaya from Y*RT2 HANDMADE is sharing her creation today.
Fabric shown for this sample: (Lining/inside bag) nijipp JG46000-3 (B)
(Pocket outer fabric / Brooch base fabric) nijipp JG46000-3 (A)
Materials:
□ Fabric: (Outer bag, Handle, Pocket (lining fabric – gingham) 100cm×50cm
(Lining/inside bag fabric) 90cm×30cm
(Pocket outer fabric, Brooch base fabric) 40cm×20cm
(Top opening fabric (Chambray)) 50cm×20cm
□ Fusible Interfacing: 90cm×70cm
□ Fusible Quilt Batting: 90cm×50cm
□ Tulle Lace: 1.8m (5cm wide)
□ Lace: 80cm (6cm wide)
40cm (3cm wide)
□ Brooch pin: One piece (2.5cm diameter)
□ Button base for fabric wrapped button: One piece (6cm diameter)
□ Spangles of your choice and Ribbon

We interviewed Yumi about her creation:
Kokka Fabric (KF): What did you think of the fabric you used for this project?
It has a very individualistic design. First I was not sure if I could incorporate the design into a creation, but decided to utilize its cute pastel base color tone to make a romantic piece with plenty of lace embellishments.
KF: Can you tell us any special elements or ideas that you incorporated into this creation?
Since the fabric’s pattern is very intricate, the bag has a simple design, which is a rectangular book bag. To limit the use of the pattern, I only used a penguin motif cutout for a pocket, combining it with a gingham check fabric. On the contrary, my initial plan was to make the inside of the bag very flashy, but the idea soon changed as the lining fabric was also cute. It ended up being a reversible bag so that both sides can be enjoyed.
KF: What are some tips for making this bag?
The shape is simple and easy, yet it looks girly with lots of lace embellishment. A simple way to make the gathering is to sew the edges with wide stitches and pull the threads together. For this bag, I used the same fabric for the handles. You could create a different look if you select other materials like leather.
KF: How should we use this bag in everyday situations?
The inside and outside look completely different. Choose the side depending on your mood for the day. The brooch adds a nice accent to a bag, hat or clothing.
KF: Thank you very much, Yumi! Here are sewing instructions along with step by step photos from her. Enjoy crafting!
How to make Stylish Reversible Bag
1.
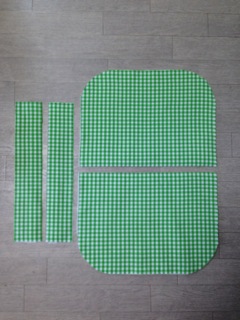
Cut the fabrics for front/outer bag.
2.

Since the gingham fabric used for this particular bag is thin, interfacing and quilt batting are added. For the handles, 3cm (width) of interfacing and quilt batting are added.
3.


Cut the fabrics for lining/inside bag. Add the interfacing to the chambray part only.
4.
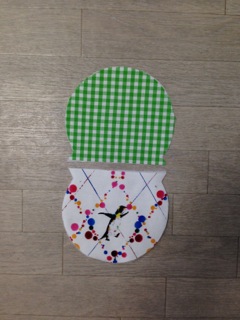
Cut the pocket fabric. Add quilt batting to print fabric, and interfacing to gingham fabric.
5.
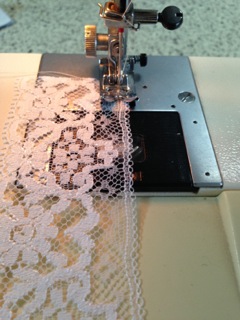
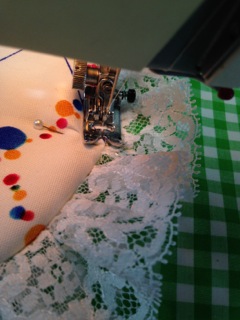
Prepare the lace to be attached to the pocket. To gather the lace, sew the edge with wide stitches. The length of the lace is twice as long as the size of the pocket.
6.

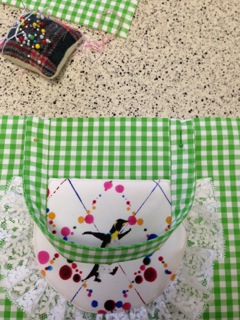
With front/outer sides facing each other, sew together only the top opening (straight line) of the pocket fabric. Leave about 5cm in the center open for turning later.
7.
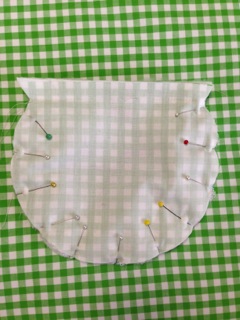
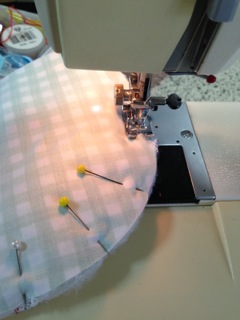
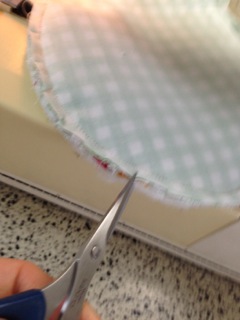
Place the gathered lace in between the fabrics along the curve. Sew along the curve about 1cm inside from the edge. After sewing, cut a slit along the curve for a clean finish when turned over. Turn it inside out and close the opening using topstitches.
8.

Place the top opening of the pocket at 7.5cm from the top end of the gingham fabric. Sew the edge along the curve to attach the pocket to the bag.
9.
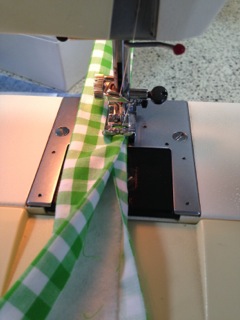
Prepare the handles. Fold in the seam for 1cm and sew both edges.
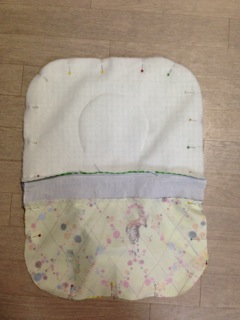
10.
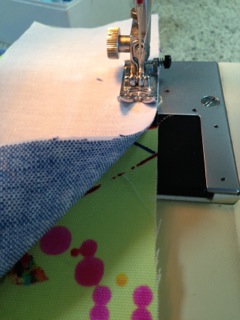
With front/outer sides facing each other, sew the lining/inside bag. Run topstitches where two pieces are sewn together.
11.
Attach the lace over the chambray fabric. The lace should be placed at 3.5cm from the top end.
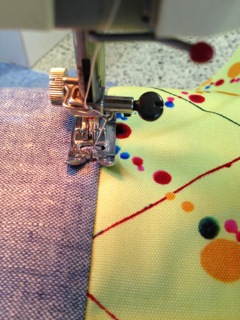
12.
Attach the handle to the outer bag prepared in Step 8. (The handle is basted) After basting, with front/outer sides facing each other, sew the lining/inside fabric and front/outer fabric at the top opening.
13.
When the fabric sewn in Step 12 is spread open, it looks like this. With front/outer sides facing each other, front and back parts are pinned together. Sew around the edge, leaving about 10cm for opening for turning.
14.
Turn it inside out and close up the opening by hand. Align the shape and top stitch the opening.
15.

The bag is complete. Spangles are attached with the glue on the outer bag, pocket and dots.
16.Brooch (pin)

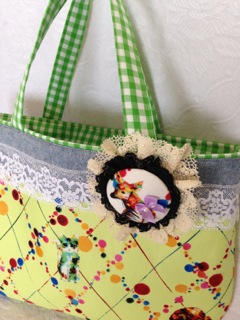
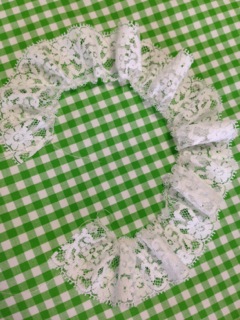
Select a 60mm diameter button base to create a fabric wrapped button. Use a cutout of your favorite animal design. (The button is available at craft stores. It is sold as buttons for small macaroon-style pouches.) Embellish with a ribbon. Attach wide lace (in ivory) and short lace (in black) with gathering in layers to go around the back of the button. Attach a broach pin on the back with an adhesive to hide where the lace is tightened.

 Puffy bag in Kokeshi fabric with bamboo handle
 Lesson bag in kitten design fabric
 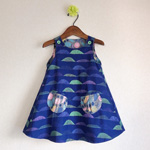 A-Line Reversible Dress – Sewing Instruction