FREE SEWING TUTORIALS
Scrunchie – Free Sewing Tutorial

New to sewing and using a sewing machine? Aimed at beginners, this original segment teaches you the joy of creating handmade pieces while learning the basics of sewing! It is a lesson of sewing basics. In this ninth issue, how to make a scrunchie is featured.
- Index
-
- In this lesson, you will learn how to do the following!
- Fabric and materials for this project
- Video tutorial! “How to make a scrunchie”
- Step-by-step photos! ① Basic scrunchie tutorial
- Step-by-step photos! ② How to Make a Ruffled Style Scrunchie
- ◎Sewing Instructions
- ◎Sewing Tutorial(PDF format / A4 size)
In this lesson, you will learn how to do the following!
In every “Sewing Basics Lesson,” essential sewing tips and techniques to remember are included. This time, let’s master these three together!
- Learn the secret to sewing thin fabrics neatly with a sewing machine!
- Master the technique for sewing fabric into a tube!
- Create a scrunchie by piecing two different fabrics!
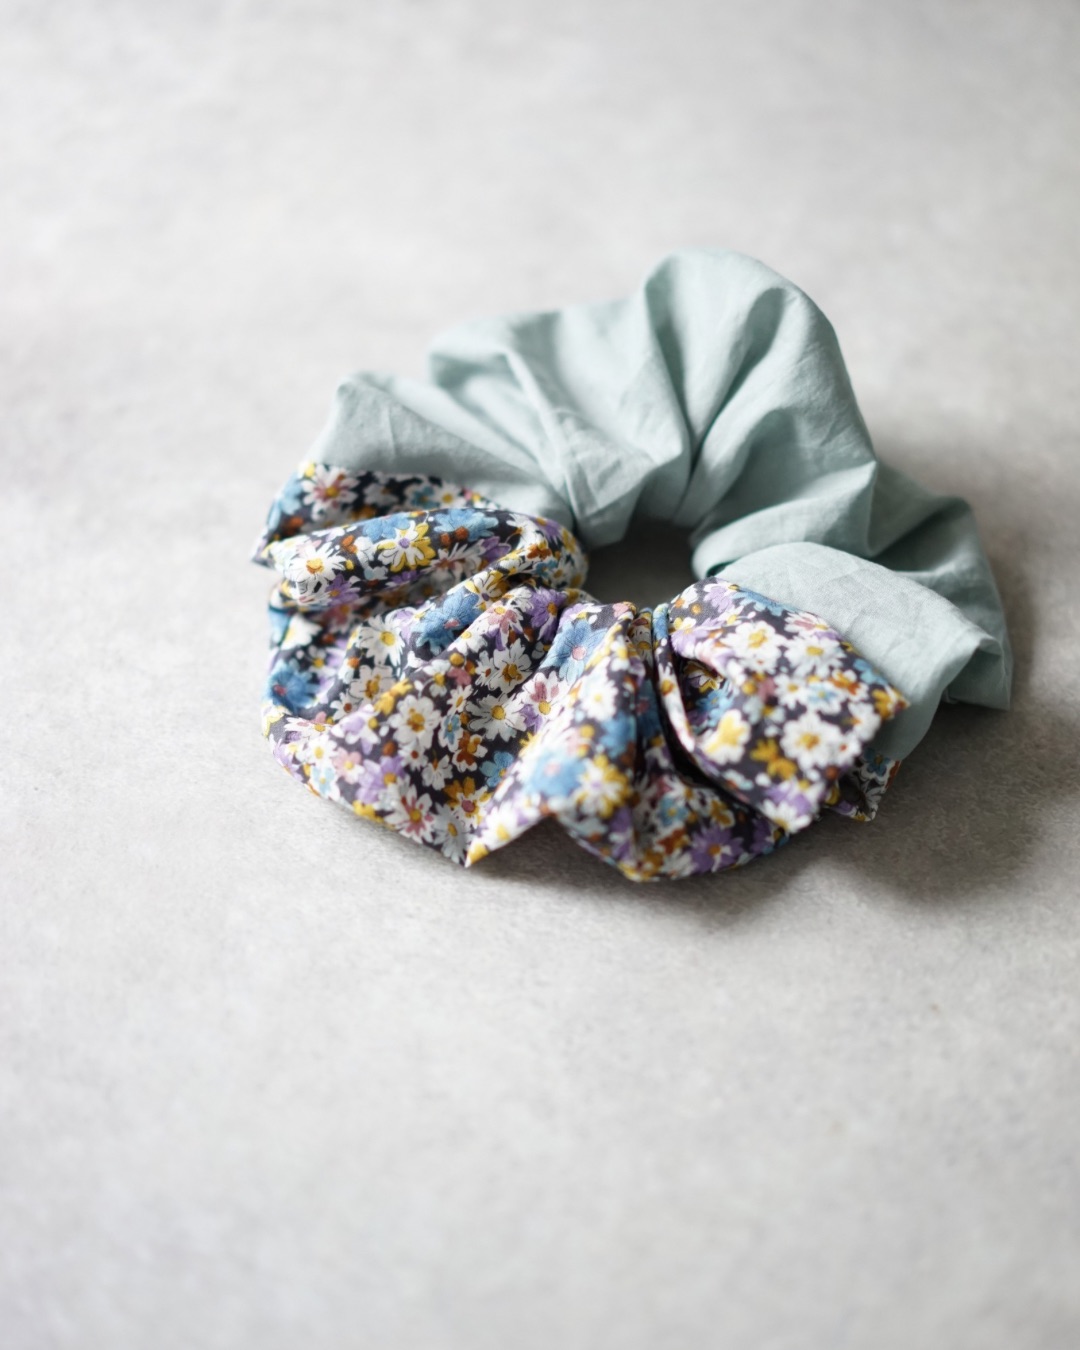
Fabric and materials for this project
| Design & Work | Yui Tamaki |
|---|---|
| Fabric shown for this sample |
A (Floral): NF-1060-61 A |
| Materials |
|
| Size |
|
Video tutorial! “How to make a scrunchie”
This easy-to-follow guide covers key points beginners often struggle with—like cutting fabric, machine sewing tips, and fabric alignment. A must-see for beginners!
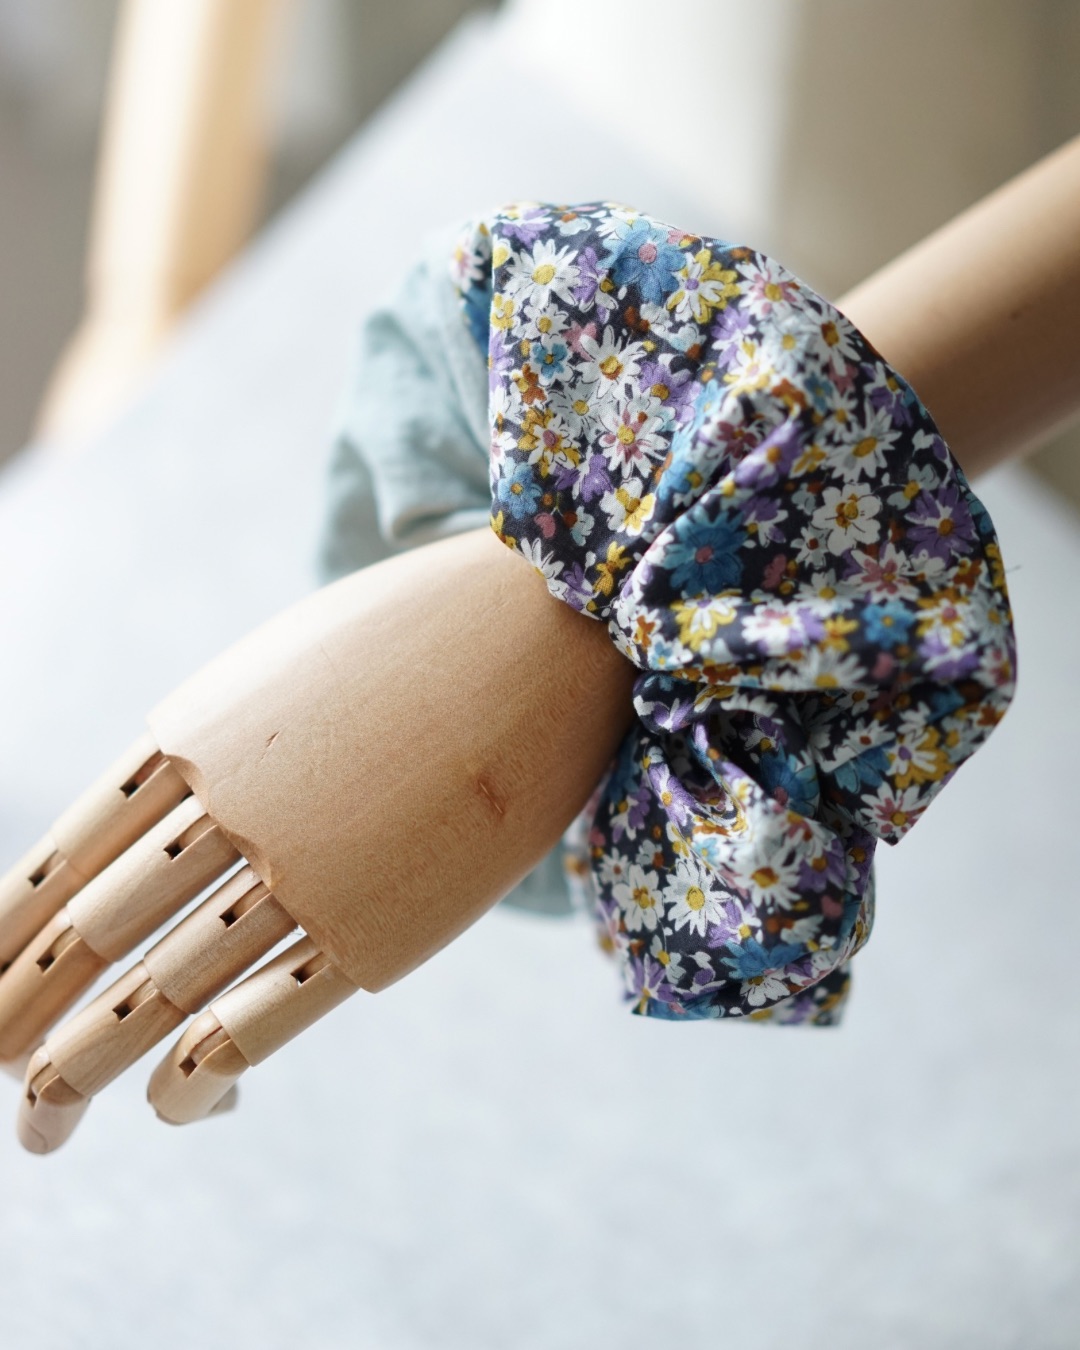
Step-by-step photos! ① Basic scrunchie tutorial
Start by making a basic scrunchie. Step photos are handy for quickly checking the flow and process.
-
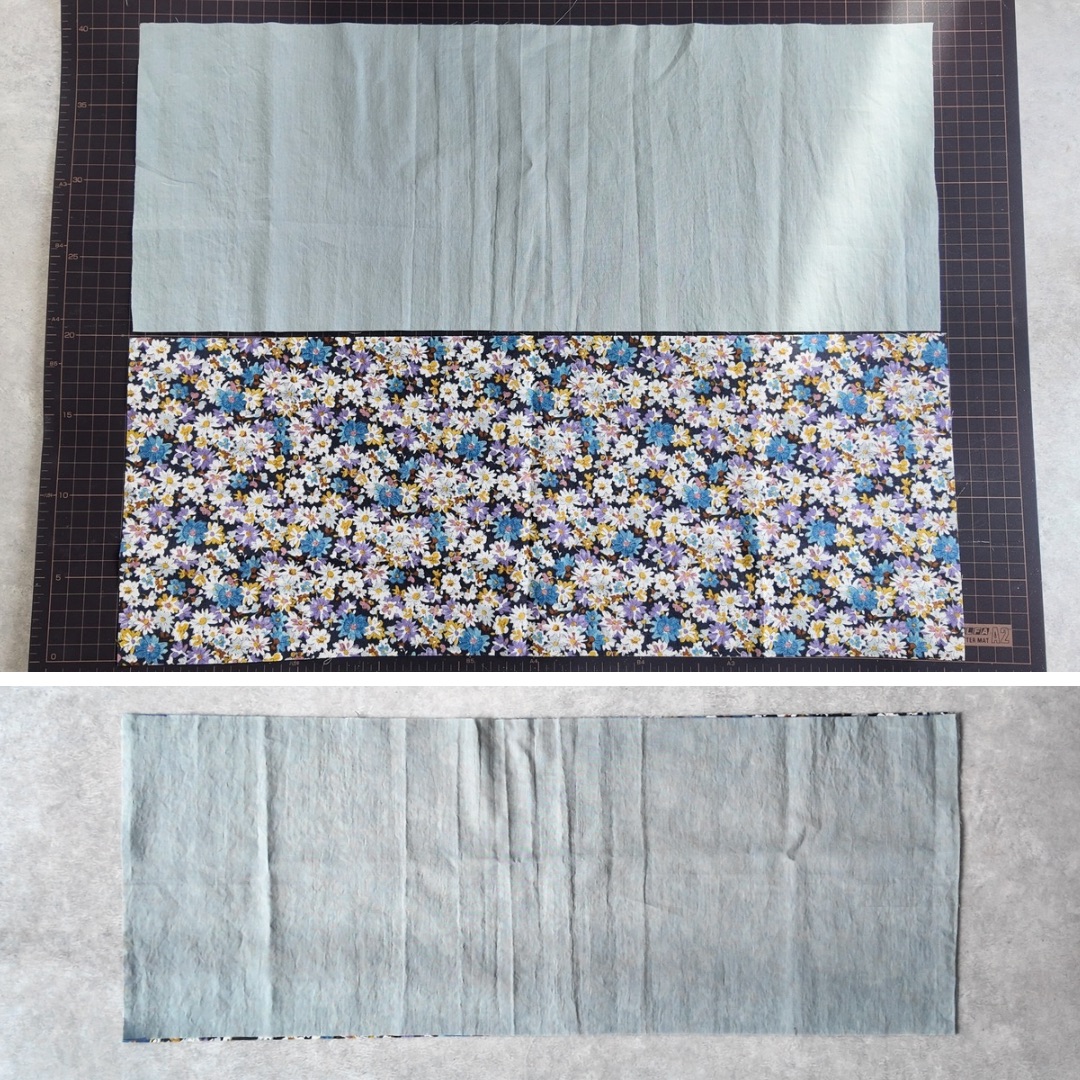
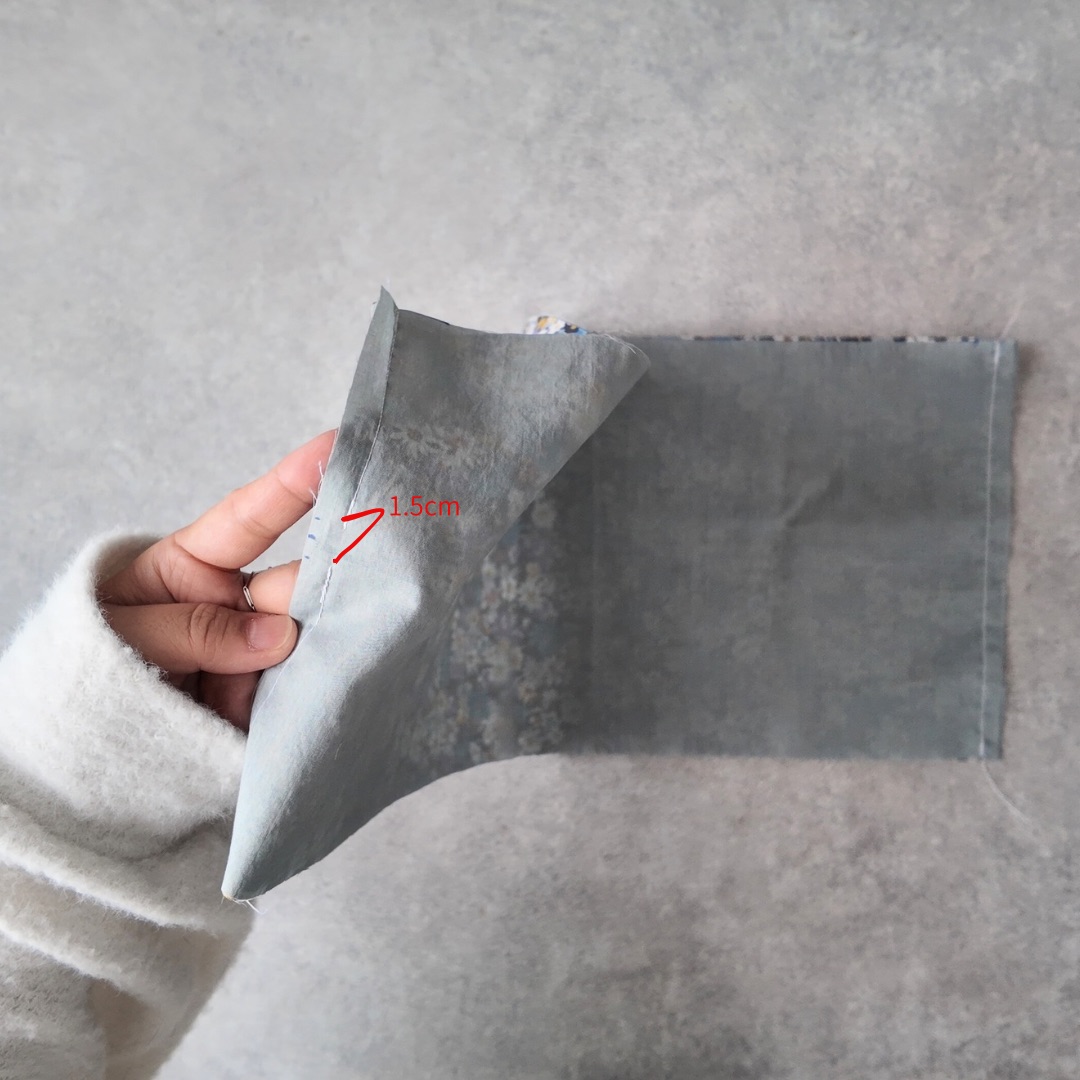
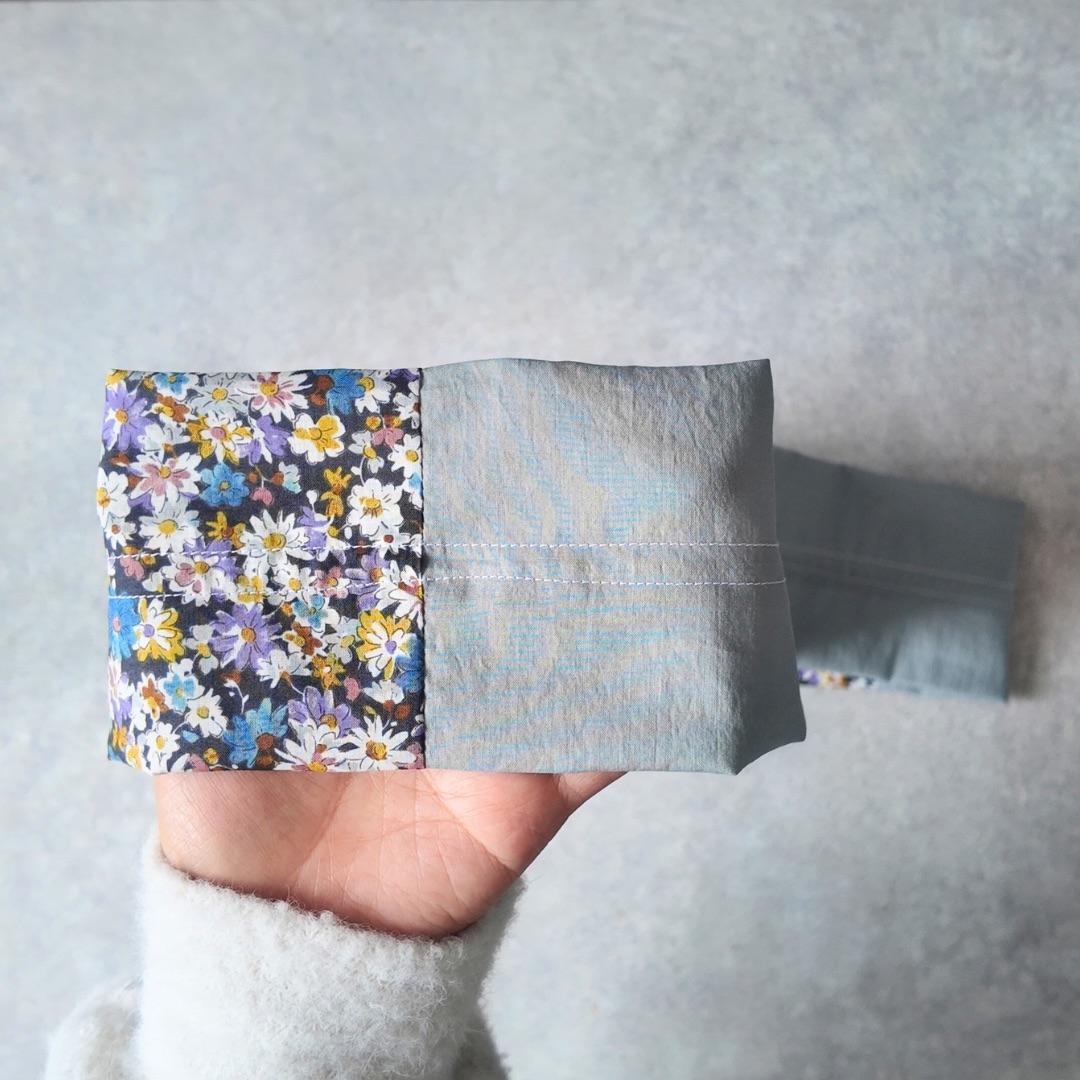
With the front sides facing each other, put together two types of fabrics (floral and solid this time) and sew both edges (1cm seam allowance).
-
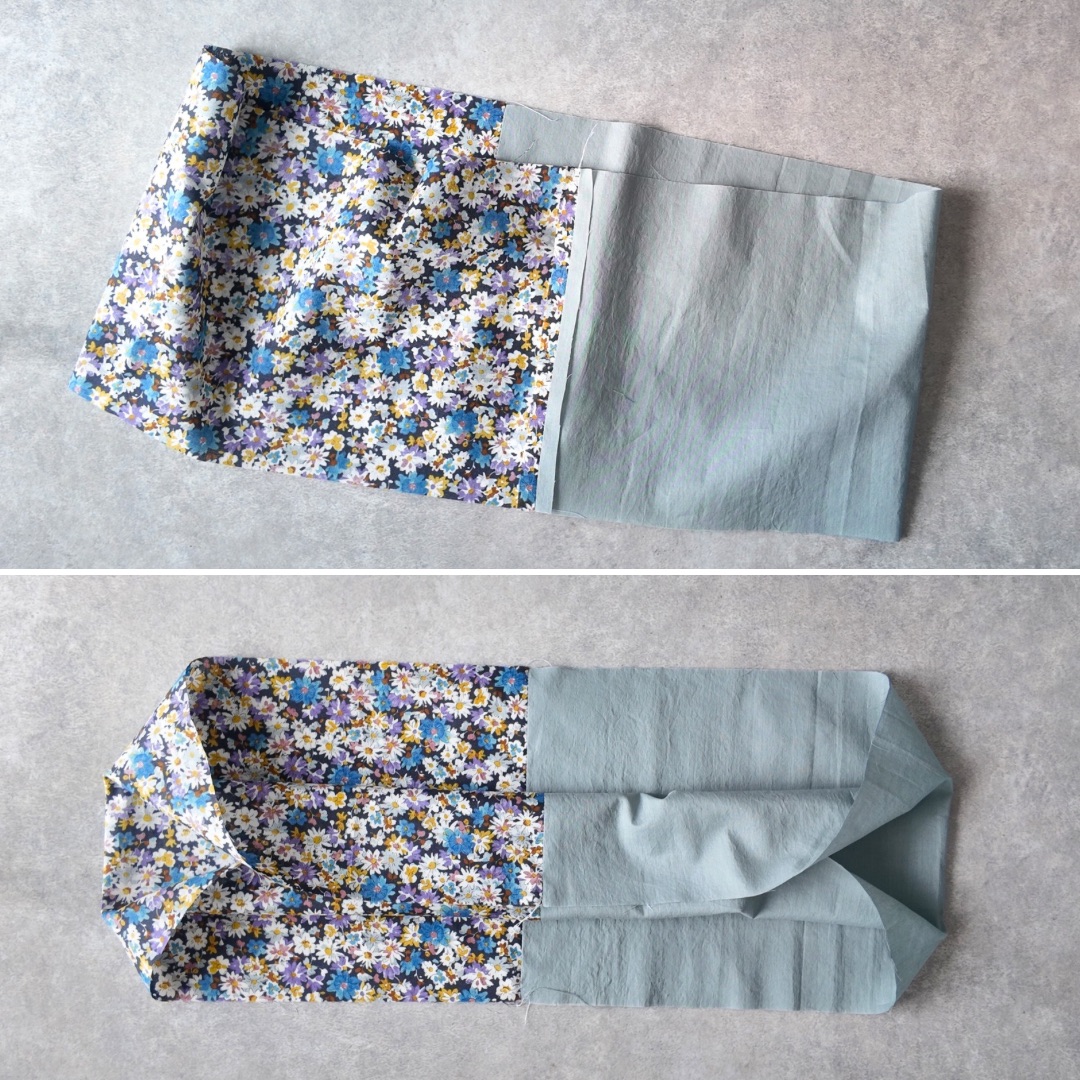
Press the seam open using an iron. Fold the top layer of the circular fabric toward the center.
-
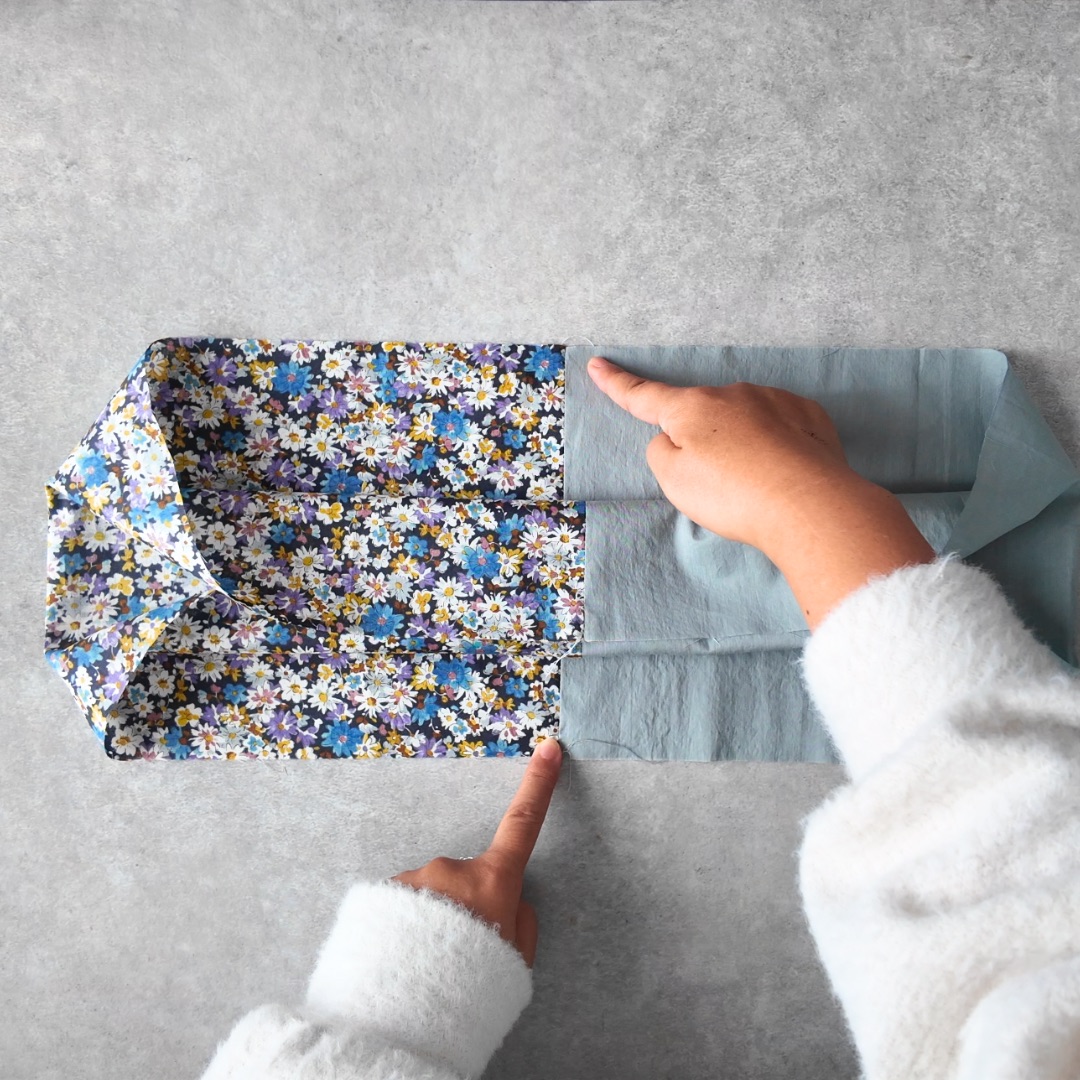
Align the seams of the bottom fabric, then fold it in half, wrapping the top fabric inside.
-
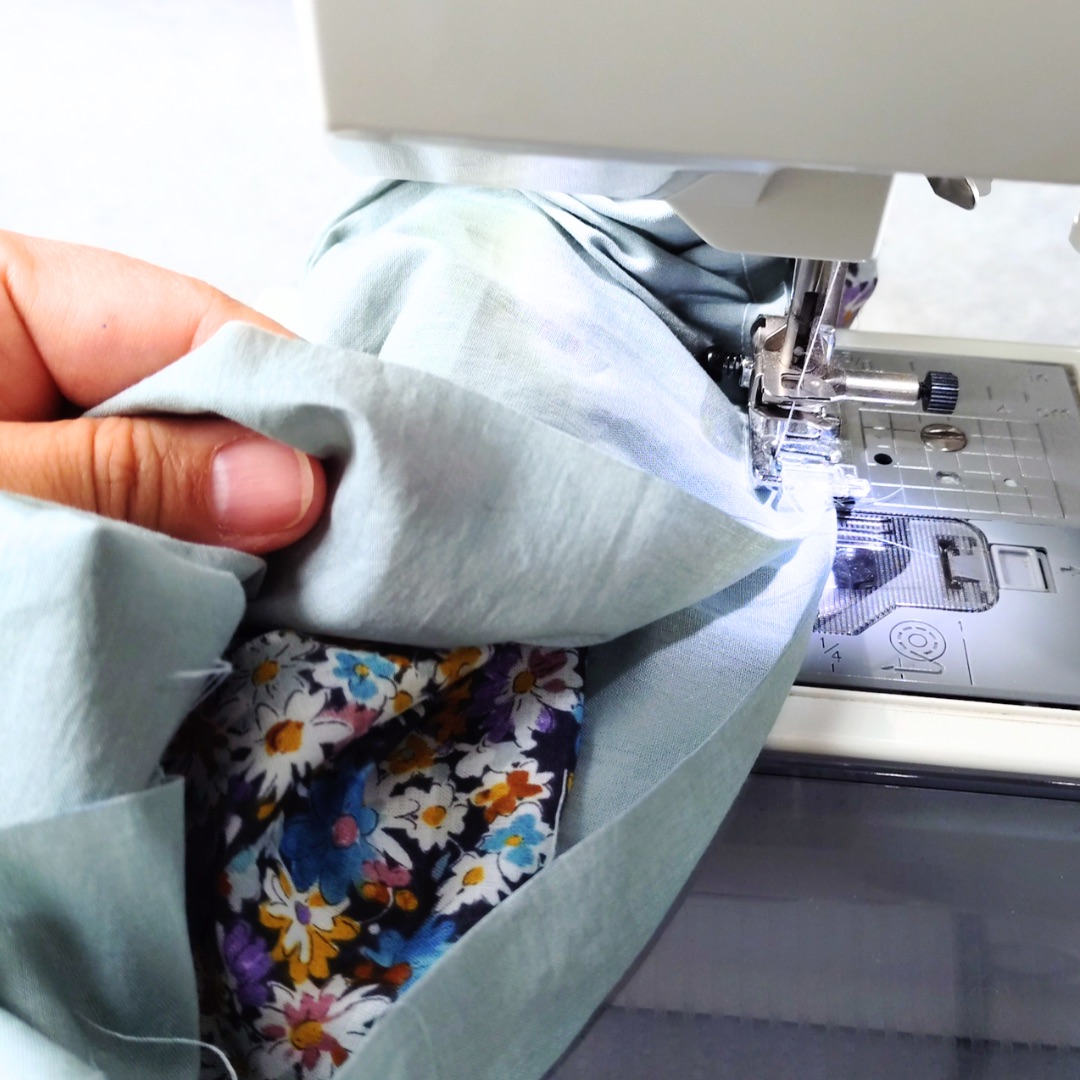
While avoiding the fabric that has turned inward, sew with a 1cm seam allowance. Pull the fabric out as you sew around the entire circumference, taking care not to sew the fabric wrapped in step 3. When you reach a point where you cannot sew straight, pull the inner fabric out and continue sewing while aligning the fabric edges. Stop sewing, leaving a 5cm opening for turning.
-

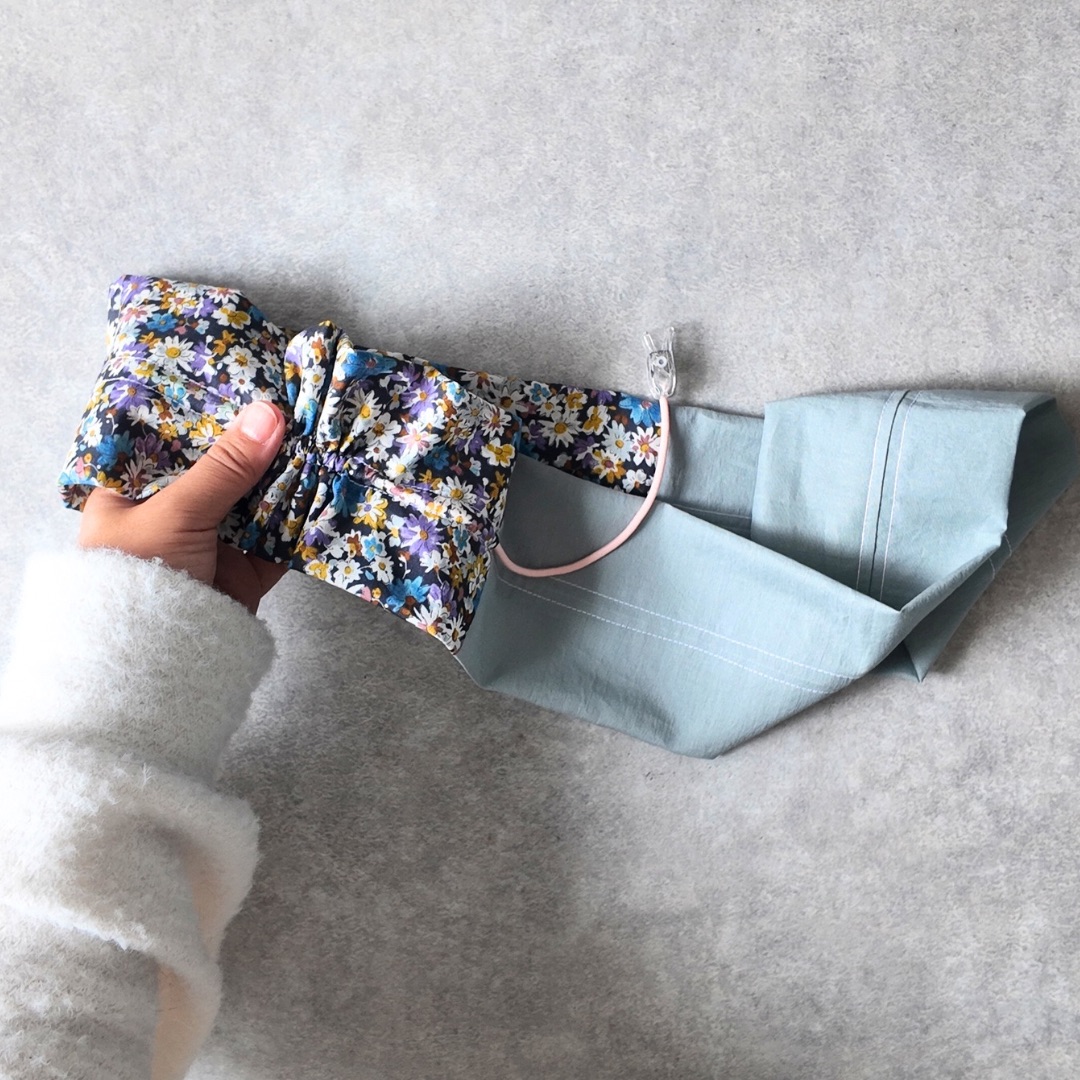
Turn it inside out and insert the elastic through the opening.
-
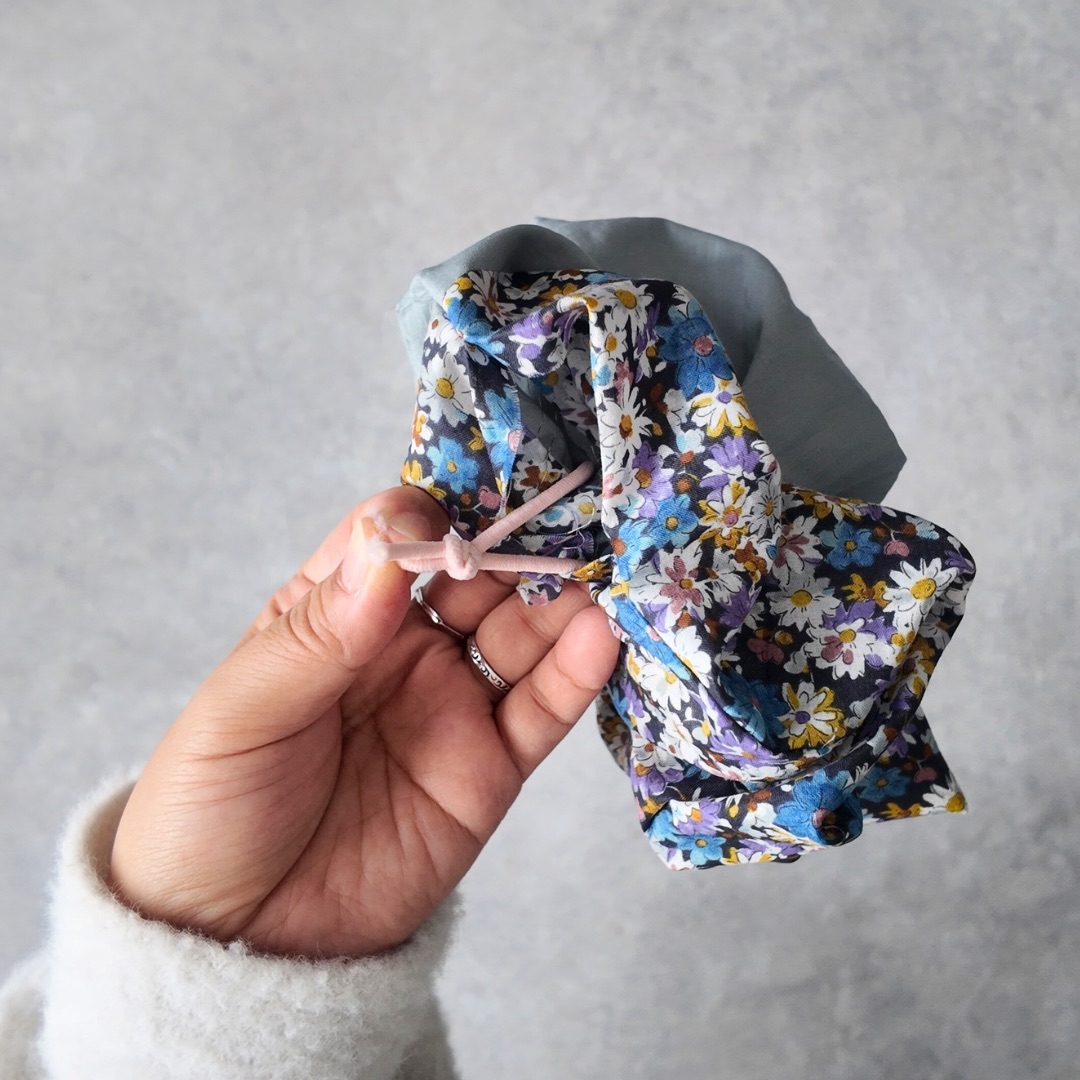
Once the elastic is inserted, tie both ends securely and close the opening.
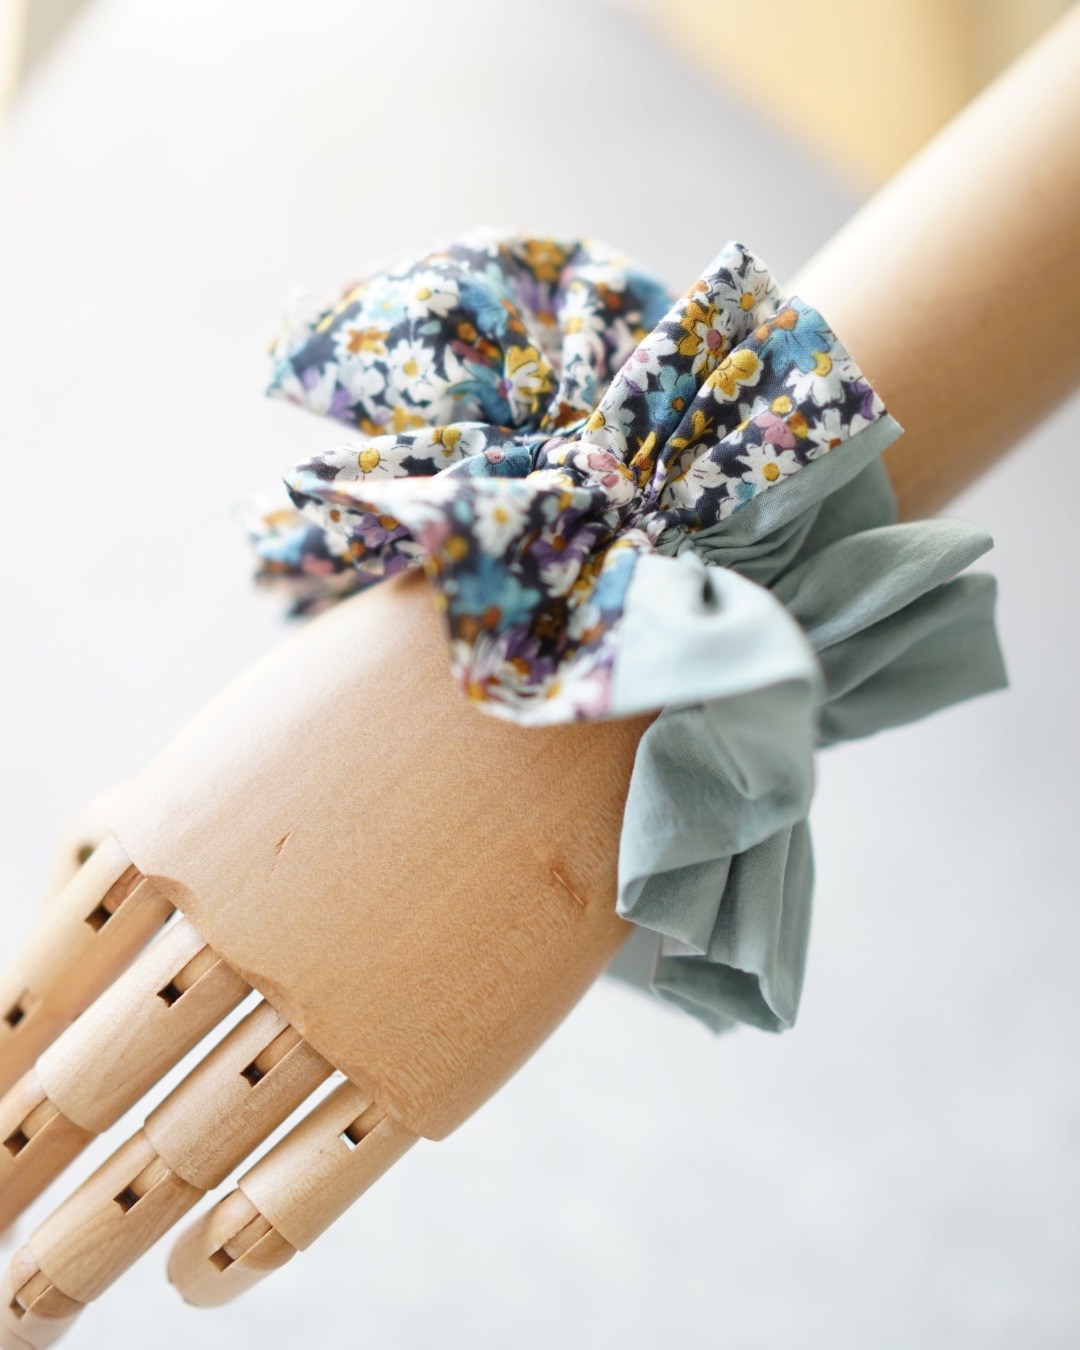
Step-by-step photos! ② How to Make a Ruffled Style Scrunchie
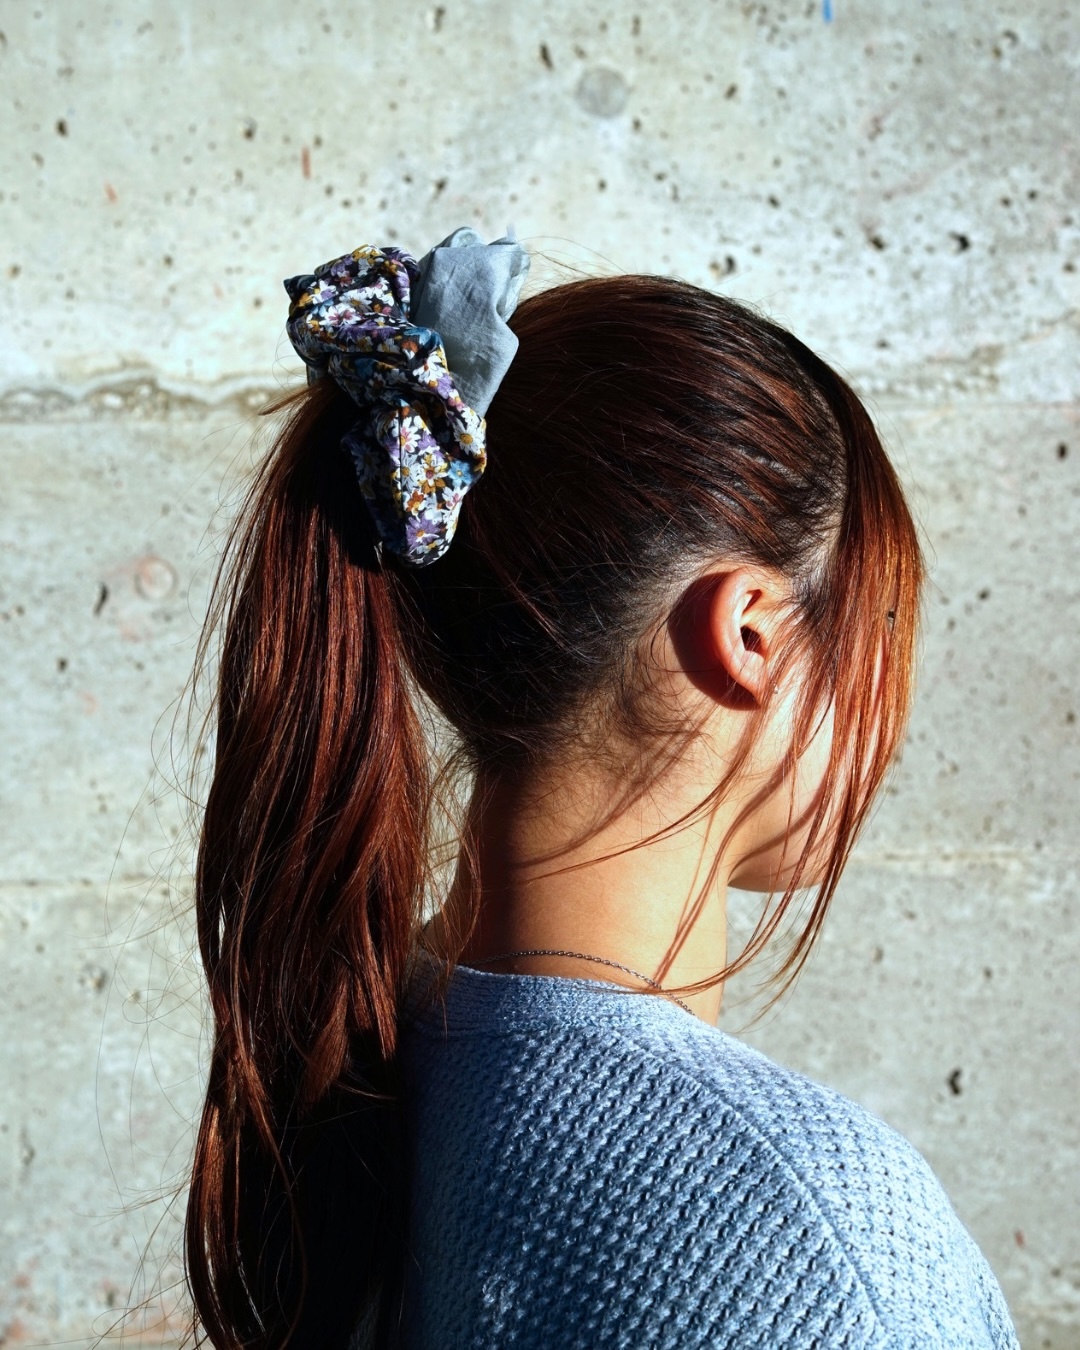
Once you have mastered the basic scrunchie, why not try making a ruffled one? Besides using it as a hair accessory, it looks cute worn on your wrist or attached to a chain as a bag charm.
-
Before sewing the fabric together, create an opening for the elastic and sew it in the same way as a basic scrunchie.
-
Turn it inside out, close the opening, then sew two rows of stitches along the seam allowance to create the opening for the elastic.
-
Insert the elastic through the opening to finish.
-

The top is the basic scrunchie, and the bottom is the ruffled style scrunchie.
◎Sewing Instructions

◎Sewing Tutorial(PDF format / A4 size)
Purchasing KOKKA fabrics
-

This online store launched in July 2022 and is operated by Kokka USA, Inc. Shipping from Kokka Fabrics is currently available to the US and Canada.
-

Visit our site for the official wholesale distributor of KOKKA fabrics in North America. (US & Canada)