FREE SEWING TUTORIALS
Bills And Coins Sorted Out Magically♪ – Coin Sliding Mini Wallet – Sewing Instructions
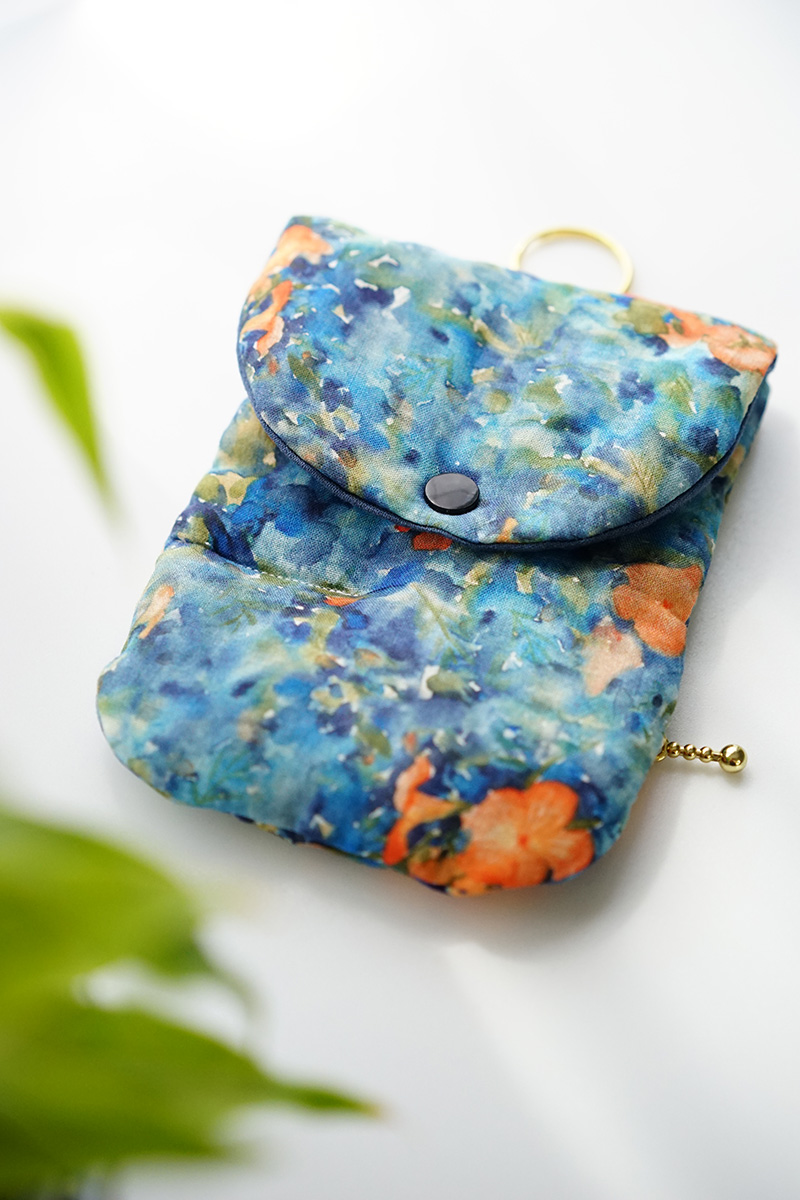
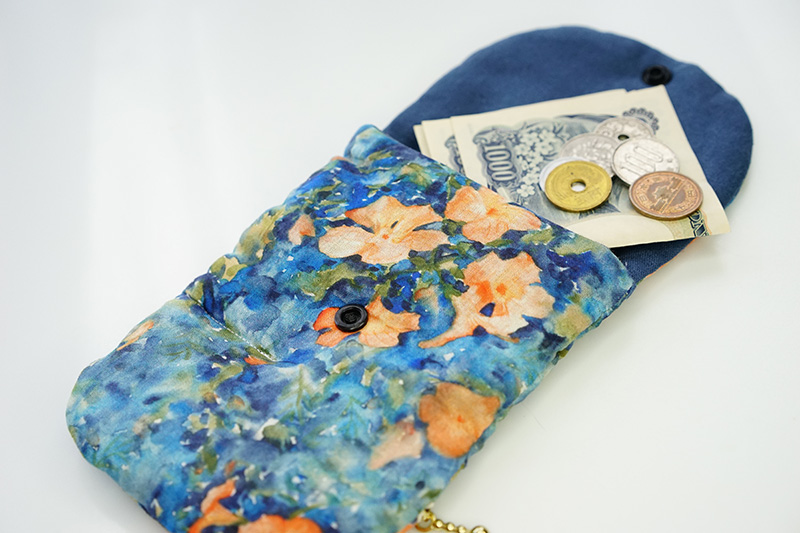
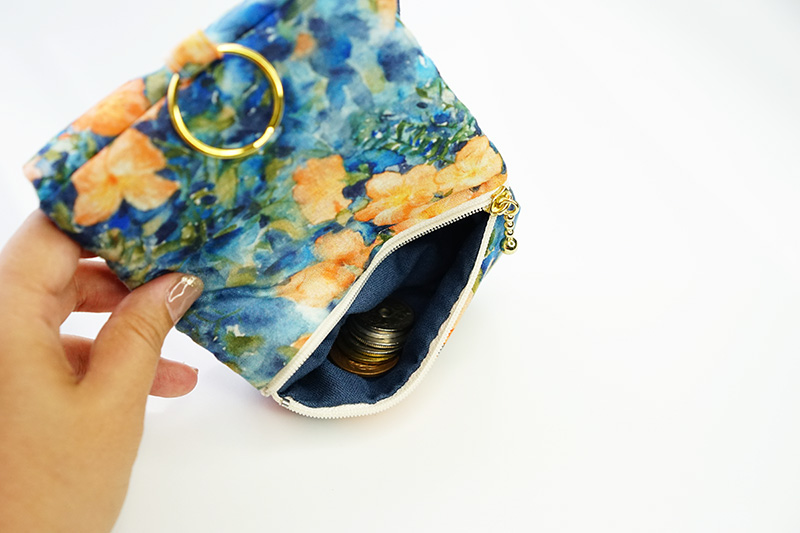
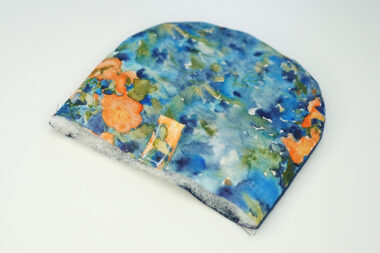
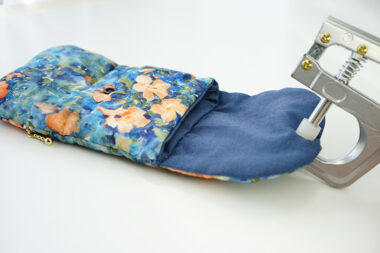
This is a convenient pouch style wallet that allows you to put bills and coins together, with only the coins stored in the bottom. The featured fabric is [nouzenkazura] from the “yui” series of textiles by Ayano Ichiyanagi, who creates watercolor paintings. The design motif is the nouzenkazura (trumpet vine), a large and beautiful flower that blooms from summer to autumn, and its deep colors are magnificent. Soft and thin cotton linen compass fabric is suitable for dresses, skirts, and scarves.
Fabric shown for this sample:EGXA-6415-1A
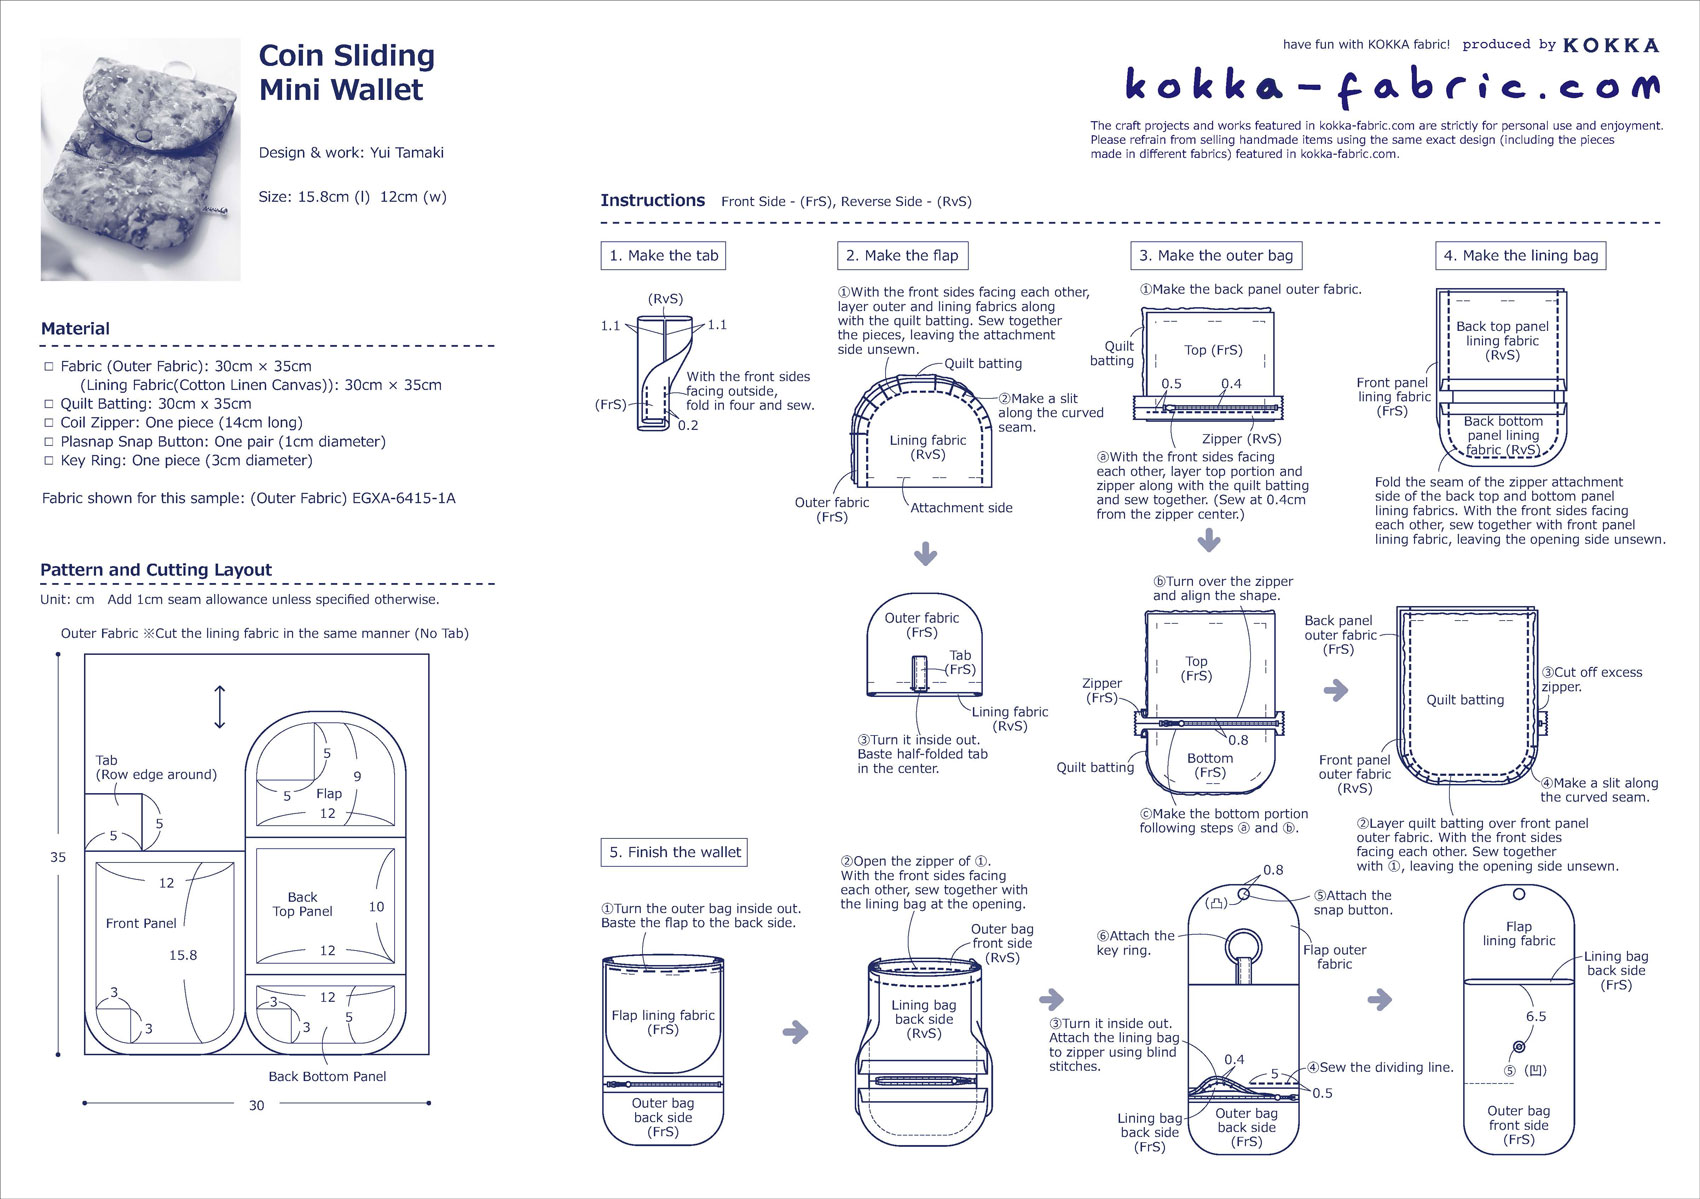
Materials:
□ Fabric (Outer Fabric): 30cm × 35cm
(Lining Fabric(Cotton Linen Canvas)): 30cm × 35cm
□ Quilt Batting: 30cm x 35cm
□ Coil Zipper: One piece (14cm long)
□ Plasnap Snap Button: One pair (1cm diameter)
□ Key Ring: One piece (3cm diameter)
Size:15.8cm (l) 12cm (w)
We interviewed Yui about her creation:
Kokka Fabric (KF): What did you think of the fabric you used for this project?
The watercolor painting design looks very gentle and the colors are wonderful. I used a quilt batting to make it fluffy to match the image of this fabric.
KF: Can you tell us any special elements or ideas that you incorporated into this creation?
While cashless transactions are certainly convenient, cash is still necessary for payment from time to time. I created this convenient pouch style wallet in order to eliminate even a little of the hassle at the cashier. When you put bills, cards, and coins together, only the coins slide down and end up at the bottom.
KF: What are some tips for making this wallet?
Curves should be sewn slowly. When attaching a zipper, set the sewing machine’s presser foot to “zipper presser foot”. Snap buttons for hand sewing can be used.
KF: How should we use this wallet in everyday situations?
It comes with a key ring so you can carry your keys along with your wallet. It is also cute when attached to a bag using a carabiner or chain.
KF: Thank you very much, Yui! Here are sewing instructions along with step by step photos from her. Enjoy crafting!
Instructions
1.
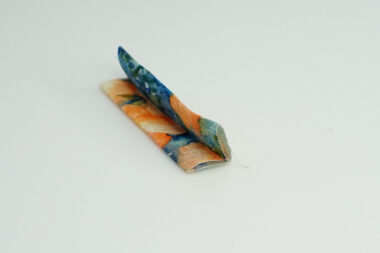
Make a tab. Fold both ends toward the center and then fold in the center. Sew both ends.
2.
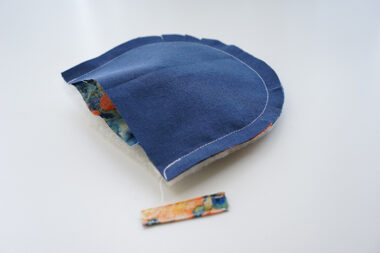
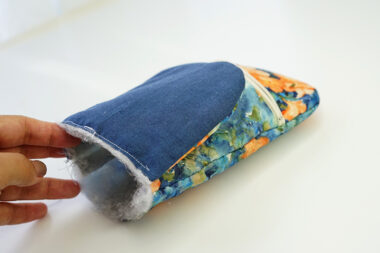
Make the flap. Place a quilt batting over the outer fabric. With the front sides facing each other, sew together the lining fabrics, leaving the attachment side unsewn. Cut a slit along the curved seam allowance.
3.
Turn the flap inside out, fold the tabs from ①, and baste.
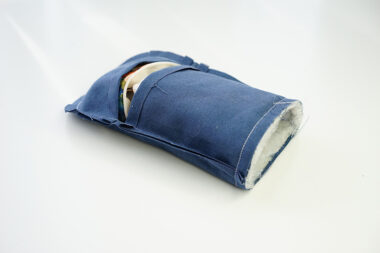
4.
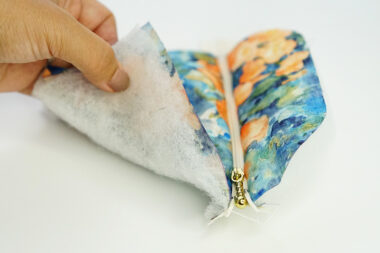
Make the outer bag. Place a quilt batting over the outer fabric (top and bottom back side). With the front sides facing each other, sew together with the zipper and align the shape from the front side.
5.
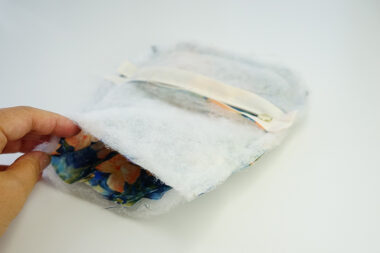
Layer the quilt batting on the outer fabric (front side). With the front sides facing each other, layer the back side pieces from ④, and sew together, leaving the opening unsewn. Cut a slit along the curved seam allowance.
6.
Make the lining bag. Fold the seam at the zipper position on the back side of the lining fabric. With the front sides facing each other, sew together the front and back sides, leaving the opening unsewn.
7.
Baste the flap to the outer bag.
8.
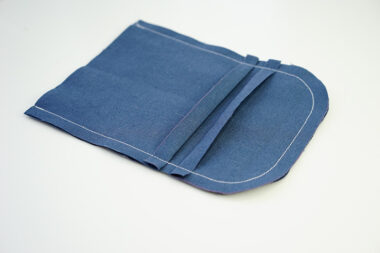
With the front sides facing each other, sew together the outer and lining bags at the top opening all the way around. Turn the bag inside out.
9.
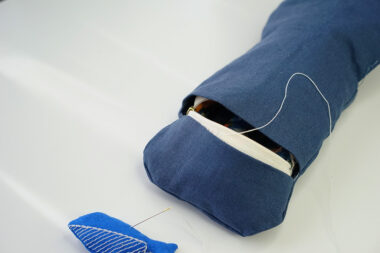
Align the zipper attachment position on the lining bag and piece together using blind stitches.
10.
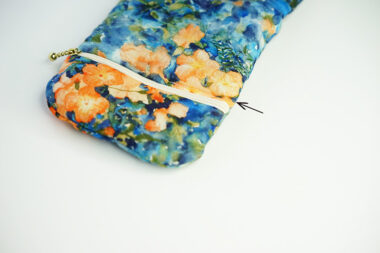
Apply stitches for 5 cm at 0.5 cm above the zipper.
11.
Attach snap buttons.
12.

Attach a key ring.
◎Sewing Instructions
◎Sewing Instructions (PDF format / A4 size)