
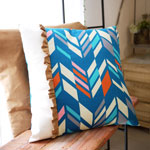
Today’s project is a throw pillow that comes in three colors, made with a polka dot border design from the Geometry of the Nordic series. It is a perfect complement as an accent for simple Scandinavian interior décor.
Fabric shown for this sample: Geometric of the Nordic P28100-101(B)
Materials:
□ Fabric: 100cm×50cm
□ Interfacing: 10×50cm
□ Concealable zipper: One 56cm piece

We interviewed Izumi about her creation:
Kokka Fabric (KF): What did you think of the fabric you used for this project?
Izumi Sato (IS): This satin fabric has the right level of sheen and smoothness. It also has a soft, nice texture. It is not only suitable for clothing and interior décor items but also for bedding such as a blanket cover and pillow cases. A bold and pop design with large and small dots prompted me to make something that can be used as an accent for home décor.
KF: Can you tell us any special elements or ideas that you incorporated into this creation?
IS: Since it is a bold fabric, I created a throw pillow cover as an interior décor accent. This gives a fresh new look for a room makeover. With a slightly smaller case (45cm x 45cm), the 50cm pillow will be tight yet puffy.
KF: What are some tips for making this throw pillow?
IS: When attaching the concealable zipper, attach an interfacing on the seam allowance so that it prevents the fabric from stretching and reinforces the seam. Also using a zipper attachment helps to sew. Before turning over the fabric, make sure to press the seam. This way, the corners will look nice and clean when turned over.
KF: How should we use this throw pillow in everyday situations?
IS: Randomly placed pillows on a sofa or a wooden chair will look very cute. A single pillow could be an accent for your room décor. Multiple pillows in different colors will still look coordinated.
KF: Thank you very much, Izumi! Here are sewing instructions along with step by step photos from her. Enjoy crafting!
How to make Throw Pillow Cover
1.
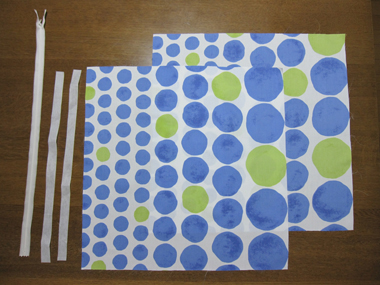
Cut the fabric. With large and small dots in one design, you can create a different feel by combining contrasting designs for front and back.
2.

Adhere an interfacing where a zipper will be attached. The zipper seam allowance is 1.2cm. Stop the stitch at 3cm from both edges. Secure with backstitches.
3.
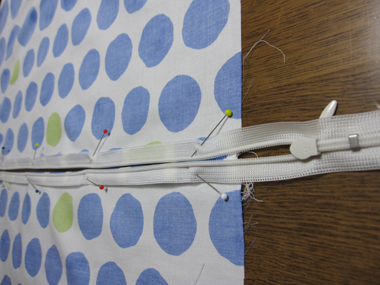
Press the seam open using an iron. Where it is not sewn, fold at 1.2cm. After pressing the seam open, lift up the backside of the zipper and pin it to secure. Align the edges of the concealable zipper and seam allowance.
4.

Sew about 3mm from the edge of the concealable zipper. Sew together the seam and zipper.
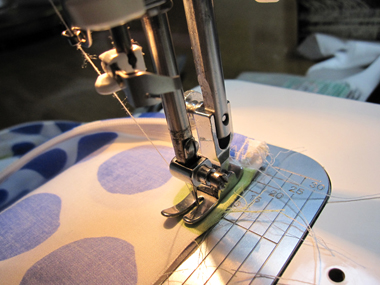
5.
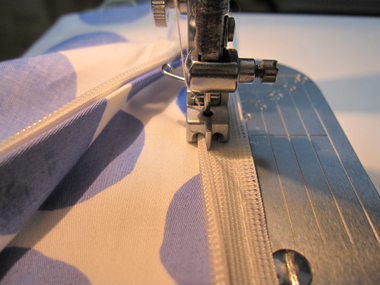
Switch the presser foot with a concealable zipper foot. Sew the zipper.
6.
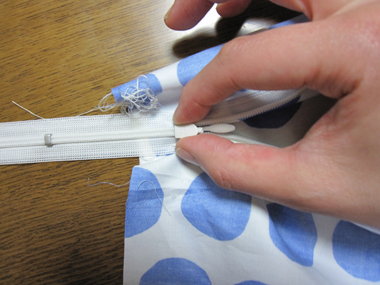
Pull up the zipper top. Grab it with your fingers from the reverse side. It may be a little tight, but you should be able to pull it up.
7.
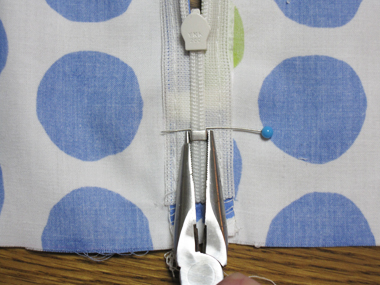
Move the metal part to where the zipper should stop. Using pliers, press the metal stopper part to secure. Cut off the excess zipper.
8.
Sew around the edge. Make sure that the zipper is open before sewing so that you can turn it inside out later using the opening. After sewing, serge or run zigzag stitches around the seam.
9.

Turn the case inside out. If you press the seam first, the corners will look nice and clean when turned over. After turning over the case, press with an iron to finish.

 Throw Pillow Cover
 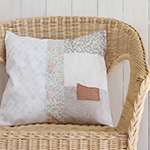 Throw pillow cover
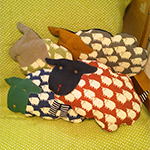 Sheep Shaped Throw Pillow