
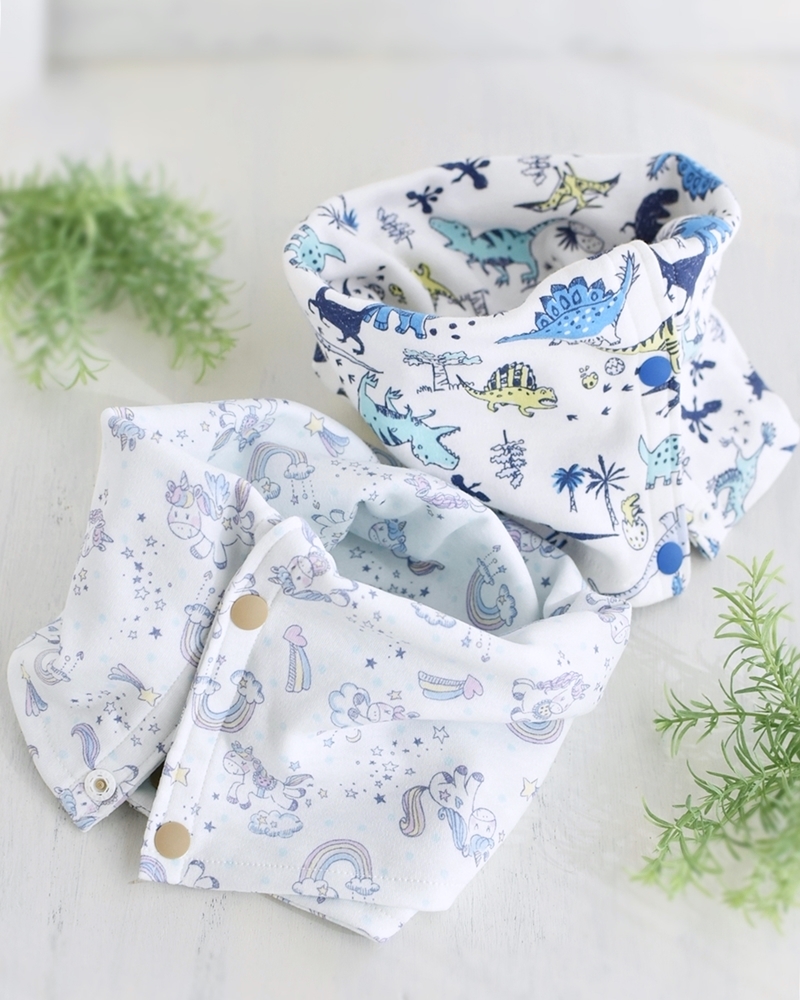
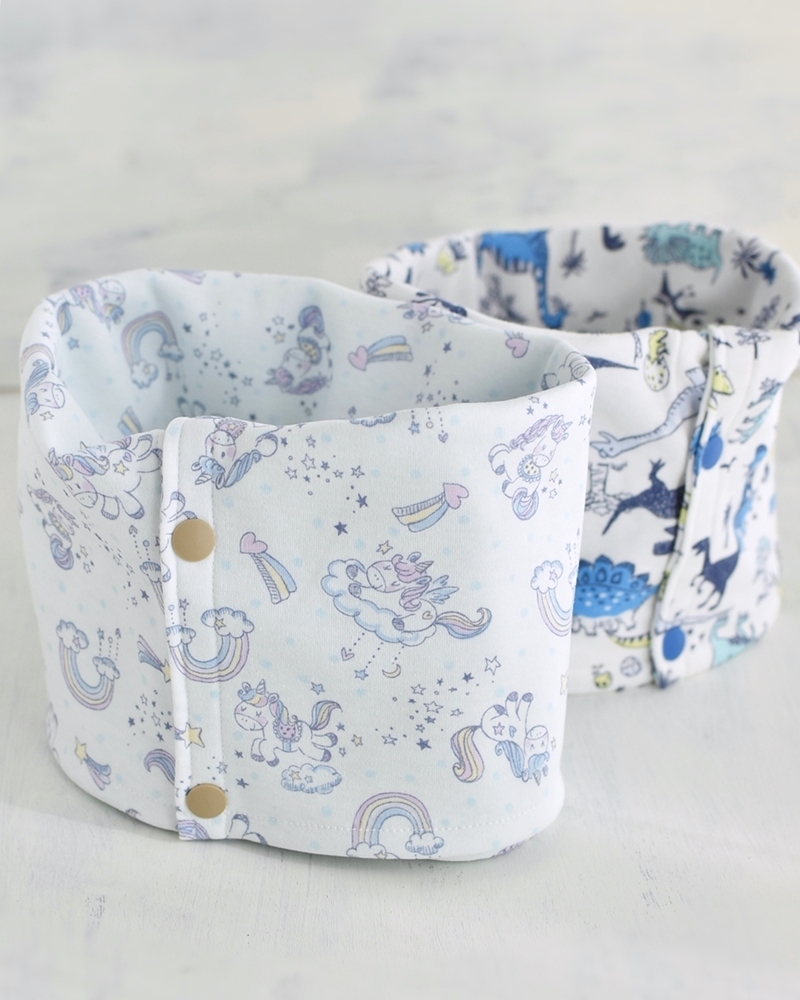
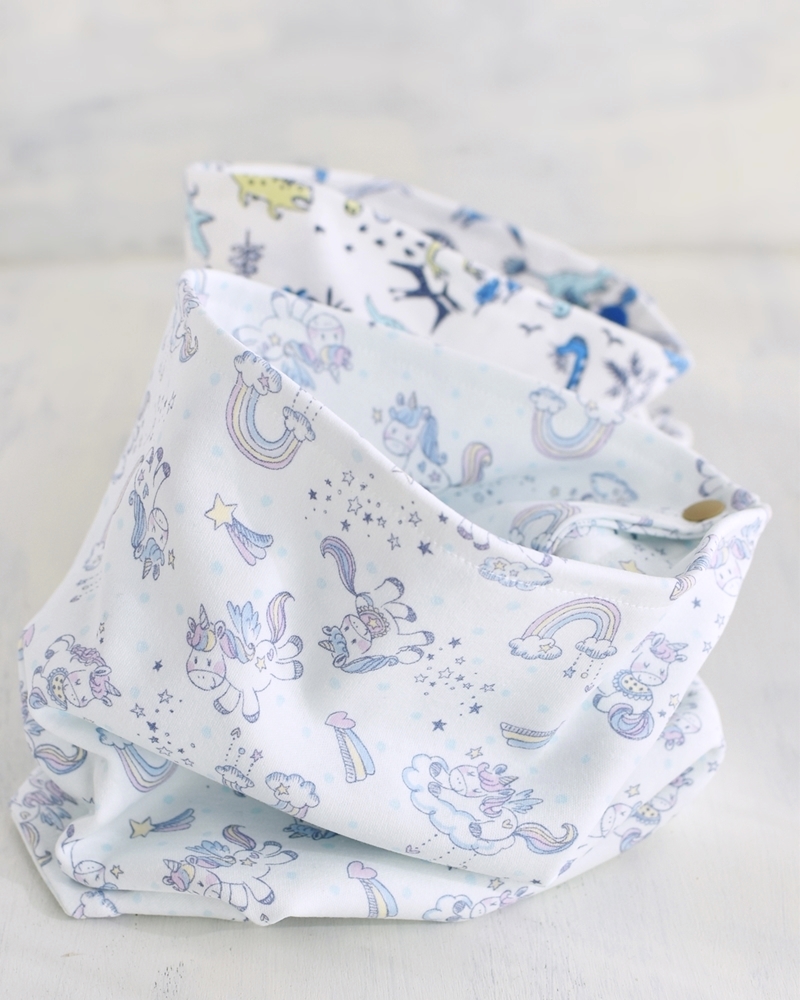
This is a two-way neck warmer that can also be used as a face mask. The featured fabric is from the “40 Smooth” series, which is very soft to the touch. It is a 100% cotton knit material. Since this neck warmer can be made quickly with only straight stitches, you can make several of them with different patterns so that you have a variety of choices to enjoy on different days.
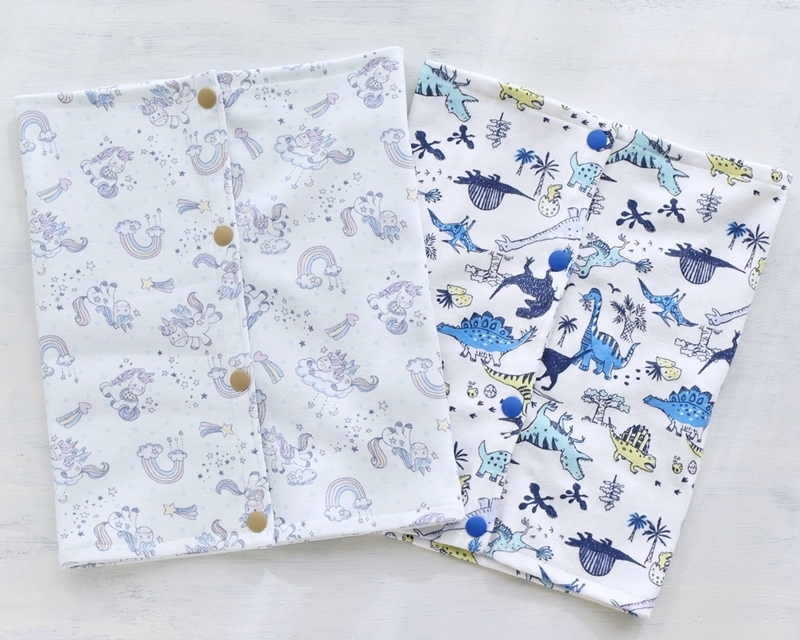
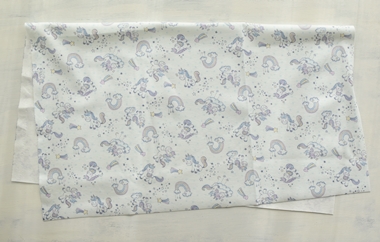
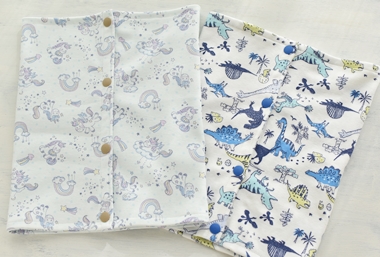
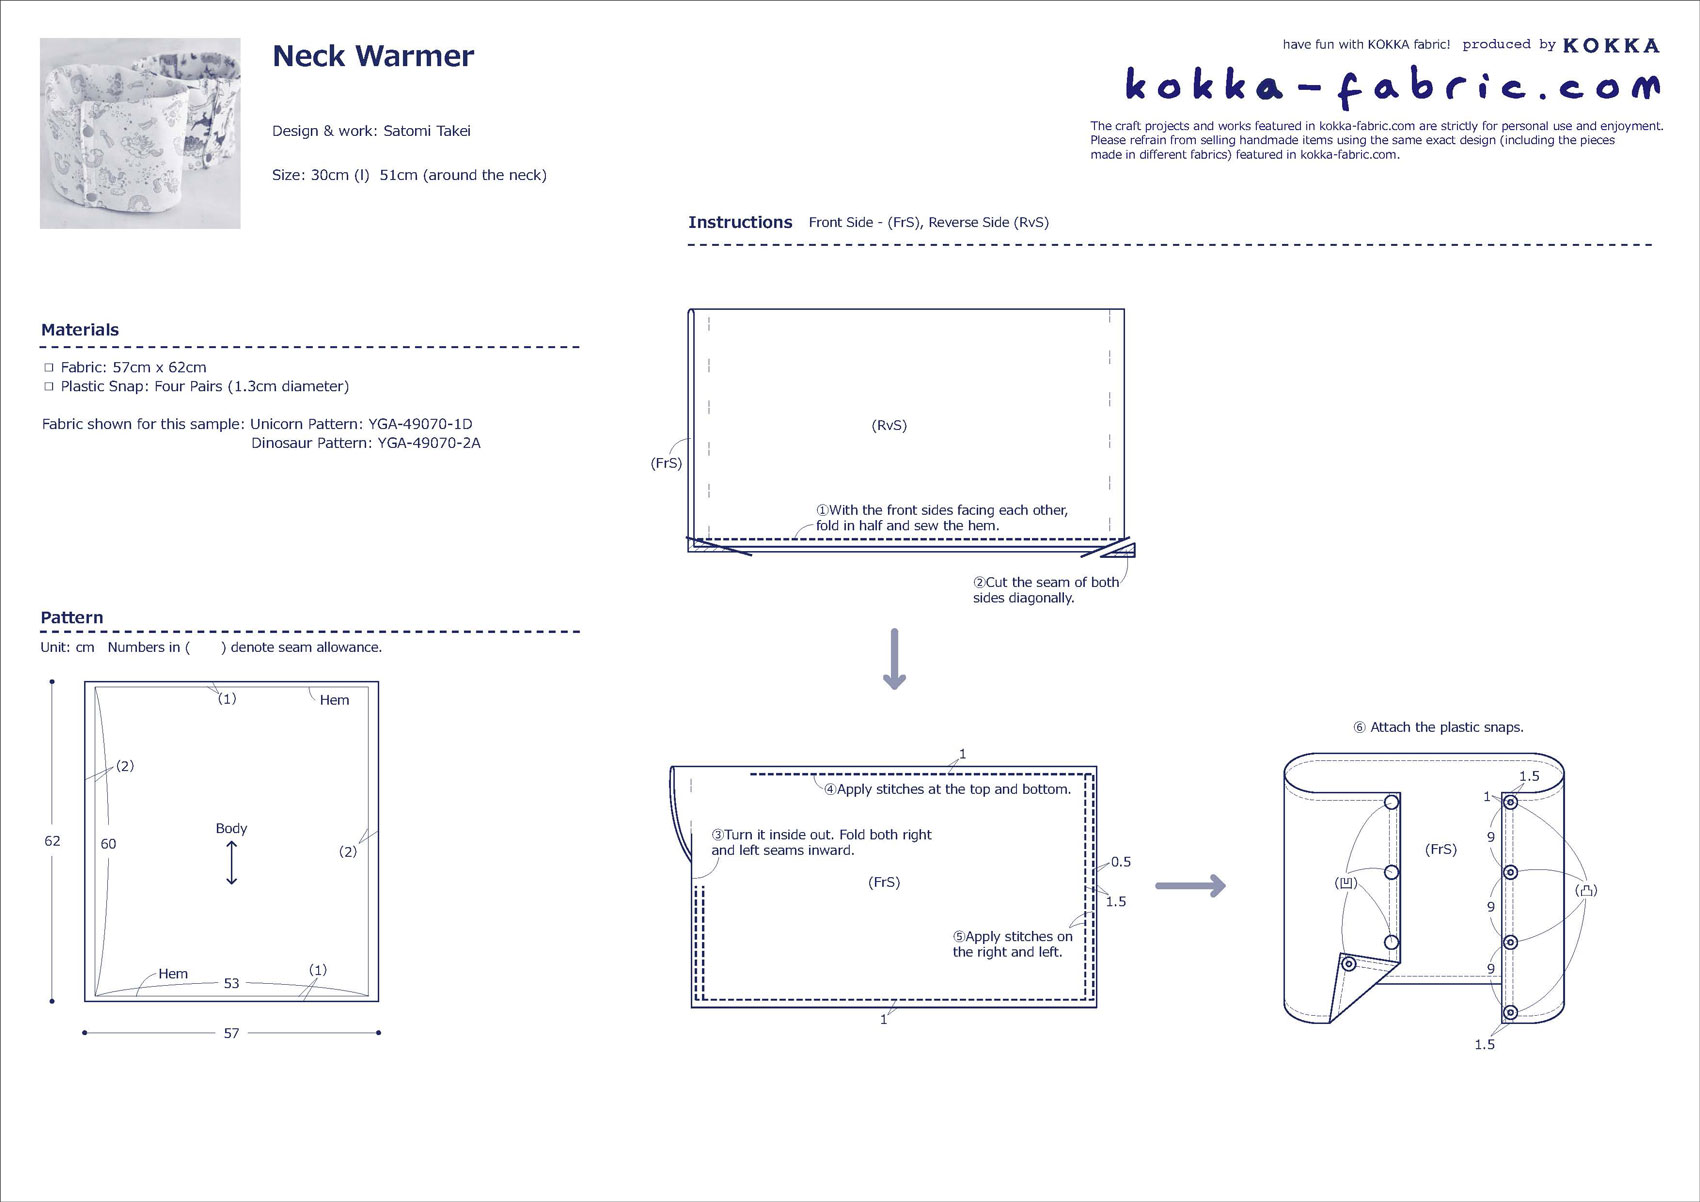
Fabric shown for this sample:Unicorn Pattern: YGA-49070-1D
Dinosaur Pattern: YGA-49070-2A
Materials:
□ Fabric: 57cm x 62cm
□ Plastic Snaps: Four Pairs (1.3cm diameter)
Size:30cm (l) 51cm (around the neck)
We interviewed Satomi about her creation:
Kokka Fabric (KF): What did you think of the fabric you used for this project?
As the texture is smooth like a cross between gauze and fleece, I made it into a neck warmer and a face mask. Featuring kids’ favorite motifs of fairy tales and dinosaurs, I think they will be happy to use it because the material is not as stiff and scratchy as fleece.
KF: Can you tell us any special elements or ideas that you incorporated into this creation?
The snap buttons make it easy to put it on and take off, and if you stretch it out above your nose, it works as a face mask. The smooth fabric is also breathable and absorbent, making it a great neck warmer for kids.
KF: What are some tips for making this neck warmer?
As it is not a slip on/off tube-type warmer, you can use regular thread to sew. This is a simple project that requires only 7 straight stitches, and it can be made quickly.
KF: How should we incorporate this neck warmer into one’s styling?
Children’s masks come in various sizes, so it would be good if you could change the position of the plastic snaps and the size of the fabric according to your child’s body. When wearing it as a face mask, it is easier to use if the snaps are placed in the back. It’s more comfortable to your skin than fleece or boa, and it is foldable into a small piece, so you can use it to keep your child warm or as a mask in case of emergency. Once you get the hang of it, it’s an easy sewing project that can be done in a short time, so please give it a try.
KF: Thank you very much, Satomi! Here are sewing instructions along with step by step photos from her. Enjoy crafting!
Instructions
1.
Cut the fabric.
2.
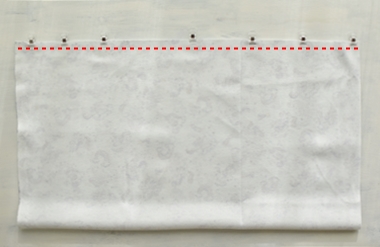
With the front sides facing each other, fold in half. Sew together with 1cm seam allowance as shown.
3.
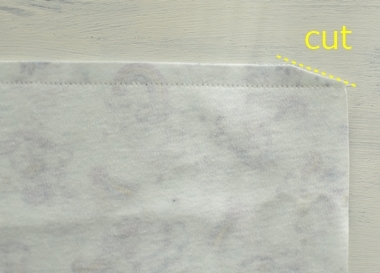
Cut the seam at both right and left corners as shown. It prevents the fabrics from getting too thick and helps with easier sewing in the subsequent steps.
4.
Turn it inside out, and fold both right and left sides by 2cm inward.
5.
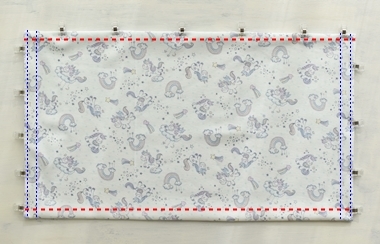
Red dotted lines (top and bottom) show 1cm seam allowances. Blue dotted lines (right and left) show 0.5cm and 1.5cm seam allowances. Sew the piece as indicated to flatten the fabric. ※You do not need to sew all the way to the corner where the fabrics are layered. It is ok if you stop the stiches at 0.5cm – 1cm inward.
6.
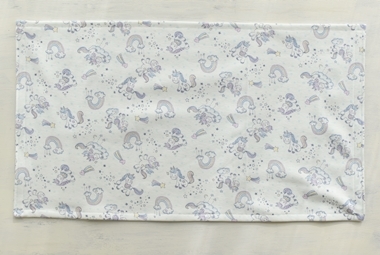
All the stitching work is complete.
7.
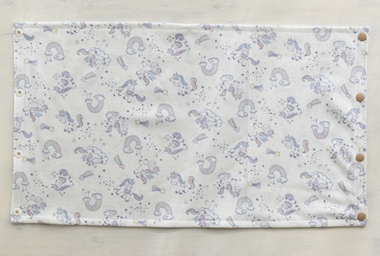
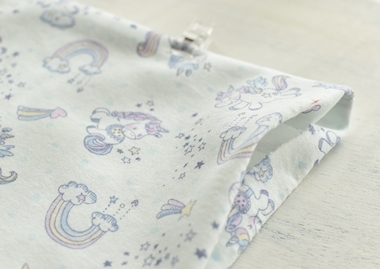
Attach plastic snaps.
8.
Finished!
◎Sewing Instructions (PDF format / A4 size)

 Three-piece Set Containing a Pleated Face Mask, Mask Case and Tissue Case – Made with Only 50cm of Fabric – Sewing Instructions
 Easy-to-Make Non-Elastic Band Face Mask – Sewing Instructions
 A Lovely Panda Design Mask Case – Sewing Instructions