
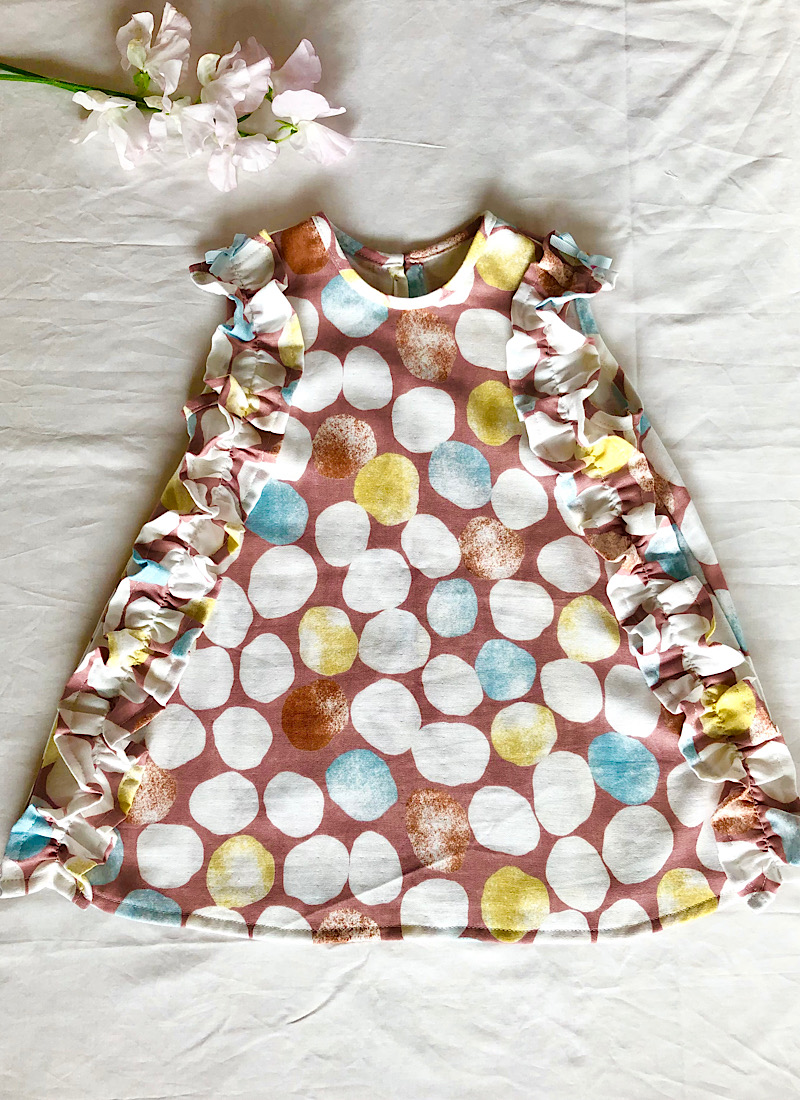
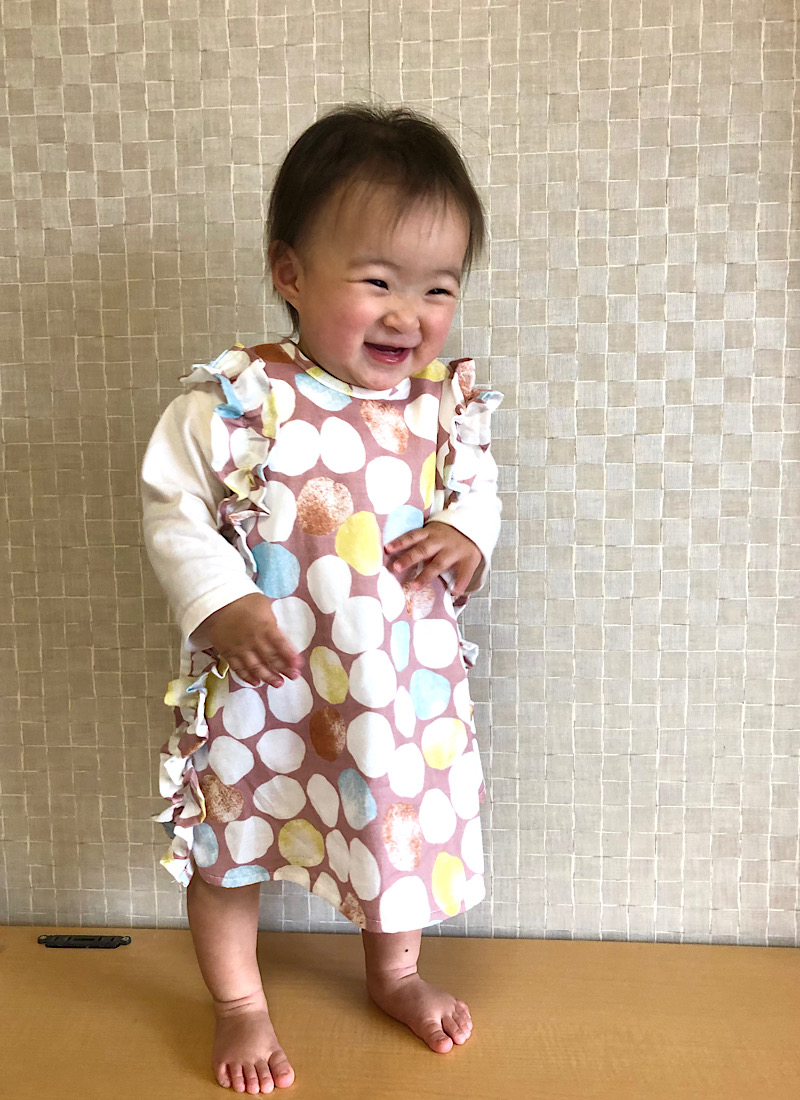
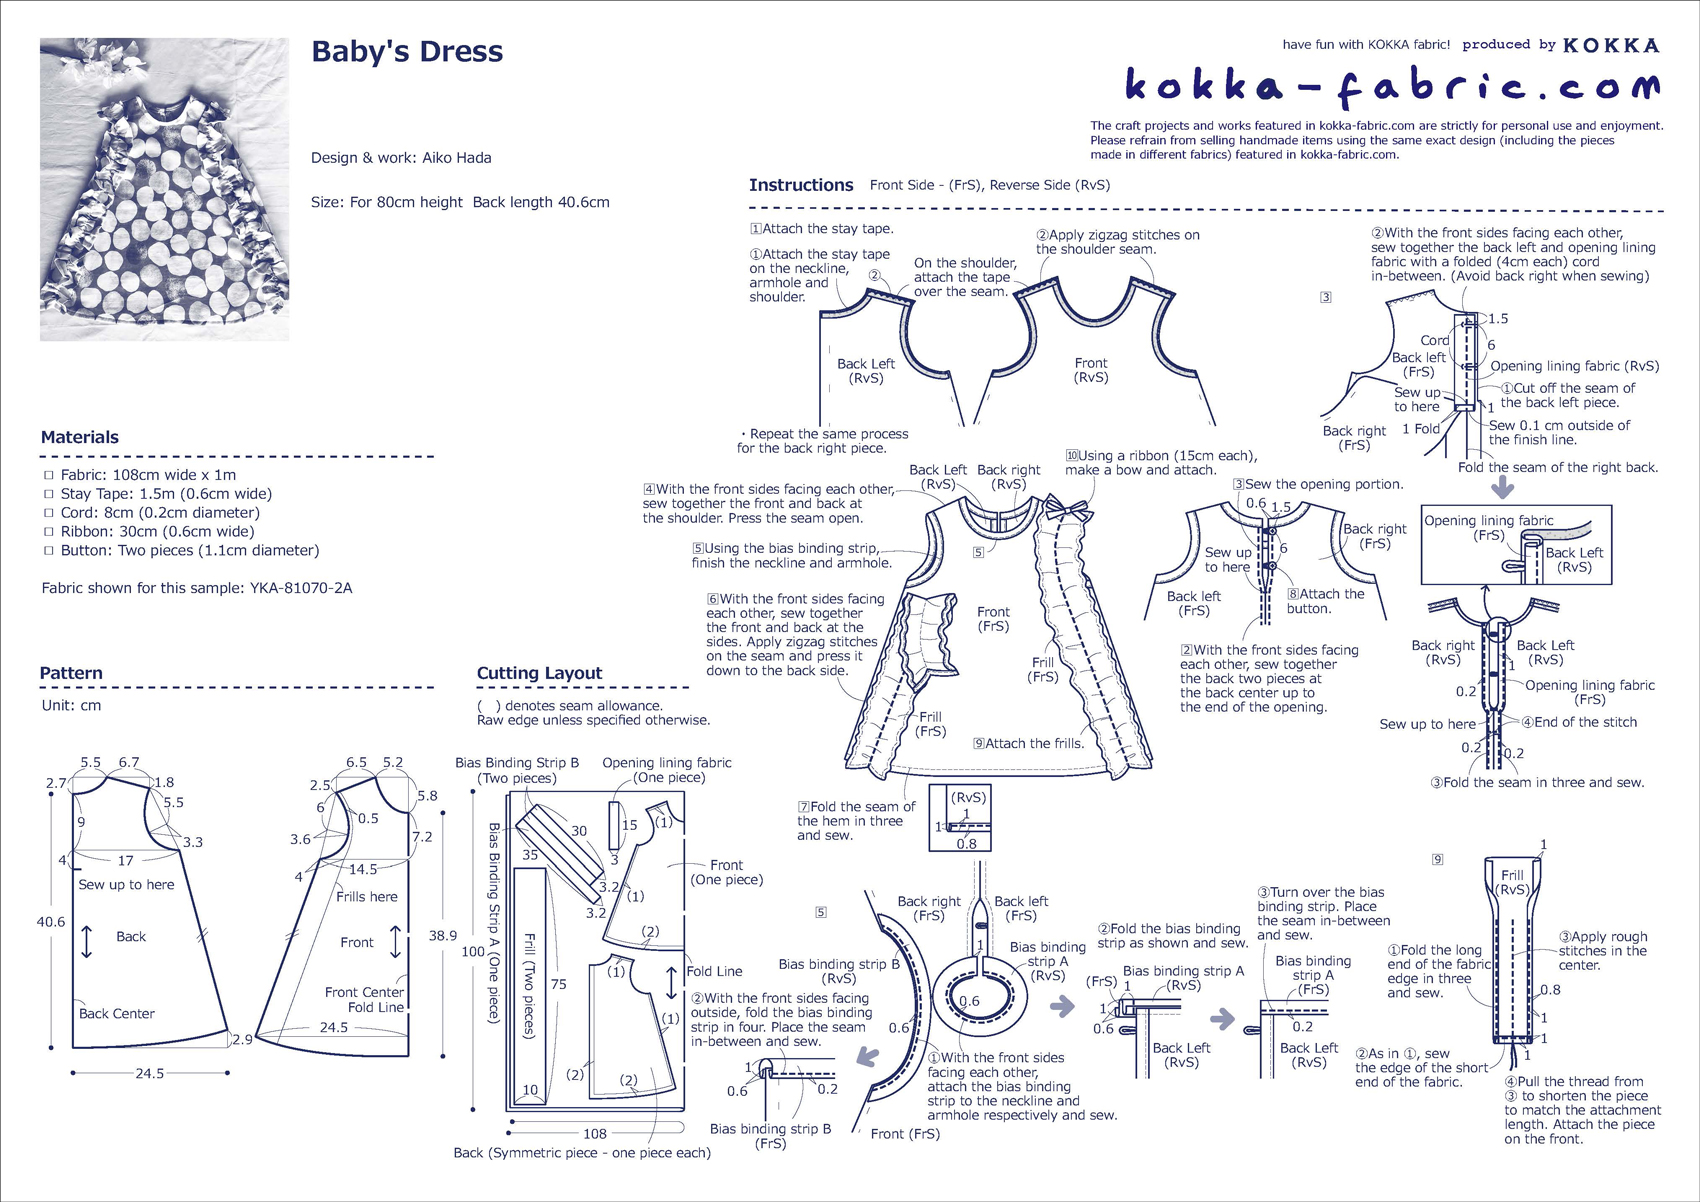
This 80cm size baby dress with side frills as an accent comes in a polka dot fabric from the “In nature” series. The material features “ecovero” made from renewable resource pulp, and “organic cotton” grown without the use of pesticides or chemical fertilizers. This double gauze is a combination of two eco-friendly materials, and it feels good against the skin. It is recommended for newborn baby dresses as well as for adult clothing.
Fabric shown for this sample:YKA-81070-2A
Materials:
□ Fabric: 108cm wide x 1m
□ Stay Tape: 1.5m (0.6cm wide)
□ Cord: 8cm (0.2cm diameter)
□ Ribbon: 30cm (0.6cm wide)
□ Button: Two pieces (1.1cm diameter)
Size: For 80cm height Back length 40.6cm
We interviewed Aiko about her creation:
Kokka Fabric (KF): What did you think of the fabric you used for this project?
The polka dot pattern has a natural outline that is not round. Its gentle colors make the soft-textured double gauze fabric even more attractive.
KF: Can you tell us any special elements or ideas that you incorporated into this creation?
Since it is a soft fabric, the bias tape is used around the neck and armpits to prevent the fabric from being damaged by friction, and the back centerline was folded in three to prevent the fabric edge from showing.
KF: What are some tips for making this dress?
Before starting work, prepare the fabric by soaking in water and drying it naturally to keep the shape and prevent shrinkage due to washing. For the areas with the bias tape, baste it first and please operate the machine slowly when sewing.
KF: How should we incorporate this dress into one’s styling?
It can be worn in a layered style with rompers or long-sleeved innerwear in early spring and of course in the summer, or you can try it with leggings♪
KF: Thank you very much, Aiko! Here are sewing instructions along with step by step photos from her. Enjoy crafting!
Instructions
1.
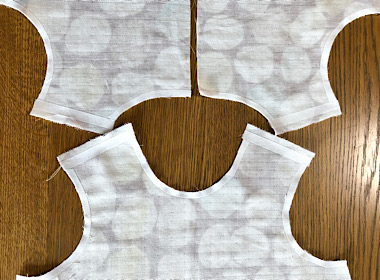
The picture shows the pieces with fusible interfacing. For the shoulder, it should be attached so that they hang over the seam allowance. For the sides and neckline, it should be attached so that they are on the inside of the bias.
2.
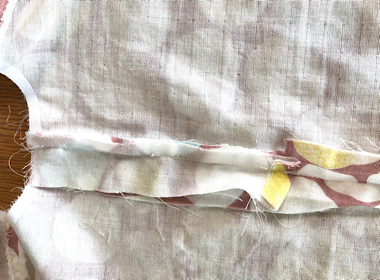
This shows how you finish the back center by folding it in three. Since the fabrics overlap, cutting off the excess seam allowance will give a clean finish.
3.

The bias binding strip is being attached. Pull it so that it does not wrinkle, and carefully place the pins along the curve.
4.
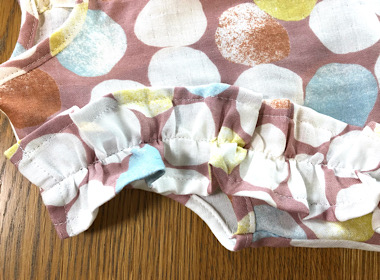
Frill is attached as shown. This is a difficult part to sew because of the unevenness of the fabric. Focus on straightening the curve of the centerline and try to make the gathers as evenly as possible.
◎Sewing Instructions (PDF format / A4 size)

 Children’s Dress with Three-Tiered Frills – Sewing Instructions
 Kid’s Dress with Lovely Frilled Sleeves-Sewing Instructions
 Kid’s Dress