
Summer festivals, Fireworks display… Yes, we are in the height of summer! This drawstring bag is perfect for a midsummer outing in Yukata (cotton kimono for summer). Featured fabric, K.A.E., is a collaborated series with Kanamorikae, who uses the stencil dyeing method for her textile making.
Fabric shown for this sample:EKA-1050-1A、EKA-1050-2A
Materials (for one bag):
□ Fabric (Bag panel outer fabric, Bottom, Cord opening): 80cm×30cm
(Bag panel lining fabric): 62cm×27cm
□ Cardboard paper or PP (polypropylene) sheet: 9cm diameter
□ Cord: 1.2m (0.2cm diameter)

*All Rights Reserved. Please refrain from the unauthorized use of project photos.
We interviewed Anriko about her creation:
Kokka Fabric (KF): What did you think of the fabric you used for this project?
The color tones give a Japanese flair and look refreshing. I immediately thought it would look stylish with Yukata. So, I came up with a drawstring bag, which is carried often with Yukata.
KF: Can you tell us any special elements or ideas that you incorporated into this creation?
The fabric itself is an easy to use cotton linen canvas. To add more Japanese taste, I incorporated the construction often used with Kimono accessories. The cord in the loop creates a pleat and it is made well like a Shifuku (tea accessory carrying bag), helping to produce a puffy silhouette.
KF:What are some tips for making this bag?
You may find it a little challenging to put a cord through the thin and narrow loop. It is made this way intentionally since if the cord is loose, it doesn’t create a nice closure. With the loop though, the bag portion is easy to make with just simple stitching.
KF: How should we use this bag in everyday situations?
The classic patterns and colors are making a comeback for trendy Yukatas. To go with it, a lovely design like this bag will fit nicely. For your travels, you will also find it useful. Whatever it is used for, if you have a drawstring bag, it comes in handy.
KF:Thank you very much, Anriko! Here are sewing instructions along with step by step photos from her. Enjoy crafting!
Instructions
1.

The loops for the cord are attached. Baste them at the designated location and place the fabrics over with the front sides facing each other.
2.

As shown, there is no slit needed to put the cord through the opening fabric. Once the loops are attached, the bag portion is completed by only making a tube.
3.

Gather the bottom fabric and attach the round bottom. The red lining and round bottom with the same cute outer fabric look cute. When you see it, it lifts up your spirit.
4.

The outer bottom is solid with a cardboard. I used a 9cm diamter coaster from a dollar shop. If you plan to wash the bag, use a polypropylene material instead. It is easy to cut with scissors that you can purchase at DIY store.
5.

Attach the bottom with cardboard by hand. When doing so, try to hide the seam of the bag. Put the cord through to finish.

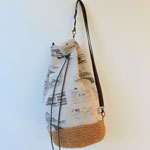 Drawstring Bag
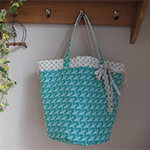 Round Bottom Bucket Bag
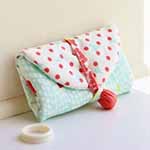 Accessory Case