FREE SEWING TUTORIALS
Mask Holder L-Shaped Pouch for Toiletries – Sewing Instructions
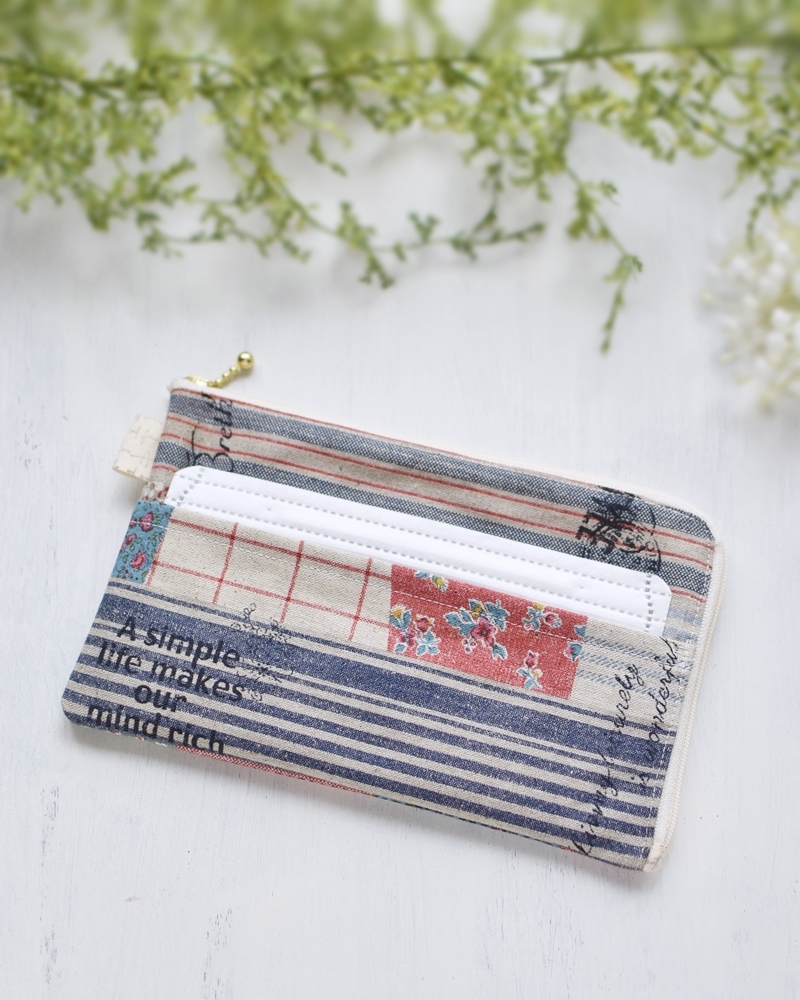
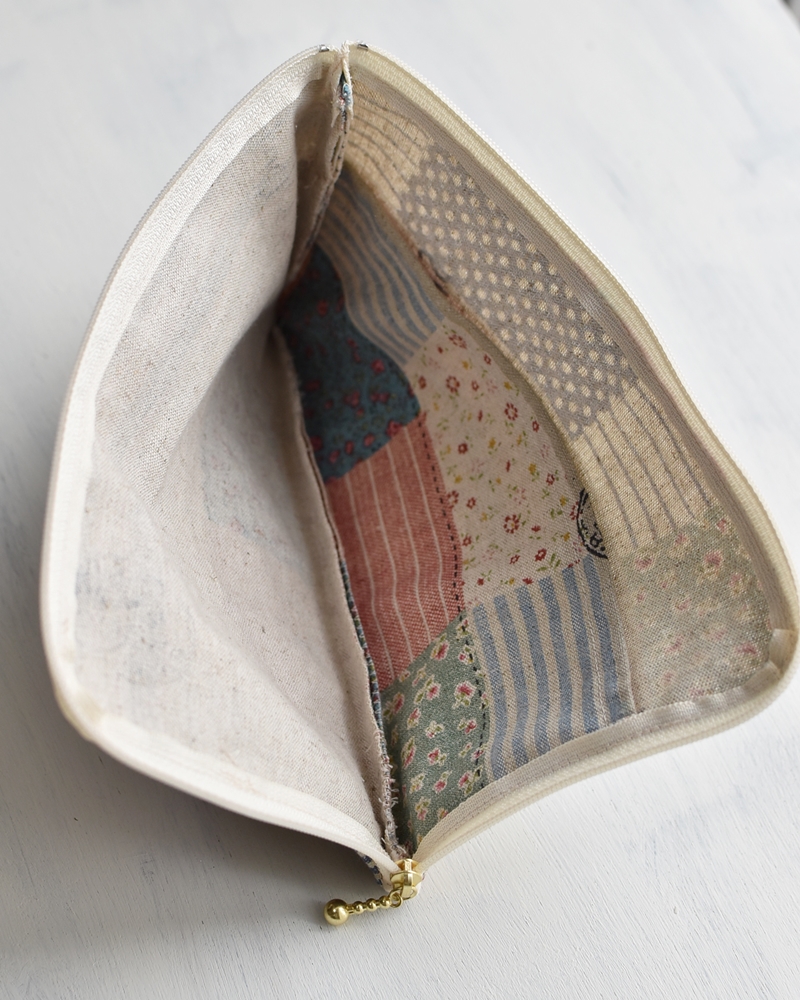
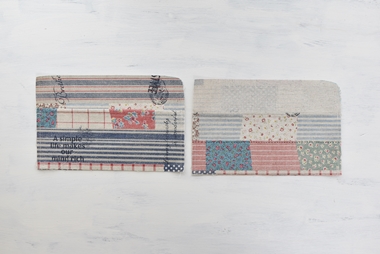
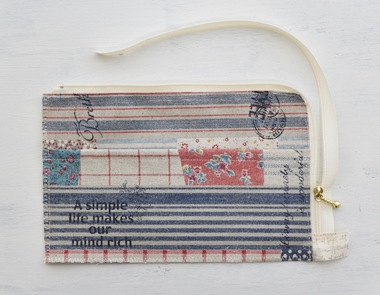
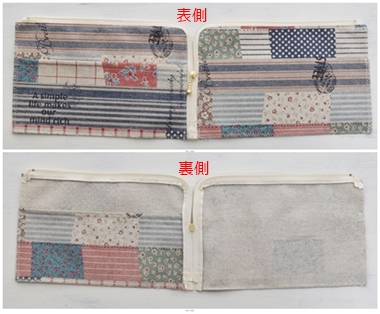
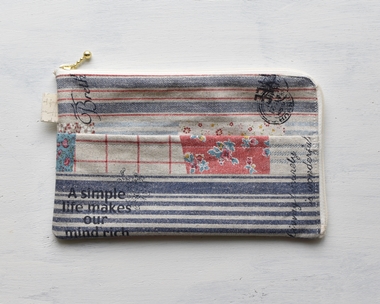
The featured project is a pouch for toiletries like pocket tissue, lip balm and masks; such items that you want to carry when going out. The patchwork pattern print from the cloth Mix idee series is a canvas fabric with a mixture of 80% cotton and 20% linen. With an appropriate thickness of the fabric, the case will not require a lining. Another key element is the size of this case. The masks can perfectly fit in the pocket.
Fabric shown for this sample:cloth Mix idee LOB-51010-1B
Materials:
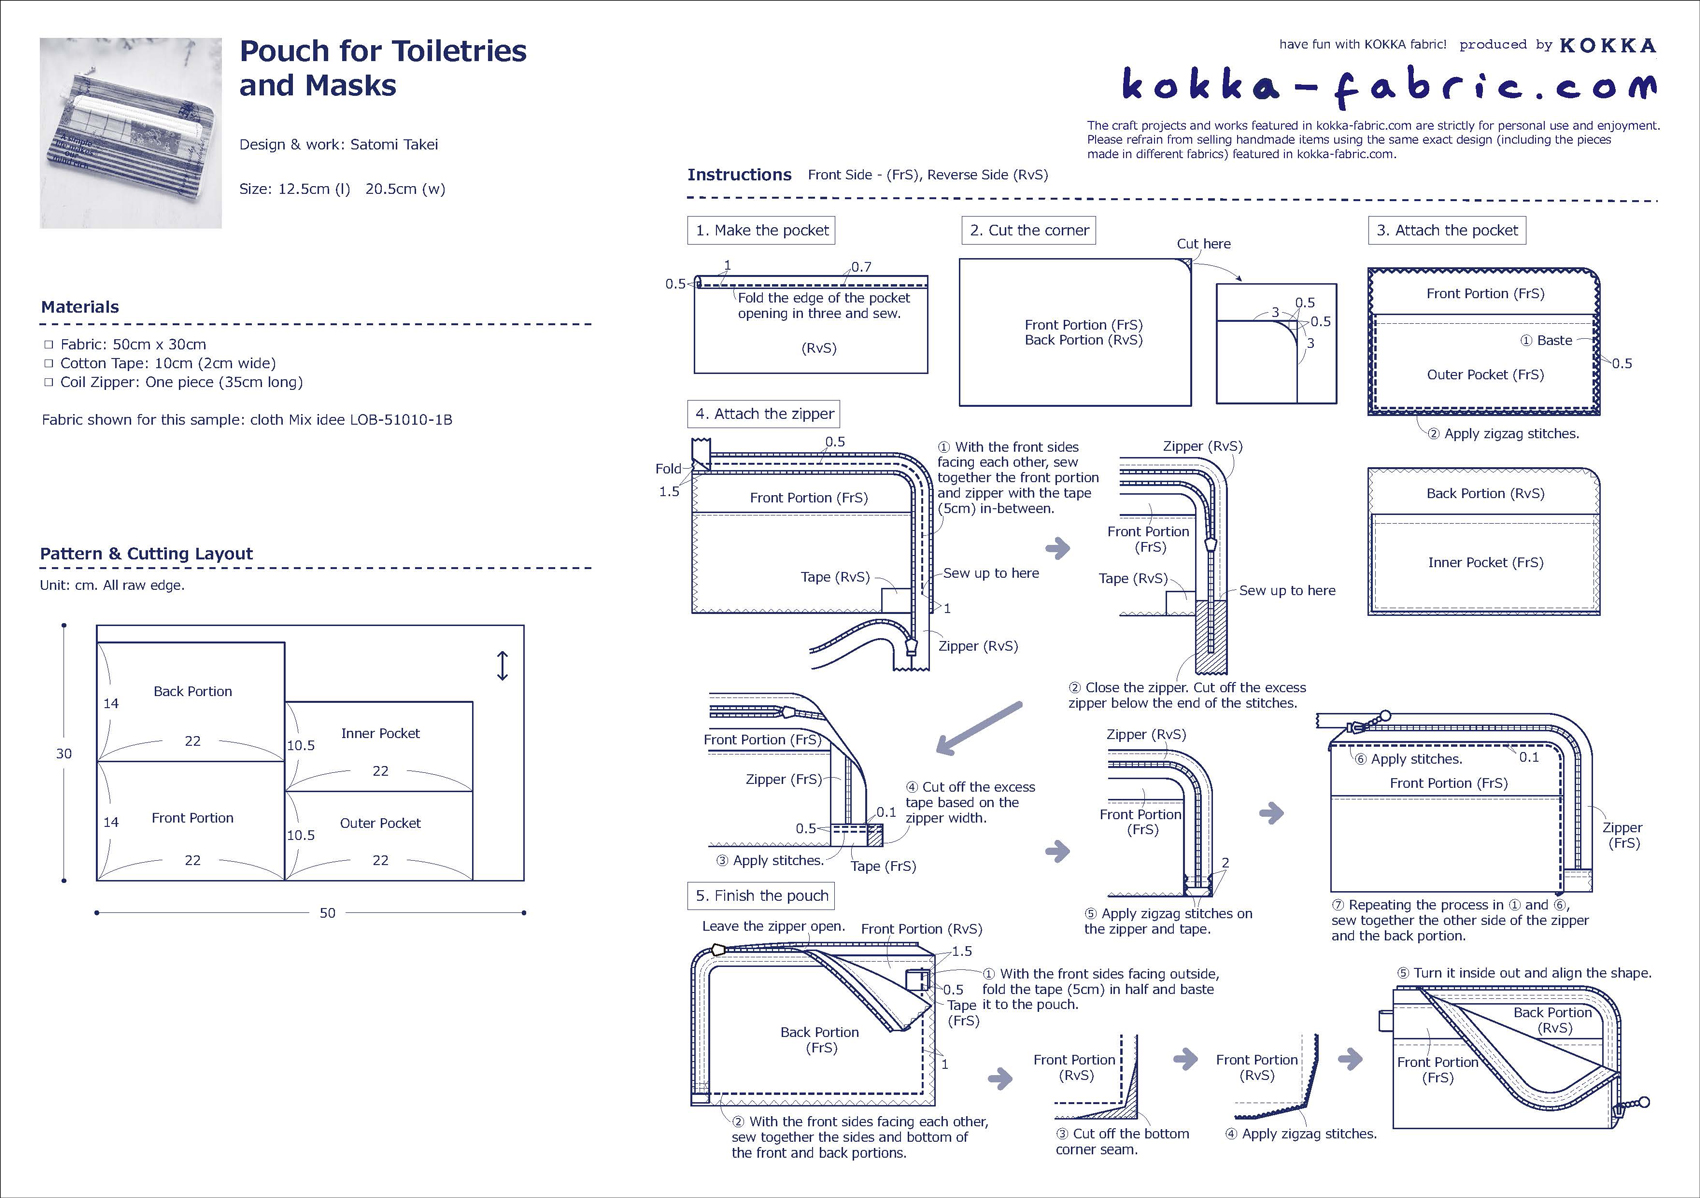
□ Fabric: 50cm x 30cm
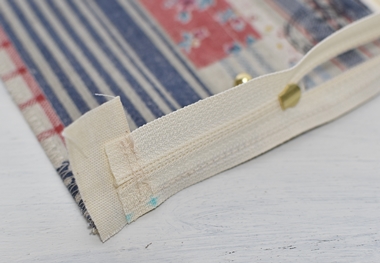
□ Cotton Tape: 10cm (2cm wide)
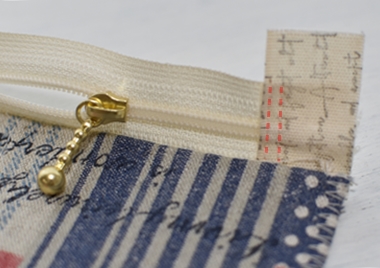
□ Coil Zipper: One piece (35cm long)
Size: 12.5cm (l) 20.5cm (w)
We interviewed Satomi about her creation:
Kokka Fabric (KF): What did you think of the fabric you used for this project?
Using a patchwork fabric gives you the fun of choosing which portion to incorporate.
For this case, I featured the design to be in stripes so that it will not look too busy.
KF: Can you tell us any special elements or ideas that you incorporated into this creation?
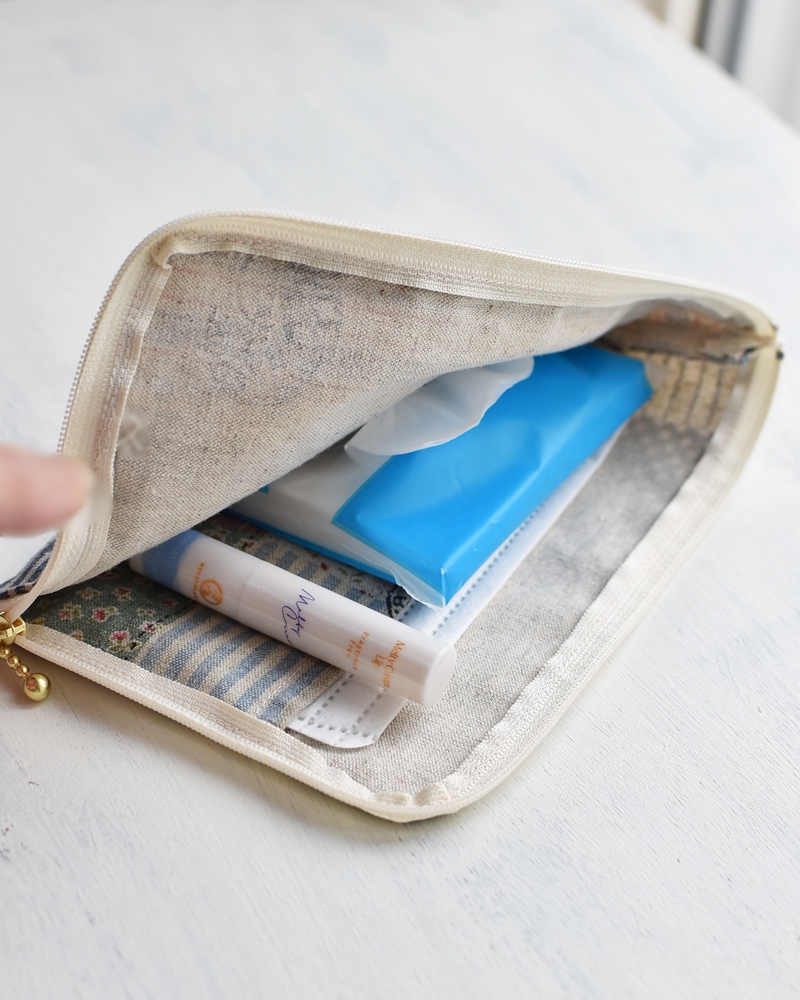
The fabric has a relative thickness. It allows you to make a piece without a lining fabric. In addition, it is designed in such a way that it dries quickly after washing. The L shape makes it easy even for a child to take the mask in and out.
KF: What are some tips for making this pouch?
Please don’t be too nervous about attaching the curved portion of the zipper. Why not just try it! For a clean finish, use a stiletto to hold the fabric, starting about 3cm before the curve, and slowly sew two stitches at a time in an oblique manner.
KF: How should we use this pouch in everyday situations?
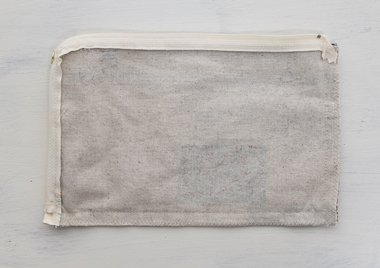
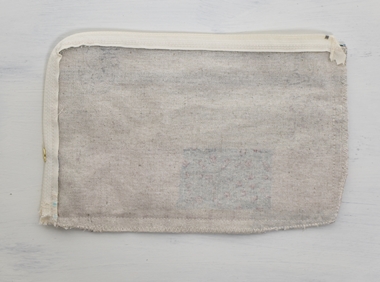
Keep a folded clear plastic bag inside for a used mask. The plastic bag with a used mask can be placed in the outer pocket. This is how I recommend using this case. Inside can store many toiletries, like pocket tissue and lip balm. You will find carrying this pouch in your purse handy for emergencies.

KF: Thank you very much, Satomi! Here are sewing instructions along with step by step photos from her. Enjoy crafting!
Instructions
1.
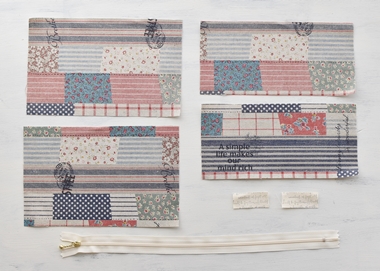
Cut the fabrics. ※ If possible, use a coil zipper as it can be cut to a preferred length. The solid color tape is embellished with a stamped design.
2.
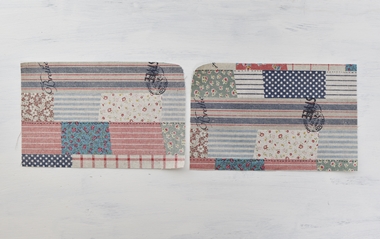
Fold the opening side of the inner pocket and outer pocket in three (at 5mm and 1cm) and apply stitches at 7mm from the edge.
3.
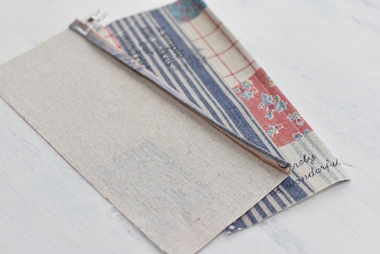
For an easy attachment of the zipper, cut one of the top corners of the front and back outer fabrics respectively.
4.
Sew together the pocket and outer fabric. Baste at 5mm from the edge. Apply zigzag stitches all the way around the piece.
5.

Sew together the front outer fabric and zipper. Apply back stitches securely at 2cm from the edge of the fabric. Make sure to close the zipper and cut it off at 1cm from the bottom edge (at red line). ※2cm wide cotton tape is placed between the outer fabric and zipper.
6.
Apply top stitches from the front to secure the zipper (red dotted line).
7.
Cut off the excess cotton tape above zipper edge. Apply zigzag stitches to prevent fraying.
8.
Apply stitches in the front along the zipper.
9.
Sew together the back side as well.
10.

Fold the cotton tape in half. Place it at 1.5cm from the top opening and baste at 5mm from the side edge.
11.
With 1cm seam, sew together the front and back side. ※Leave the zipper half open.
12.
Cut the corner as shown. This way, the corner will not look bulky when the case is turned inside out. Apply zigzag stitches where it is cut.
13.
Turn the case inside out and adjust to create a clean corner. Finished!
◎Sewing Instructions
◎Sewing Instructions (PDF format / A4 size)