
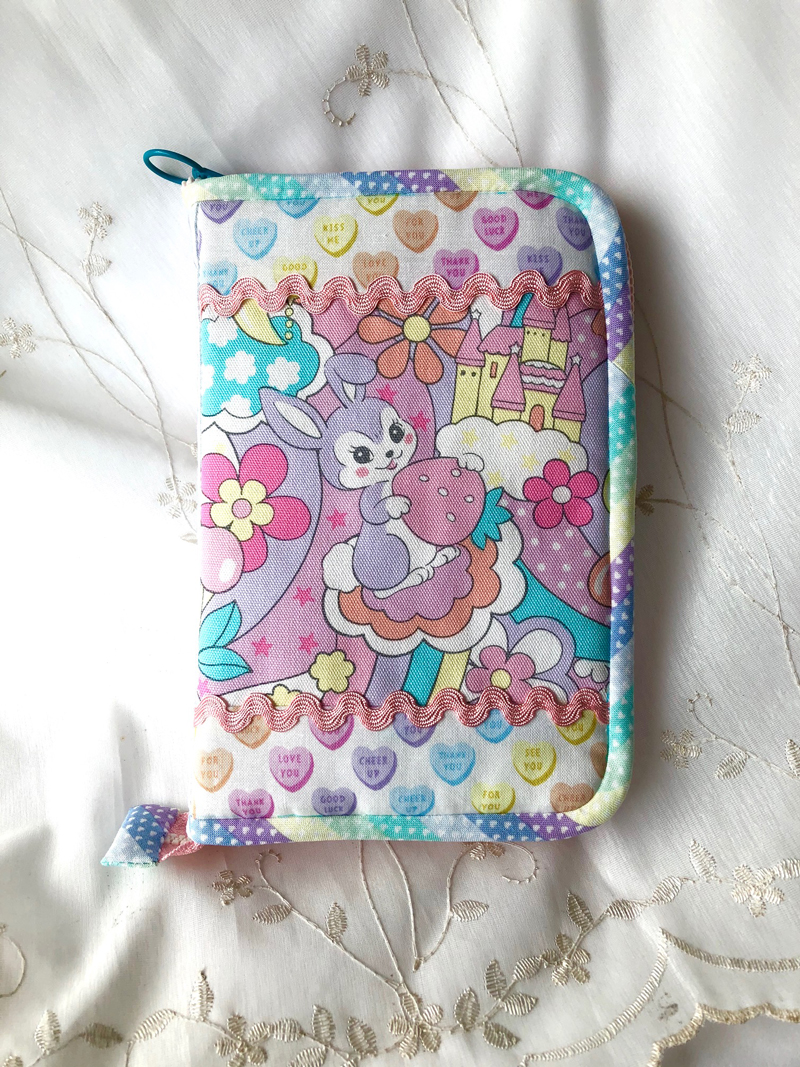

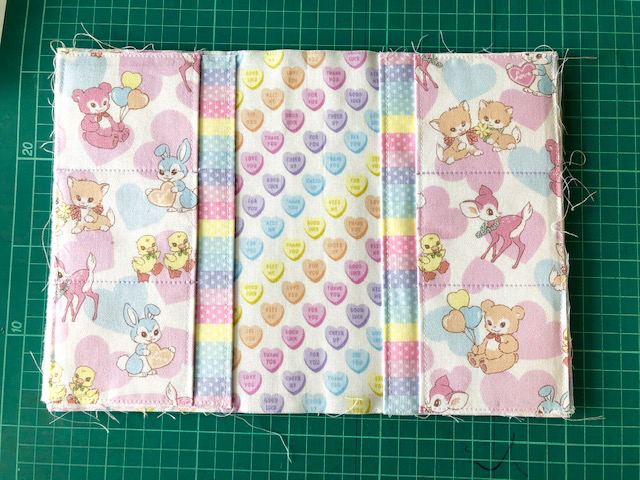
This multi-purpose case allows you to carry a variety of cards and items. The zipper closure will make it safe and secure. The lovely rabbit and bear animal print fabric is from the PASTEL POP series. The coordinated multiple color tones with a feature animal design combined with small hearts fabric are perfect to enjoy making patchworked items
Fabric shown for this sample:(Outer fabric A):PASTEL POP YK-76020-2A
(Outer fabric B, Lining fabric)::PASTEL POP YK-76040-2A
(Outer fabric C, Pen holder, Zipper tab, Bias binding strip):PASTEL POP YK-76040-1C
(Pocket-Large):PASTEL POP YK-76040-1B
(Pocket-Small)::PASTEL POP YK-76020-1A
Materials:
□Fabric (Outer fabric A):50cm×25cm (Outer fabric B, Lining fabric):50㎝×25㎝
(Outer fabric C, Pen holder, Zipper tab, Bias binding strip):50㎝×50㎝
(Pocket-large):50㎝×25㎝ (Pocket-small):40㎝×25㎝
□Fusible quilt batting:30㎝×20㎝ □Fusible interfacing (light weight):60㎝×20㎝
□Fusible interfacing for bags (stiff type):2㎝×18㎝ □Rickrack tape:0.4cm wide x 60cm
□Free style zipper (3VS):90㎝ □Mini ring slider:One piece
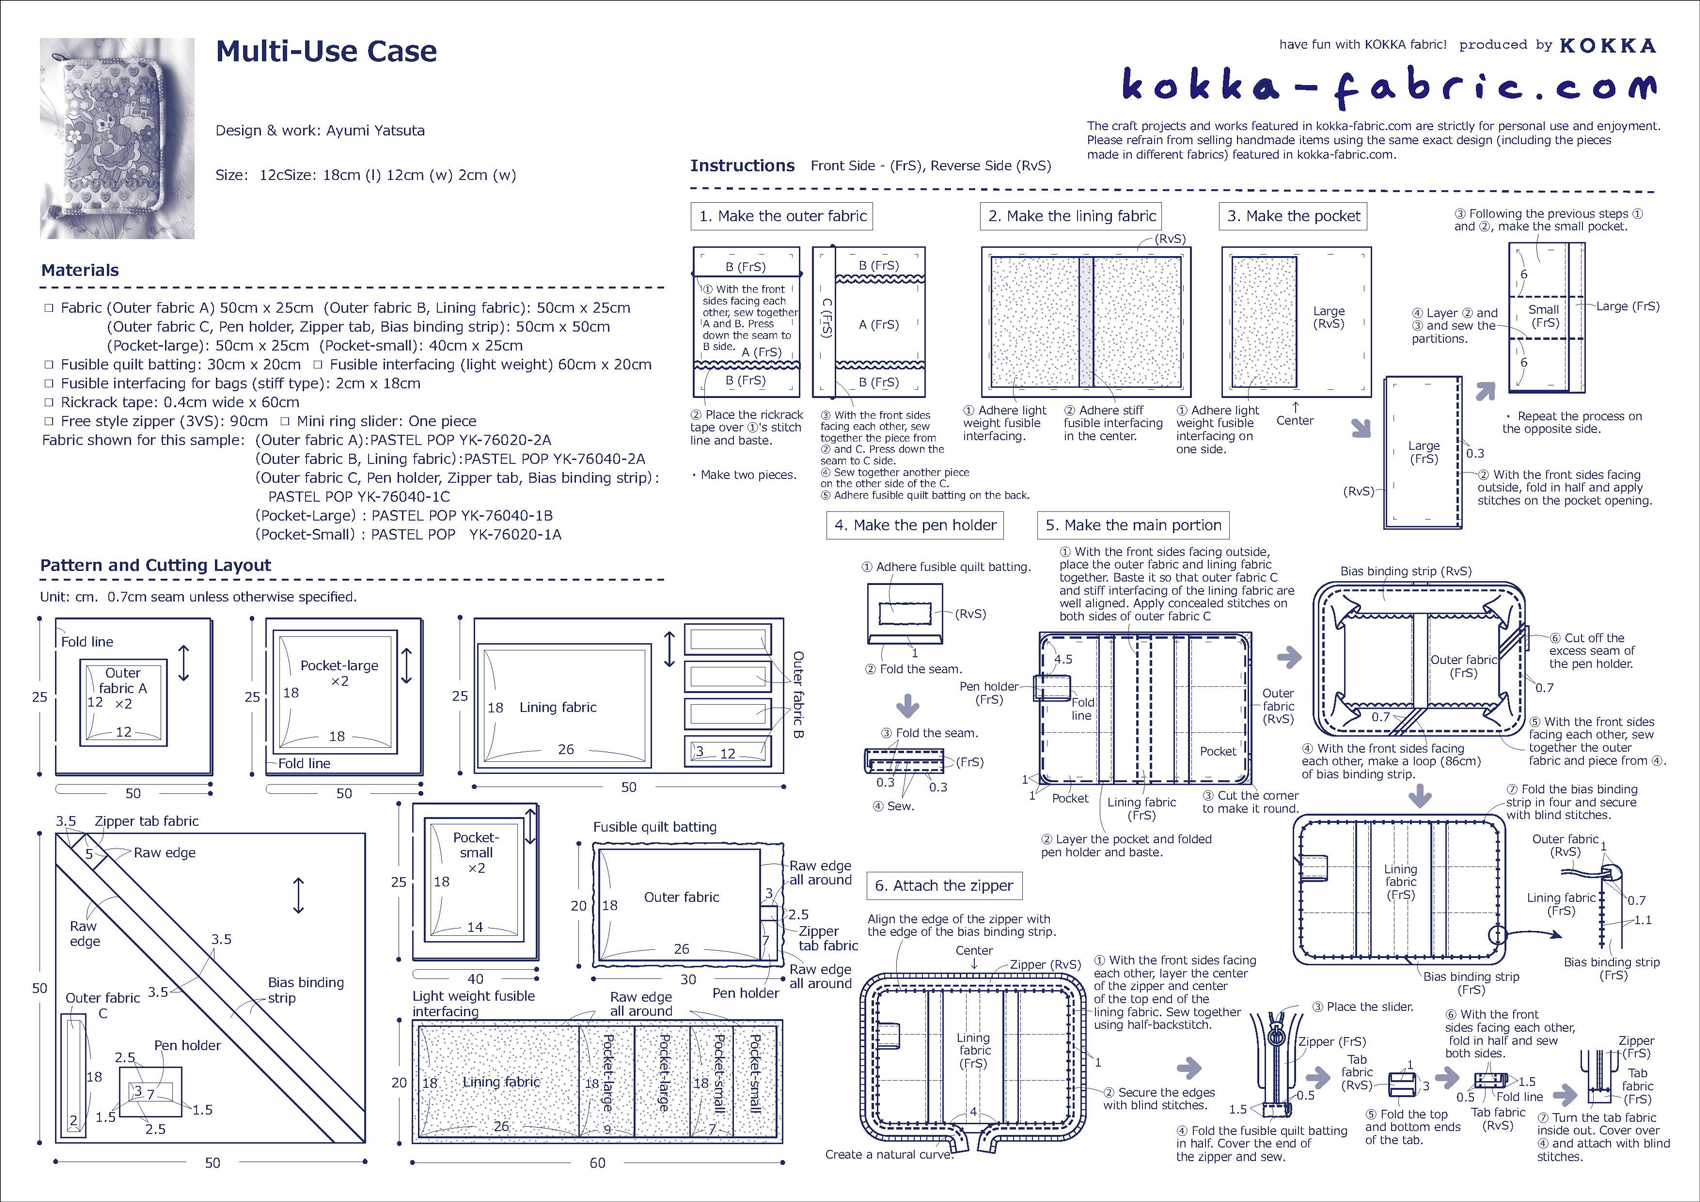
Size: 18cm (l) 12cm (w) 2cm (w)
We interviewed Ayumi about her creation:
Kokka Fabric (KF): What did you think of the fabric you used for this project?
The animals and heart motifs in the soft tones of pastel are so lovely that I truly enjoyed making this piece. The well-coordinated colors in PASTEL POP series work great without looking busy even when you combine it with all different designs. In particular, this striped fabric can be worked in many ways. One way to use it is as a bias binding strip. Another way is to use it vertically or horizontally to create a different look.
KF: Can you tell us any special elements or ideas that you incorporated into this creation?
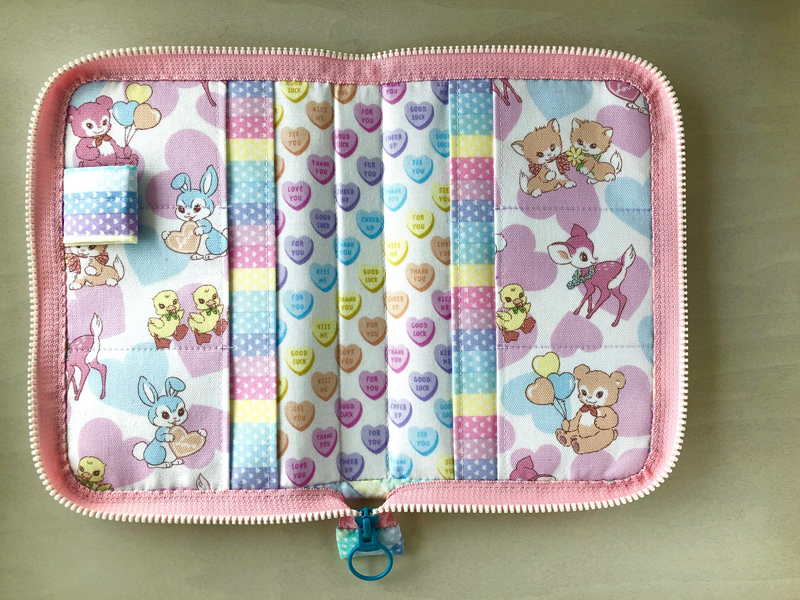
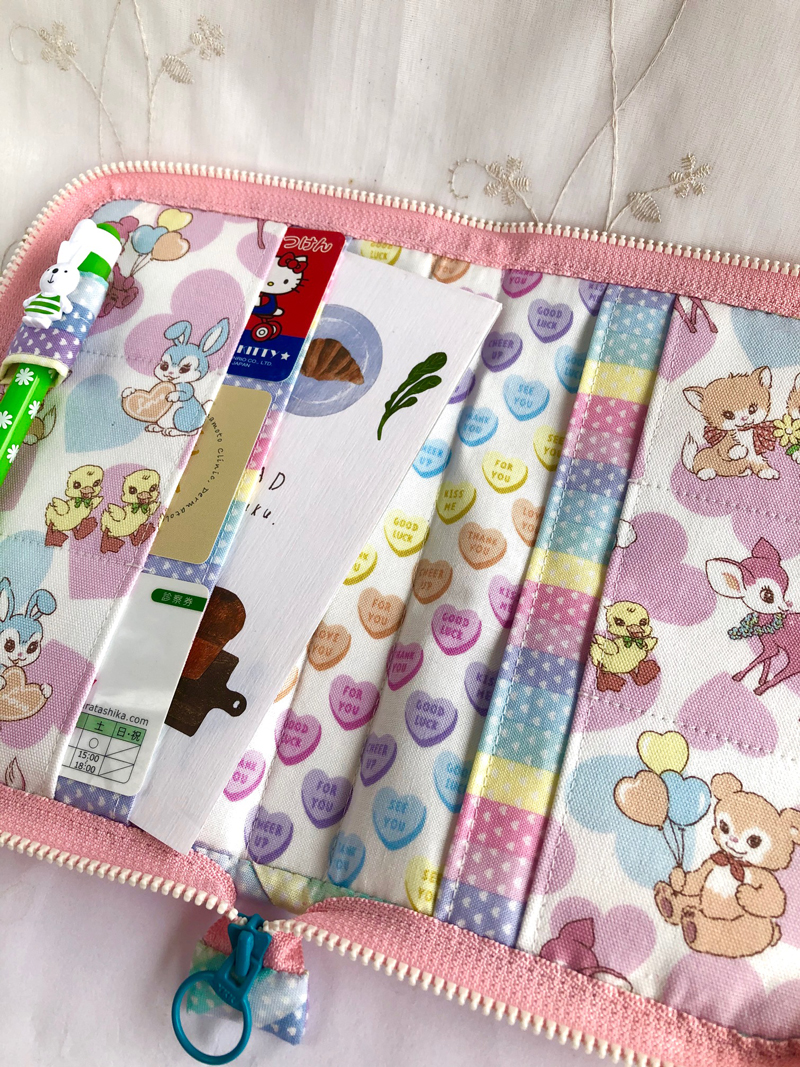
There are two standard A6 size pockets for papers and notebooks. Six smaller pockets are for various cards. Also included is a pen holder. All the things you need can be stored in this single case. With the zipper closure, you don’t have to worry about losing important items inside.
KF: What are some tips for making this case?
When sewing the layered pockets, make sure to align small and large pocket openings horizontally, otherwise the uneven look might bother you. Mark the spot so that the pieces will line up when sewing. Since the zipper width becomes the gusset width, the stitch line should be placed at 1cm from the zip teeth. For the curve, use small stitches and gather corners as you sew.
KF: How should we use this case in everyday situations?
It will make an excellent gift for different occasions.
KF: Thank you very much, Ayumi! Here are sewing instructions along with step by step photos from her. Enjoy crafting!
Instructions
1.

Cut each fabric according to the layout. Add 0.7cm seam except for the pen holder and bias binding strip. Make sure to mark the inner base fabric and pockets.
2.

With the front sides facing each other, place outer fabric B at the top and bottom of main outer fabric A and sew together. Place the rickrack tape and baste. Put together with fabric C for the spine. Adhere fusible quilt batting on the backside using an iron.
3.
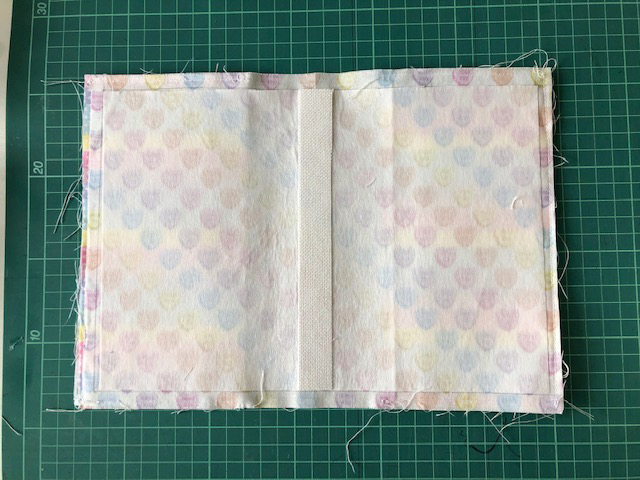
Iron the light weight fusible interfacing (18cm x 26cm) on the back of the lining fabric. Place the stiff interfacing (18cm x 2cm) over the position of the spine and iron to adhere.
4.
Adhere light weight fusible interfacing on one half side of the large and small pockets. The size of the interfacing should be 18cm x 9cm for large and 18cm x 7cm for small. With the front sides facing outside, fold the pockets in half. Apply edge stitches on all fold lines of four pockets. Layer large and small pockets and apply stitches to create card slots. Make sure that pocket pieces are placed symmetrically.
5.

Pin the spine portion of the outer fabric and stiff interfacing on lining fabric to avoid misalignment. From the front side, apply stitches on the edge of the spine. Baste the perimeter and cut the corner to make it round. Attach the pen holder on the left side of the lining side. Align the edge of the front side and edge of the bias binding strip and sew together with 0.7cm seam.
6.
Fold the bias binding strip inward to wrap the seam and secure with blind stitches. Leave 2.5cm of zipper at the end and start sewing at the side of the spine on the lining fabric. The zipper will not be attached at the bottom 2cm width of the spine. Layer the zipper above piping and sew with half-back stitches at 4-5mm from the edge. Apply many small stitches around the curve.
Once you sew all the way around, put the ring slider. Layer the corners first so that both sides will match. Cut off excess zipper and wrap the edge with quilt batting. Fold the end of the bias binding strip and sew to make a tiny pouch. Place it over and finish with blind stitches.
◎Sewing Instructions (PDF format / A4 size)

 Gathered “Cashe coeur” Bag
 Patchwork Style Lovely Vanity Case – Sewing Instructions
 Backpack Sewing Instructions