FREE SEWING TUTORIALS
Little Red Riding Hood Bag – Sewing Instructions
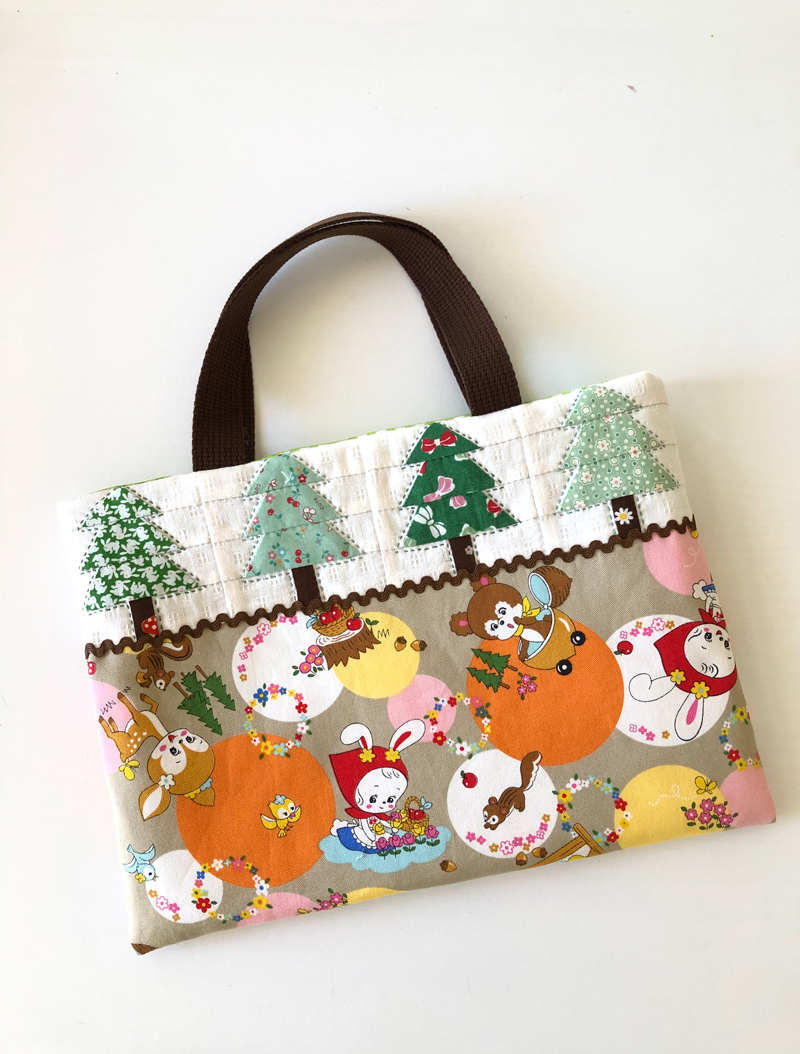
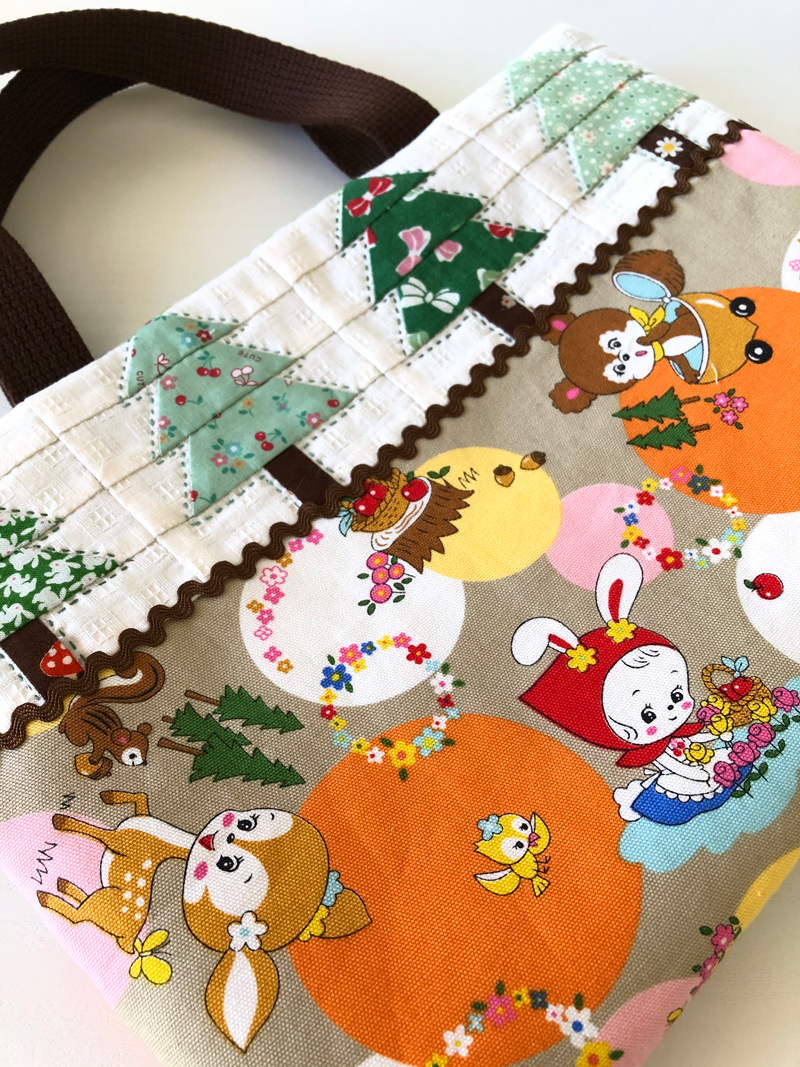
The animals like deer, bear, rabbit and squirrel, all looking nostalgic, fill this fabric from the Retro Hyakka series. The patchwork trees complement the fir tree in the printed design. The 100% cotton oxford material has the right amount of thickness and easy to sew. A perfect fit for handcraft beginners.
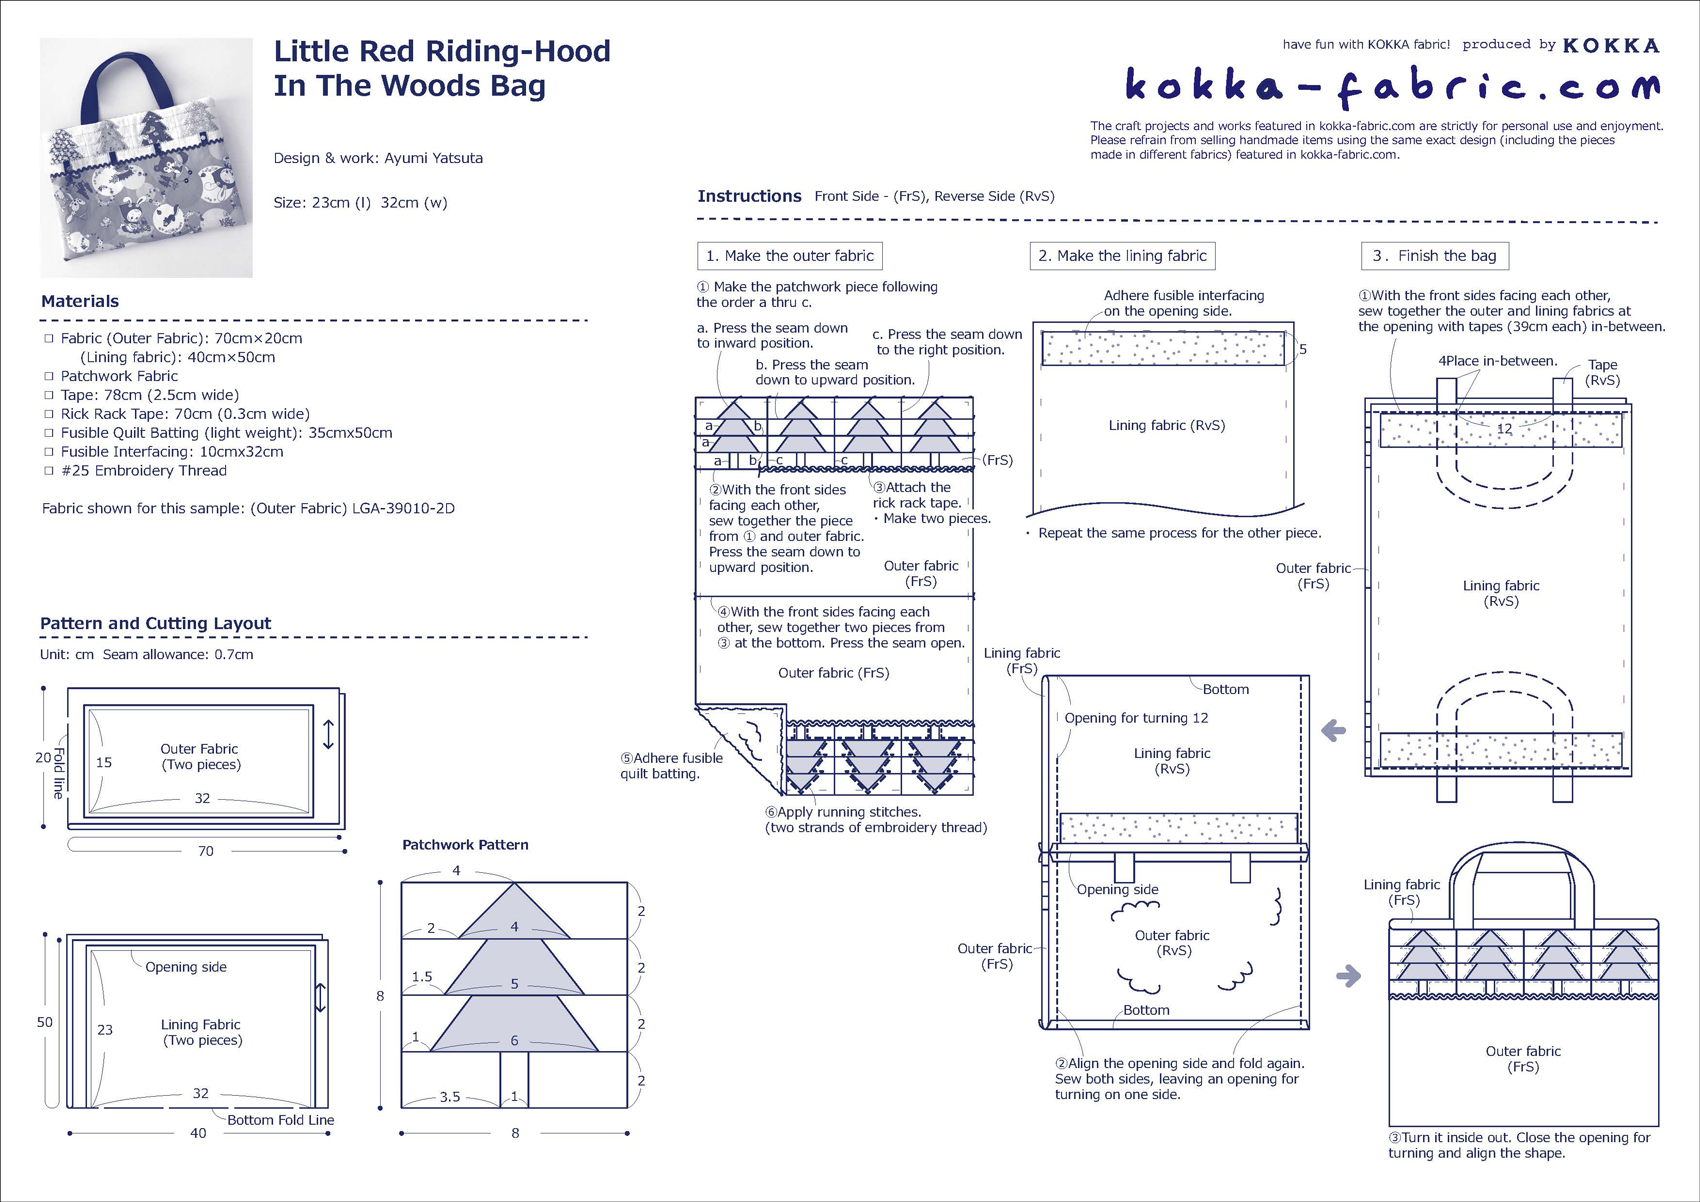
Materials:
□ Fabric (Outer Fabric): 80cm×w0cm
(Lining fabric): 40cm×50cm
□ Patchwork Fabric
□ Tape: 78cm (2.5cm wide)
□ Rick Rack Tape: 70cm (0.3cm wide)
□ Fusible Quilt Batting (light weight): 35cmx50cm
□ Fusible Interfacing: 10cmx32cm
□ #25 Embroidery Thread
Size: 23cm (l) 32cm (w)
We interviewed Ayumi about her creation:
Kokka Fabric (KF): What did you think of the fabric you used for this project?
Starring lovely animals, the Retro Hyakka is a colorful, pop and fun fabric. Since it is sturdy with a slight thickness, I thought that it would be perfect for a child’s lesson bag. From ample color variations, please have fun with your child in choosing the one you like.
KF: Can you tell us any special elements or ideas that you incorporated into this creation?
Every pattern is colorful and cute, and it was hard to decide which one to use. For this project, I picket the Little Red Riding Hood pattern. To create the feel of a story, I combined the design with the patchwork pattern of a fir tree. It portrays the scene where the little girl is walking through the forest to visit her grandmother.
KF: What are some tips for making this bag?
When working on the patchwork fir, make sure to align the matchmark of each piece of the patch fabric when you piece together. By incorporating several kinds of light and dark shades for the green scrap fabric, it can create a joyful variation.
KF: How should we use this bag in everyday situations?
For the coming holiday season, this bag will make a great Christmas gift for your kids and grandkids.
You can also have fun making it for a new school year in April. Enjoy handcrafting.
KF: Thank you very much, Ayumi! Here are sewing instructions along with step by step photos from her. Enjoy crafting!
Instructions
1.
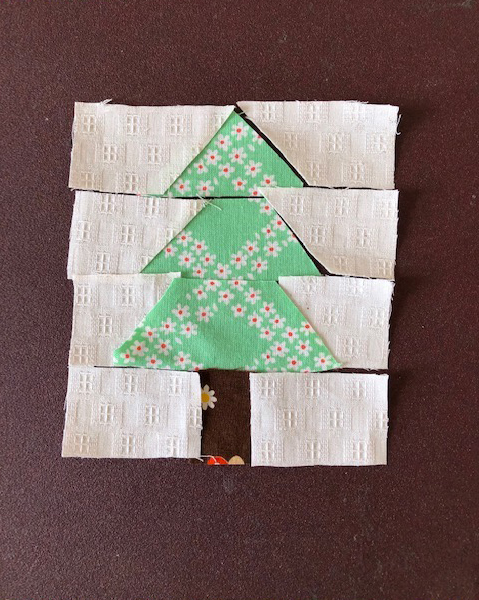
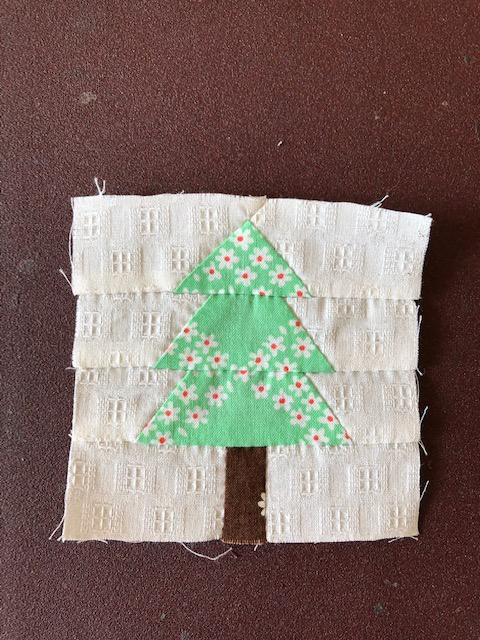
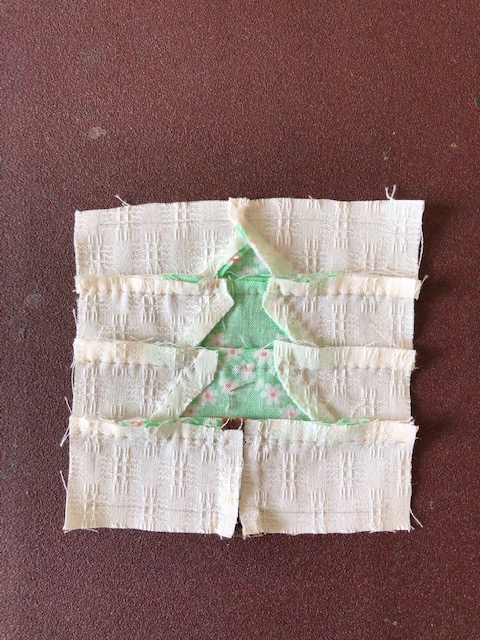
Peace together the fir tree pattern. Based on the patchwork design of the instruction recipe, make a pattern using a cardboard. Put a matchmark on each piece and cut the fabric. Sew together the pieces and press down the seam to the darker color side.
2.
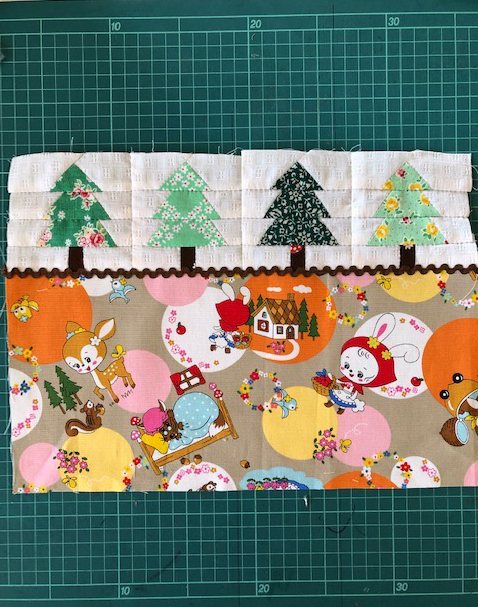
Using the same pattern, make four pieces of fir trees in different fabrics and piece them together side by side. Piece together the little red riding-hood fabric underneath. Attach the rick rack tape along the seam line in the front.
3.
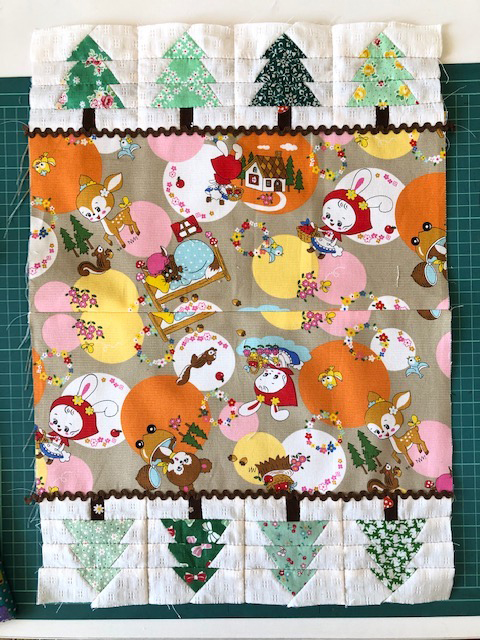
Repeat the same process on the other side. Sew together the bottom to create one piece of top panel.
4.
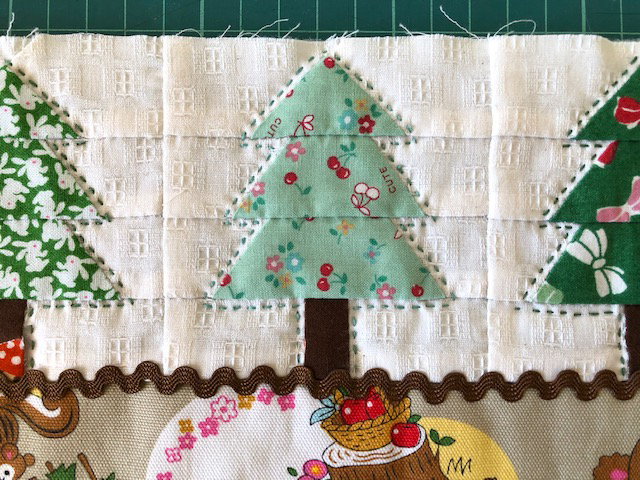
Adhere light weight fusible quilt batting on the back of the outer fabric. Around the tree, apply running stitches using two strands of embroidery thread.
5.
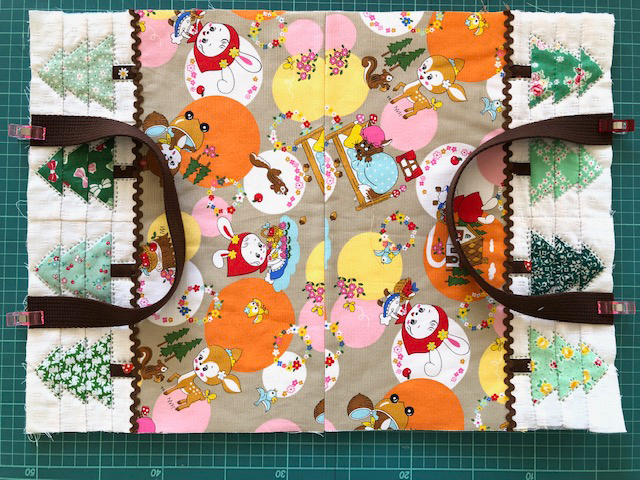

With the front sides facing each other, layer the outer and lining fabrics and place the handle in-between. Sew together the opening side using the machine.
◎Sewing Instructions
◎Sewing Instructions (PDF format / A4 size)