
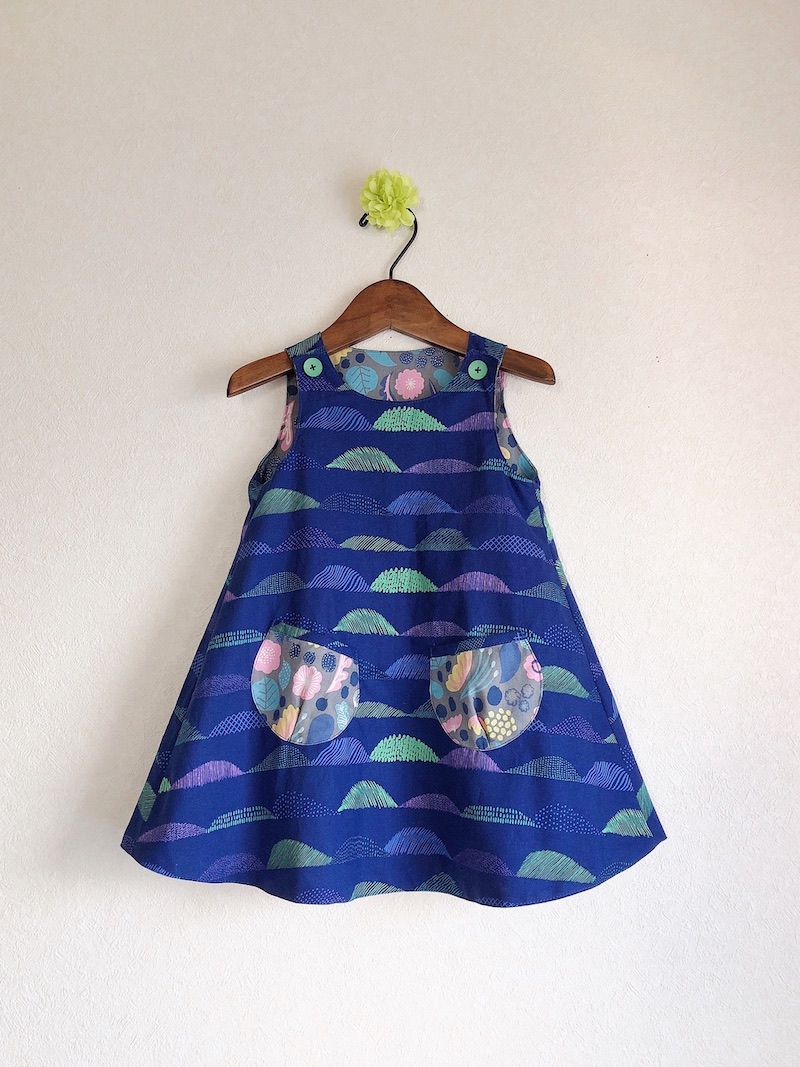
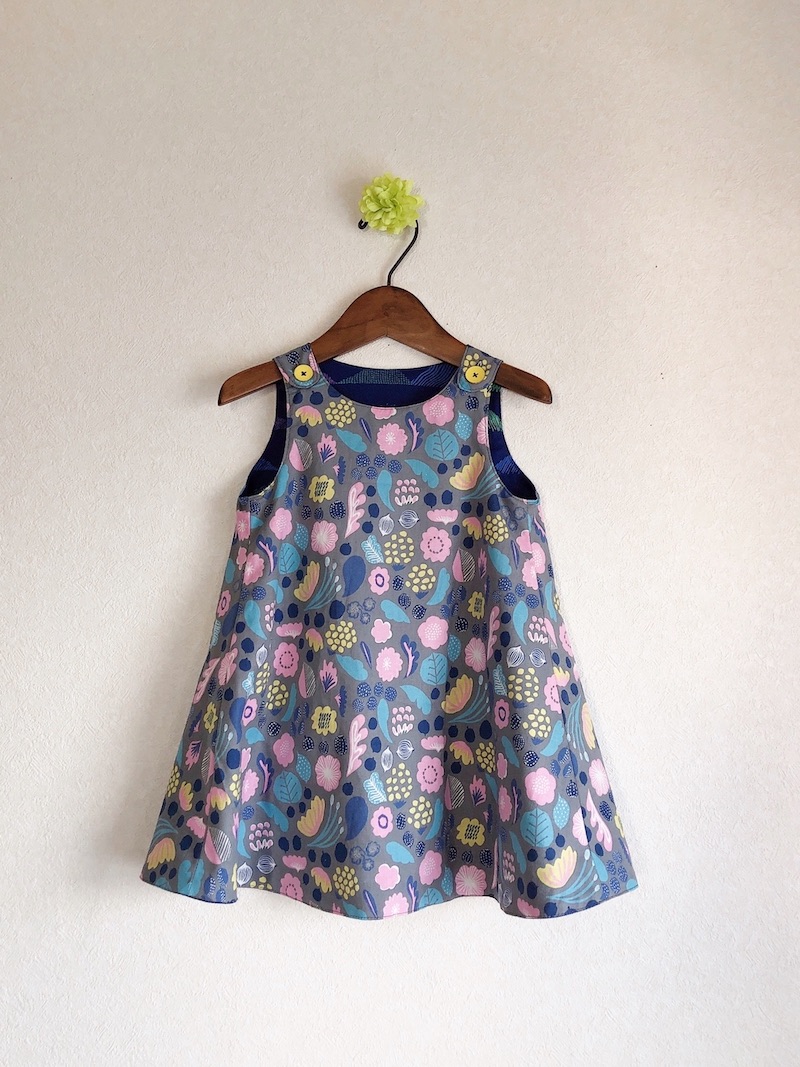
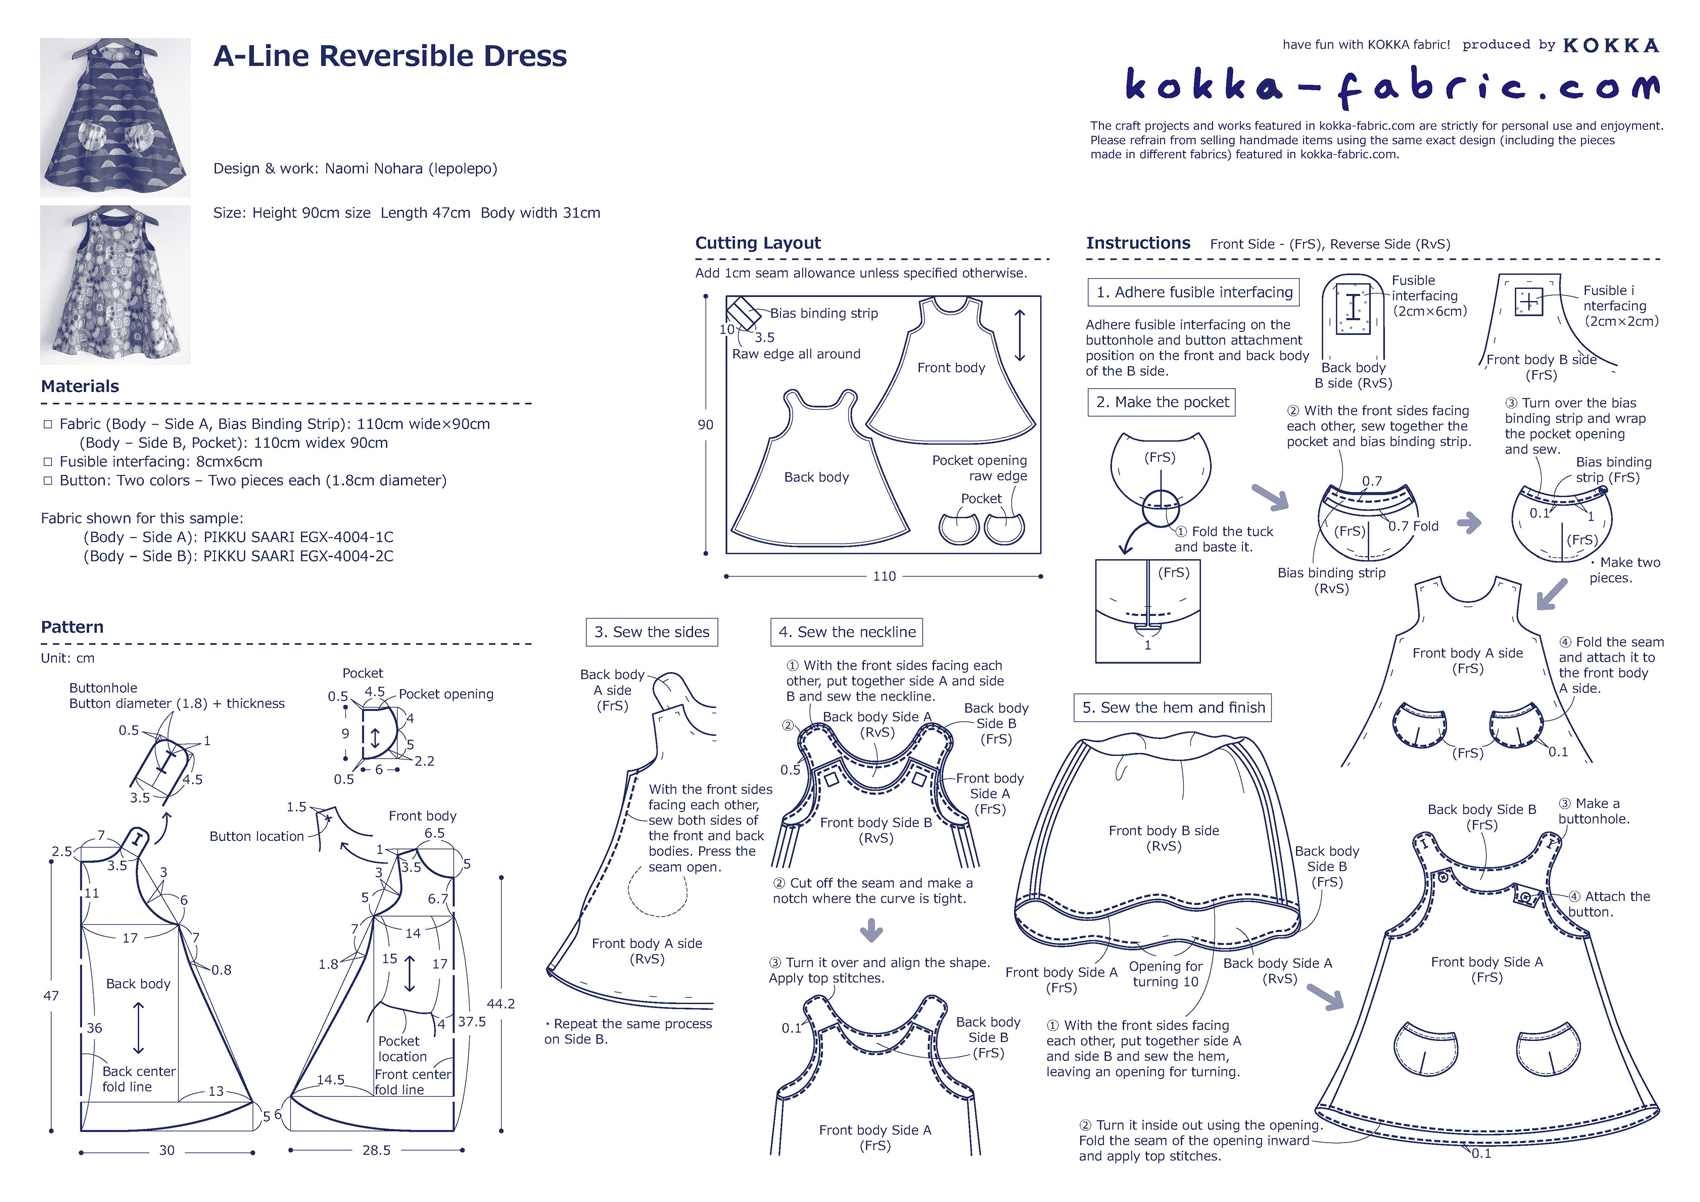
Being able to enjoy it in two ways, this reversible one piece dress for kids is made of two cotton linen sheeting fabrics from the PIKKU SAARI series – Tunturi – the Hills of the Lapland for side A and Taika – Magic for side B. As an accent, you can choose to add pockets in various styles, place them on both sides or use the same fabric as the dress.
Fabric shown for this sample:(Body – Side A): PIKKU SAARI EGX-4004-1C
(Body – Side B): PIKKU SAARI EGX-4004-2C
Materials:
□ Fabric (Body – Side A, Bias Binding Strip): 110cm wide×90cm
(Body – Side B, Pocket): 110cm widex 90cm
□ Fusible interfacing: 8cmx6cm
□ Button: Two colors – Two pieces each (1.8cm diameter)
*All Rights Reserved. Please refrain from the unauthorized use of project photos.
We interviewed Naomi about her creation:
Kokka Fabric (KF): What did you think of the fabric you used for this project?
It is a beautiful fabric that is filled with a Scandinavian feel. To make great use of the impactful pattern and colors, I designed a reversible dress with a simple style that allows you to enjoy the print design. The soft material is easy to sew, yet with relative tension, it constructs the silhouette nicely.
KF: Can you tell us any special elements or ideas that you incorporated into this creation?
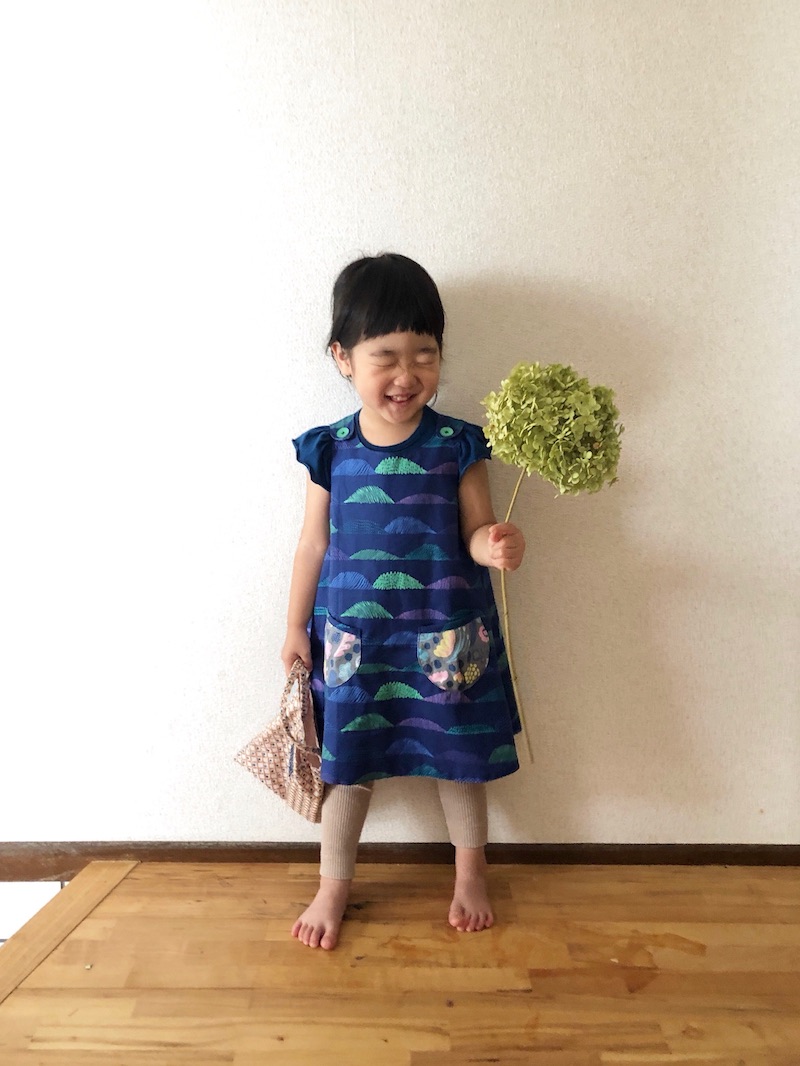
was particular about the A-line tent silhouette as I wanted to make this dress fit for kids around two years old who have a cute body shape with a little tummy.
The kids around this age starts to show an interest in pockets, so a fluffy round pocket is added as an accent.
In the example, I added pockets only on side A and it is made with opposite design fabric. Depending on your preference, you may arrange the design using the same fabric as the dress body.
KF: What are some tips for making this dress?
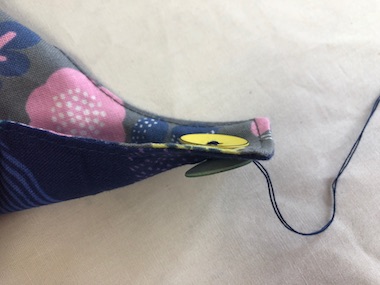
For this dress, I used a sewing method called “turn back.” You may find it a little difficult when piecing together the hem. Please make sure to refer to the instruction photos when sewing.
With this method, you don’t need to finish the seam. You can even make this dress with hand sewing only.
KF: How should we incorporate this dress into one’s styling?
With a wide arm hole, it is perfect for a layered look. It will look cute with a T-shirt and leggings/bloomers in the summer, or a turtleneck and tights for the fall/winter season.
KF: Thank you very much, Naomi! Here are sewing instructions along with step by step photos from her. Enjoy crafting!
◎Sewing Instructions
1.

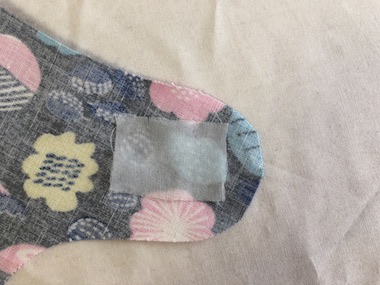
Adhere fusible interfacing on the buttonhole and button attachment position on the front and back body of the B side.
2.
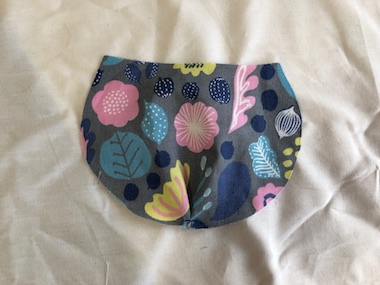

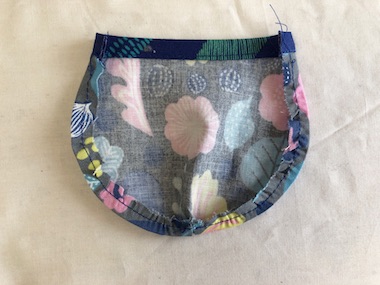
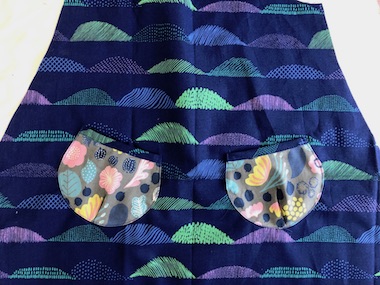
Make pockets with outer fabric B and attach them to outer fabric A.
3.

With the front sides facing each other, sew the sides of front and back bodies of outer fabric A. Press the seam open using an iron. Repeat the process on outer fabric B.
4.
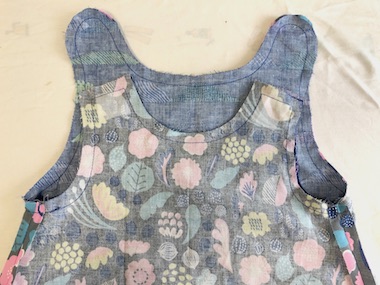
With the front sides facing each other, put together outer fabric A and B and sew from the armhole all the way around to neckline. Cut the seam to 0.5cm.
5.
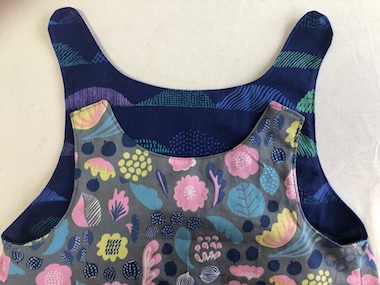
Turn it inside out and align the shape using an iron. Apply top stitches from the armhole to neckline.
6.
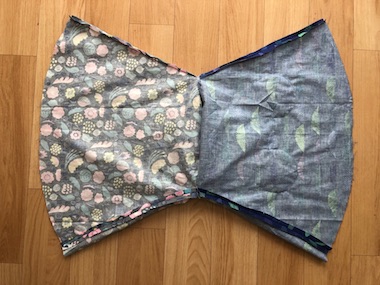
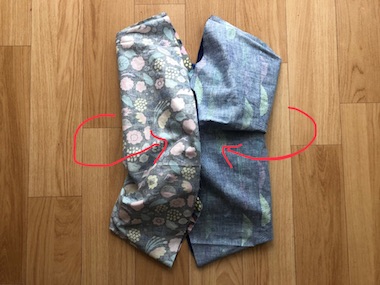
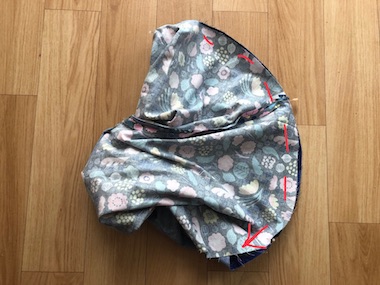
Turn it over to the reverse side. With the front sides facing each other, place the hem together and sew all the way around, leaving an opening for turning. Turn it inside out using the opening. Align the shape of the hem using an iron. Apply top stitches all the way around the hem.
7.
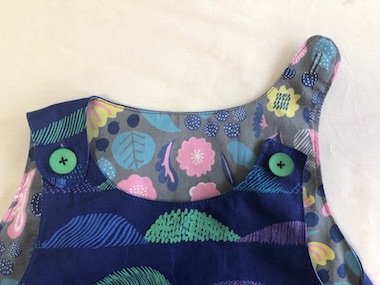
Make a buttonhole on the shoulder of the back body. Attach the button on the shoulder of the front body.
◎Sewing Instructions (PDF format / A4 size)

 Handmade Kids Clothing – Fluffy Bunny Dress – Sewing Instructions
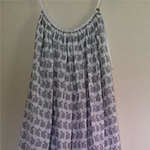 Cami dress in double gauze fabric
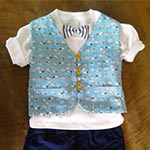 A reversible vest in double gauze fabric