
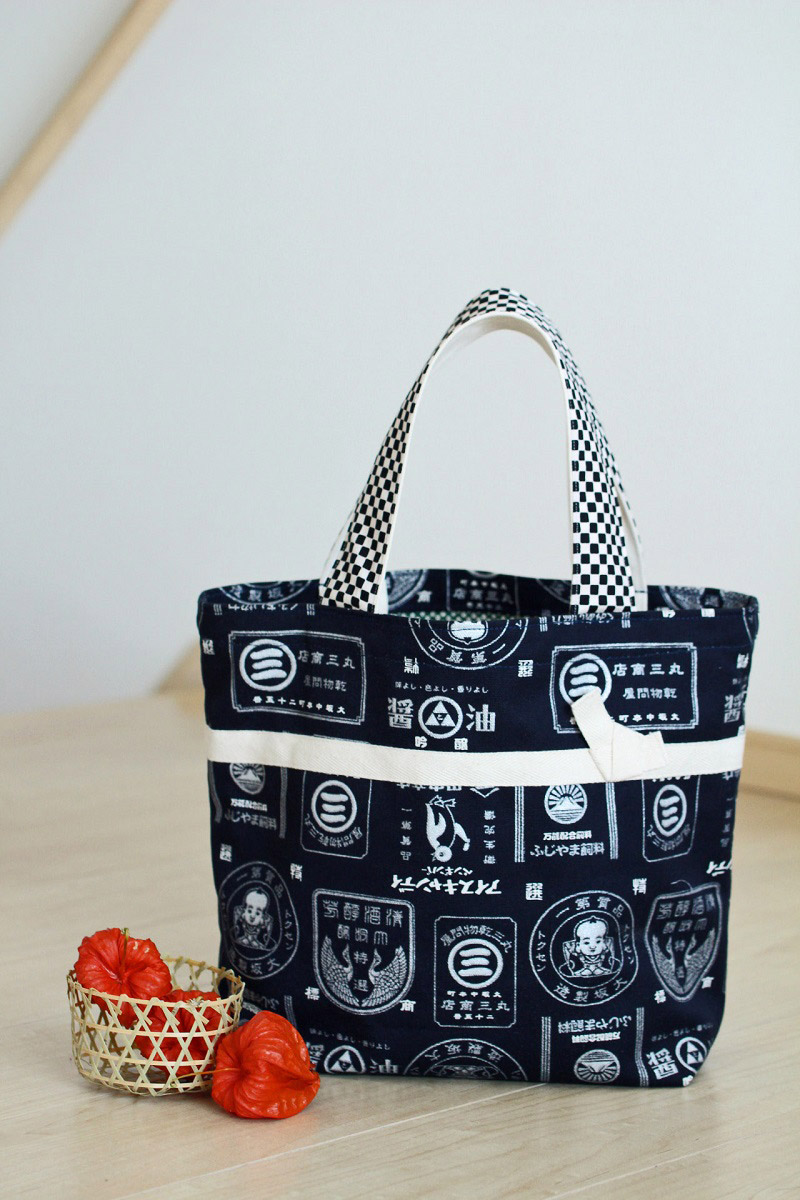
Today’s project is a tote bag made from a signboard design fabric of the “Show Retro” series.
The bag looks solid in this thicker #8 canvas fabric. It is full of stylish accents like checker design handles, white tape accent on the outer bag and a “MADE IN JAPAN” tag on the hanging pocket. Kanae Nakayama, known for her handcraft item-filled blog, “Hanabana Tanoshii Hi” is here to introduce her creation.
Fabric shown for this sample: P38100-101 (A)
Materials:
□ Fabric (Main outer fabric): 90cm×50cm
(Main lining fabric): 50cm×80cm
(Handle outer fabric): 50cm×20cm
(Handle lining fabric) : 50cm×20cm
(Pocket): 20cm×60cm
□ Cotton tape: 2cm wide x 122cm
We interviewed Kanae about her creation:
Kokka Fabric (KF): What did you think of the fabric you used for this project?
When I saw this fabric, I thought without hesitation, “I am going to make a Japanese style bag!”
What I had in mind was an apron worn by a delivery person and wanted to create something that depicted a “cool guy.”
KF: Can you tell us any special elements or ideas that you incorporated into this creation?
The design accent is the cotton tape embellishment that emulates the tape on the apron. Also the hanging pocket has a cutout tag that says “MADE IN JAPAN.” It is a fun and playful bag.

KF:What are some tips for making this bag?
While #8 canvas is a thick fabric, it is not stiff and the sewing needle goes smoothly. You will find it easy to sew even with a household sewing machine. I used a thicker needle (#16) and thread (#30) than usual and tried to stitch slowly and carefully.
KF: How should we use this bag in everyday situations?
A casual style, like a white T-shirt and blue jeans will look cool with this bag.
KF:Thank you very much, Kanae! Here are sewing instructions along with step by step photos from her. Enjoy crafting!
Instructions
1.

Make the hanging pocket. Cut out the MADE IN JAPAN design from the fabric’s edge to create a tag and sew it onto the main fabric. With the front sides facing outside, fold the fabric in half and sew at 1cm from the fold line (this will become the pocket opening side.)
2.
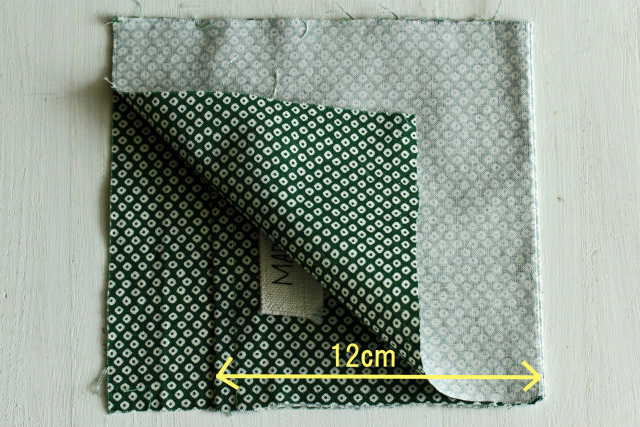
With the front sides facing each other, fold the fabric, at 12cm from the fold line.
3.
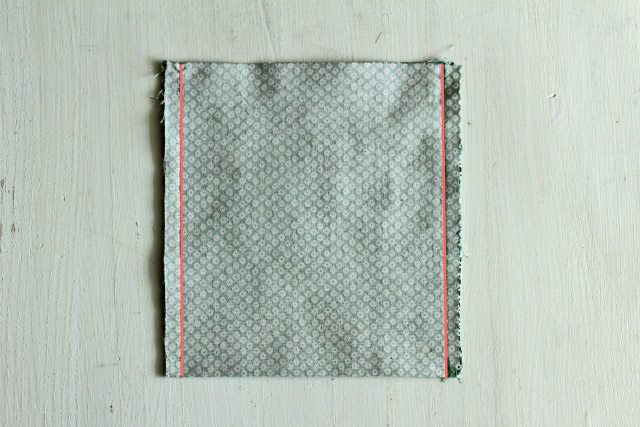
Align both edges cleanly and sew with 1cm seam.
4.

Turn it inside out, align the shape and iron.
5.

Put together the lining bag, hanging pocket and handles with the main outer bag. With the front sides facing outside, insert the lining bag into the outer bag. Align the lining bag with the finished line of the outer bag. Place the hanging pocket over the lining bag (make sure to match the center).
6.
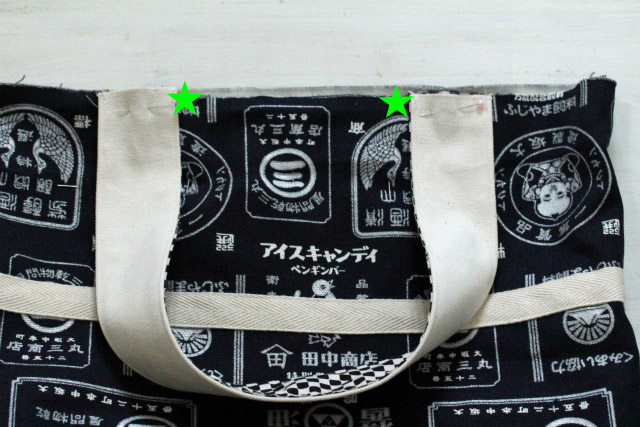
With the front sides facing each other, place and pin the handles to the outer bag, aligning with the edges of the pocket (marked with the ★).
7.
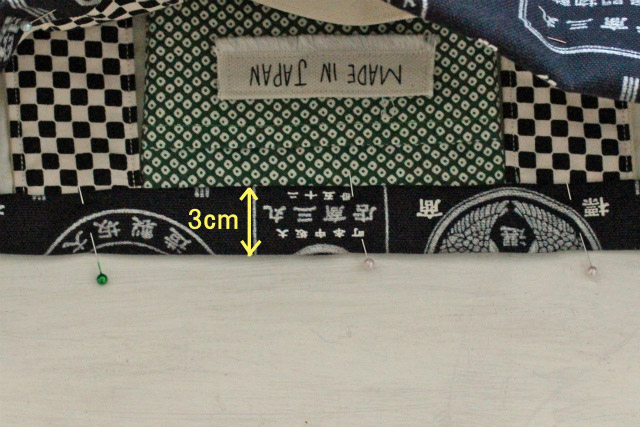
Fold for 1cm first, then fold for 3cm. The lining bag, pocket and handles will be placed under this folded edge (top opening). Repeat the same process for the edge of the other side.
8.
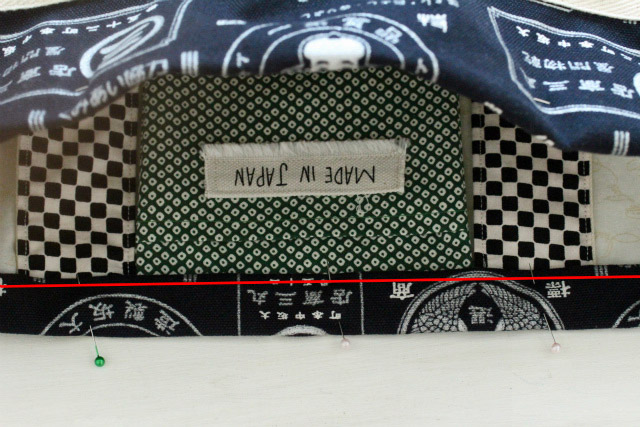
Stitch all the way around the folded edge at about 2-3mm from the edge.
9.
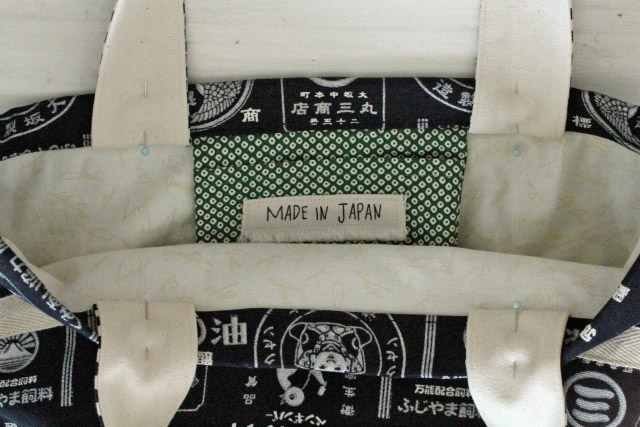
Pull the handles to the top and pin them. Stitch all the way around the top opening at 5mm from the edge. Apply backstitches over the handles.

 Tote Bag with Scrnched Handles
 Travel Tote
 Lesson bag in kitten design fabric