
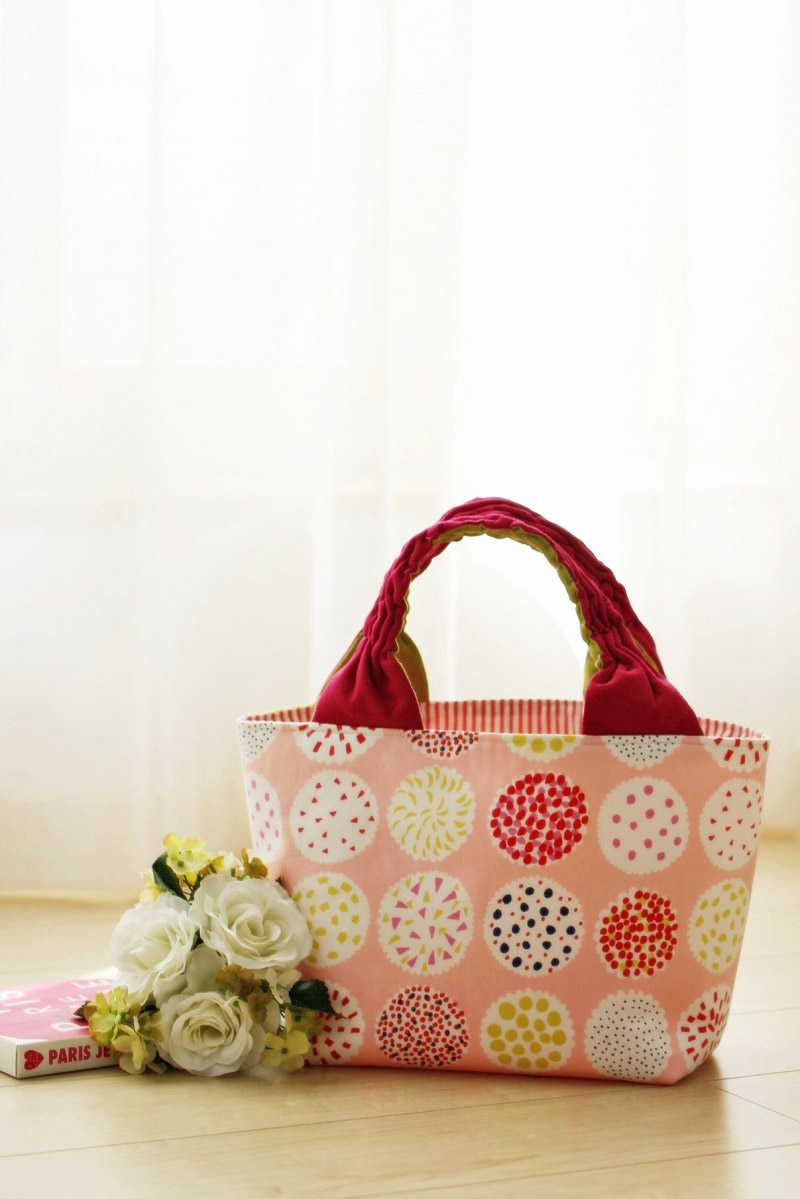
Helsinki-based Eri Shimatsuka’s textile, PIKKU SAARI is the material featured for this tote bag. A simple bag is enhanced with scrunched handles. Kanae Nakayama, known for her popular blog, “Hanabana Tanoshii Hi” is here to introduce her creation.
Fabric shown for this sample: PIKKU SAARI JG50410-1 (A)
Materials:
□ Fabric (Bag Outer Fabric, Pocket Outer Fabric): 100cm×40cm
(Bag Lining Fabric):90cm×40cm
(Handle Outer Fabric, Pocket Lining Fabric): 40cm×50cm
(Handle Lining Fabric): 20cm×50cm
□ Fusible Quilt Batting: 90cm×40cm
□ Sashiko Embroidery Thread
We interviewed Kanae about her creation:
Kokka Fabric (KF): What did you think of the fabric you used for this project?
I fell in love with this fabric when I saw it at the collection show. The design is fun and filled with a Scandinavian feel. I thought of making an item to show off as much of this fabric as possible without adding a transition fabric.
KF: Can you tell us any special elements or ideas that you incorporated into this creation?
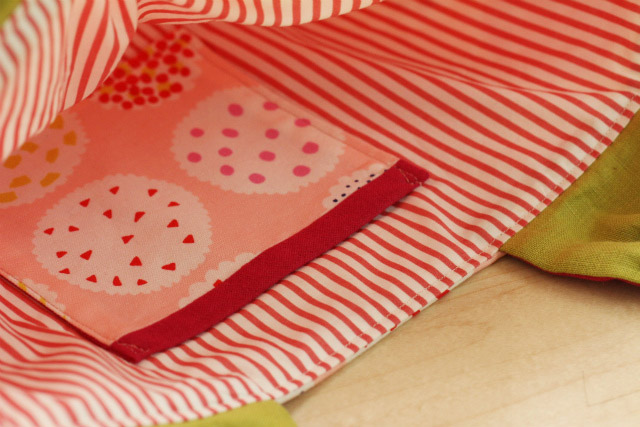
The bag itself is simple and I added playfulness to the handles. Deep pink and chartreuse color that peeks out on the back are linked to the color of the main bag fabric. The inside pocket also has a deep pink accent slightly peeking over the main bag fabric.
KF: What are some tips for making this bag?
The design is simple so it should be easy to make. Your patience may be tested when making the scrunched handle, but it is not difficult.
KF: How should we use this bag in everyday situations?
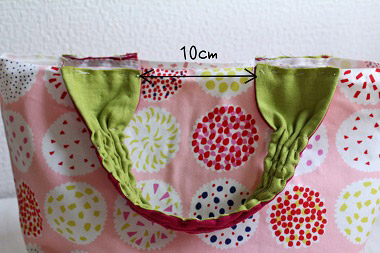
With an ample gusset at 14cm, you can carry a lot of things in this bag. The handles are just long enough to hold the bag over the shoulder. You may like to carry this bag as if it were a large accessory.
KF: Thank you very much, Kanae! Here are sewing instructions along with step by step photos from her. Enjoy crafting!
Instructions
1.
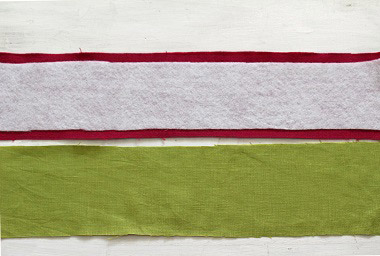
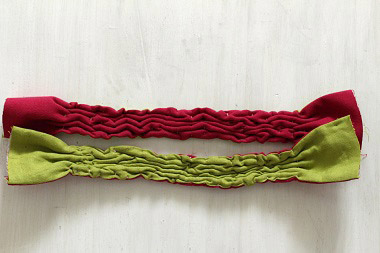
Make the handles. Cut two colors of fabric. Adhere fusible quilt batting on one of the fabrics. With the front sides facing each other, sew both long ends. Turn it inside out and iron to align the shape.
2.
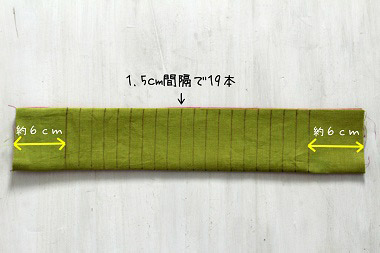
Using an erasable marking pen, draw 19 lines at a 1.5cm interval. Leave 6cm unlined on both ends.
3.

Using the Sashiko embroidery thread, sew with rough stitches and pull the thread.
4.
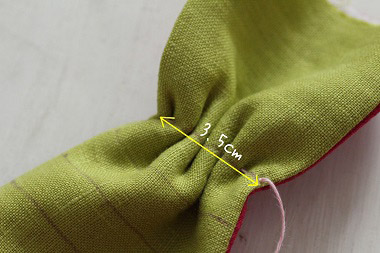
Shrink it to 3.5cm width and tie a knot. (Do not cut the thread.)
5.
Put the thread through the fabric and pull the needle out to the edge of the next line. As in the previous step, sew with rough stitches and shrink it to 3.5cm.
The picture shown is after two lines are sewn.
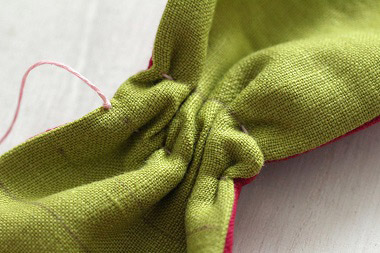
6.
Repeat the sewing and shrinking to finish!
7.
As shown, place the handles on top of the outer bag. Baste the handles. Place the lining bag over outer bag with the front sides facing each other, and sew all the way around the top opening.
8.

The handles are attached. With the quilt batting in-between, it has a soft feel yet sturdy with scrunching. Here is a bag with unique handles!

 Travel Tote
 Apron Tote
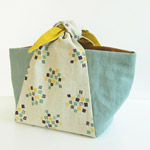 Furoshiki Tote