
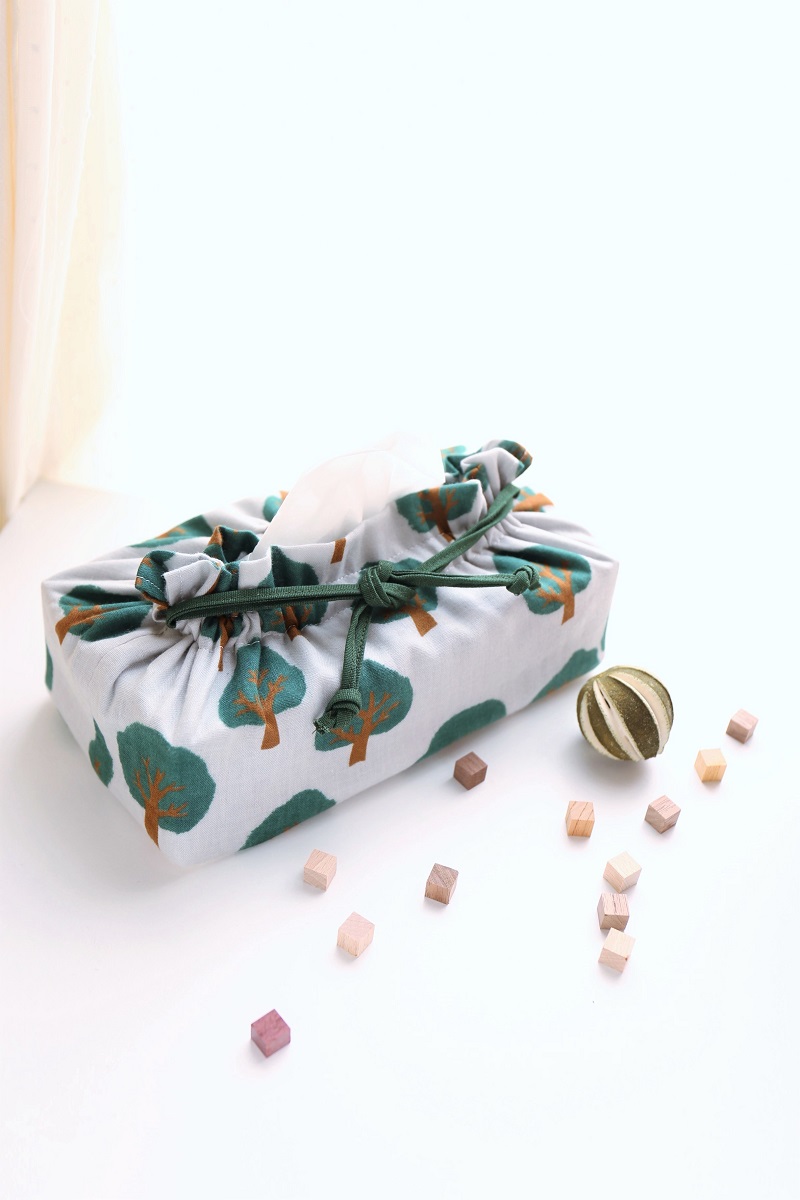
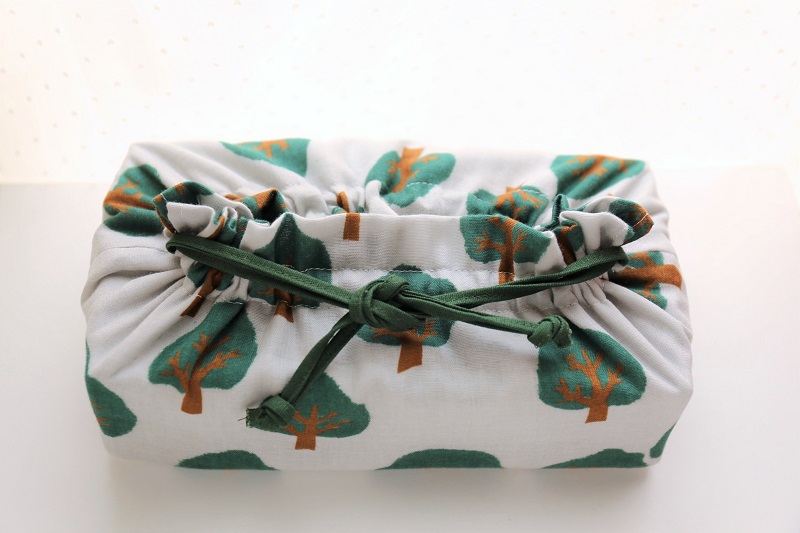
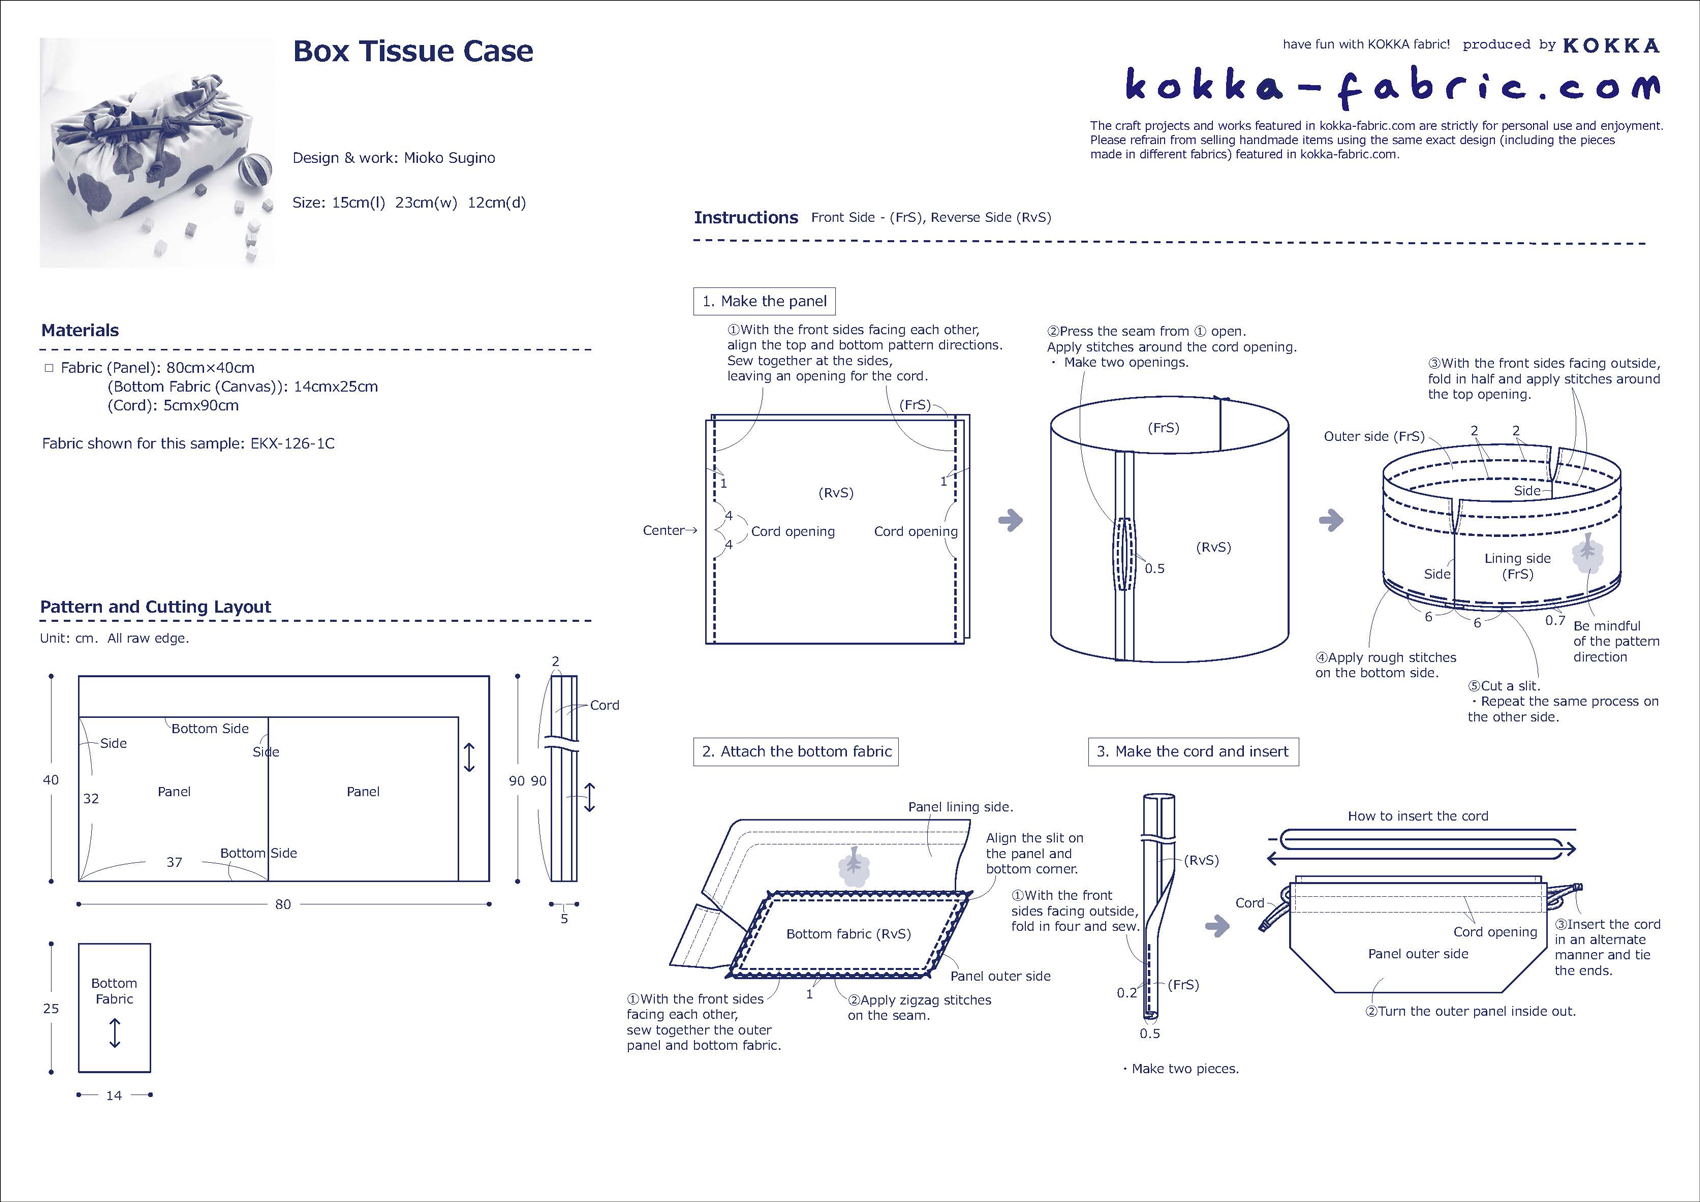
The featured project is a box tissue case with a refreshing green tree design. The part that touches your hands is made of double gauze, while the bottom is finished with a solid canvas. The fabric used is “Kigi (Trees)” from Muddy Works, a textile brand by Tomotake.
Fabric shown for this sample:EKX-126-1C
Materials:
□ Fabric (Panel): 80cm×40cm
(Bottom Fabric (Canvas)): 14cmx25cm
(Cord): 5cmx90cm
Size: 15cm(l) 23cm(w) 12cm(d)
We interviewed Mioko about her creation:
Kokka Fabric (KF): What did you think of the fabric you used for this project?
It is a lovely and soft double gauze featuring trees with an idyllic feel. It is both comfortable to see and touch. As we spend more time at home these days, I made a small home décor item with this comfy fabric.
KF: Can you tell us any special elements or ideas that you incorporated into this creation?
The part where you touch is made of double gauze for softness, and the bottom uses canvas for a solid finish, so it looks soft but holds its shape well. For this drawstring case, the accent is a tied bow of a solid dark green cord.
KF: What are some tips for making this tissue box?
I came up with a process that uses as few parts and steps as possible. The seam on the inside is not treated with a bias binding tape, and is simply finished with zigzag stitches. If you want to finish the inside nicely, please wrap it with the bias binding tape and sew it. For the cord, you could also use a wax cord or ribbon.
KF: How should we use this tissue box in everyday situations?
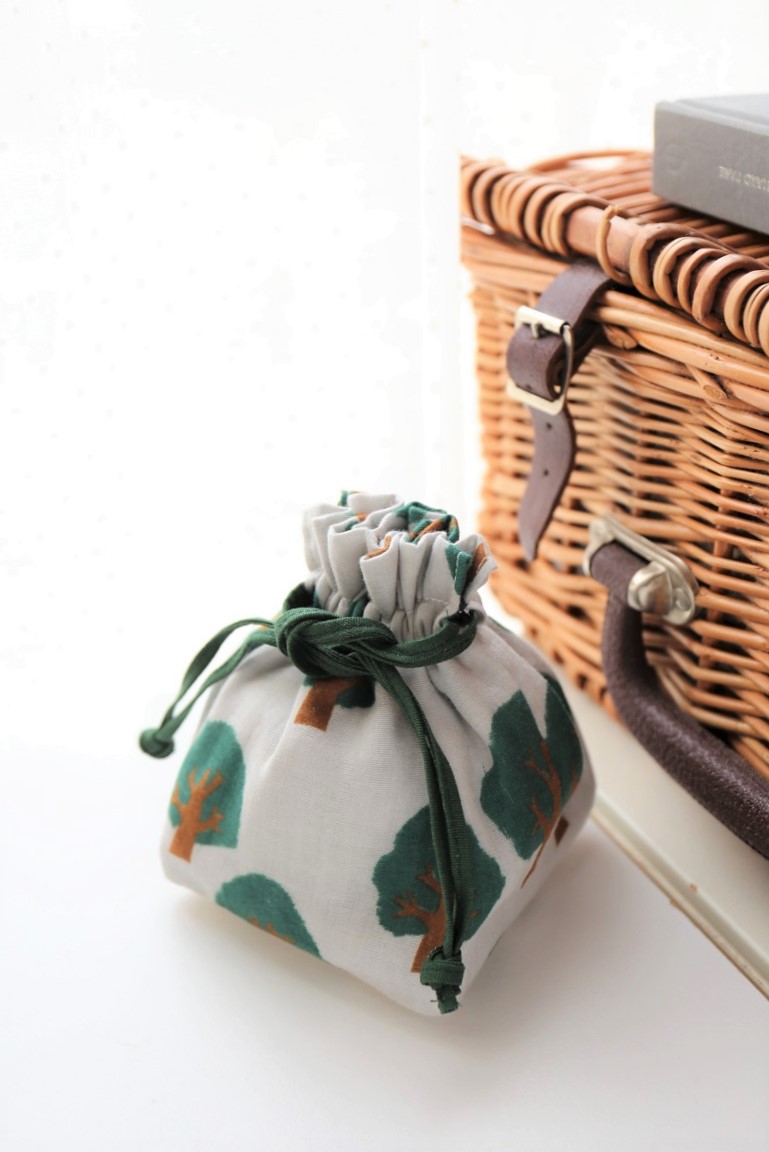
It would be cute to make a small size drawstring bag out of the same fabric and keep it beside the box. Matching items make you feel good, do they not? It would be nice to make them in colors that complement the atmosphere of the room.
KF: Thank you very much, Mioko! Here are sewing instructions along with step by step photos from her. Enjoy crafting!
Instructions
1.
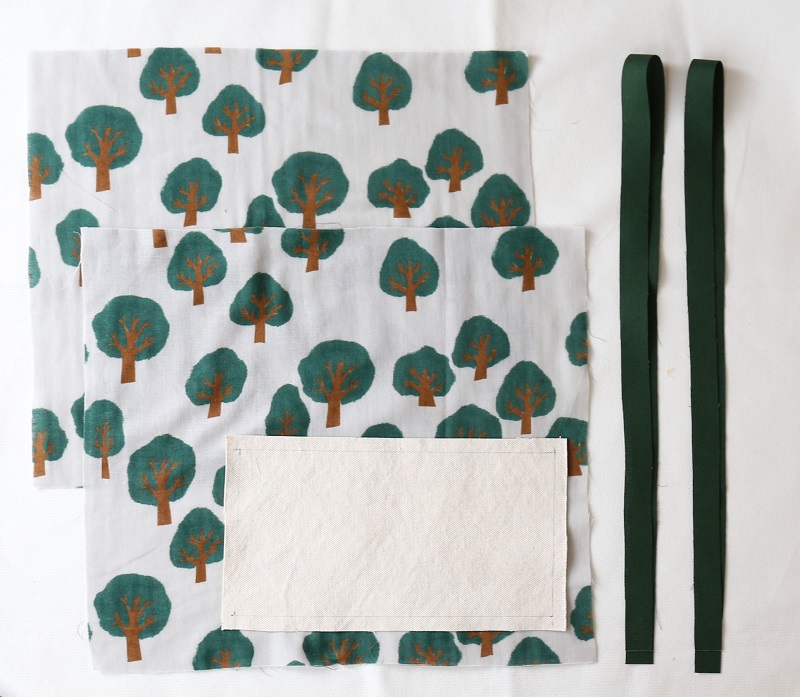
Cut the fabrics.
2.

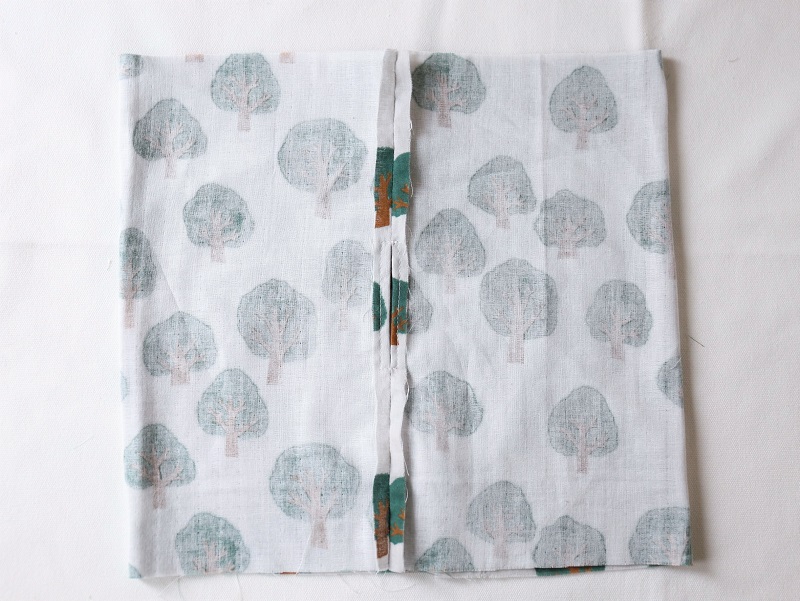
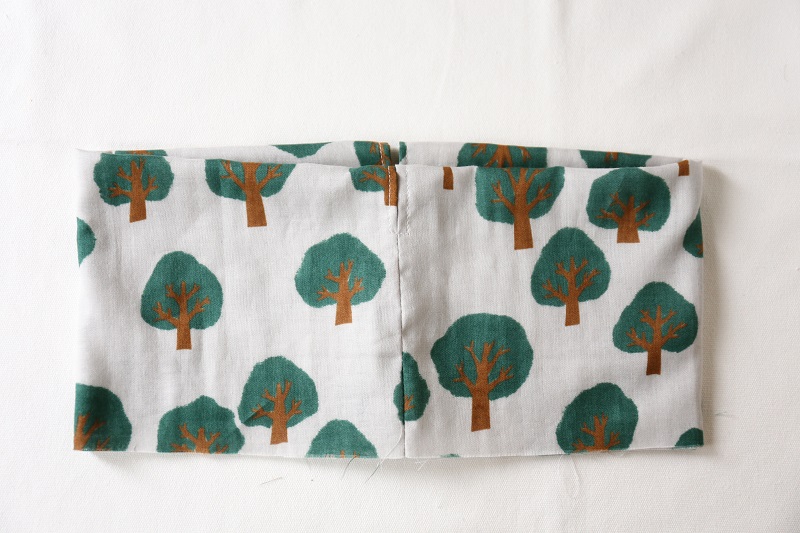
With the front sides facing each other, sew together the sides of the panel fabrics, leaving 8cm cord opening in the center. Align the directions of the pattern.
3.
Press the seam open. Sew around the cord opening in a square.
4.
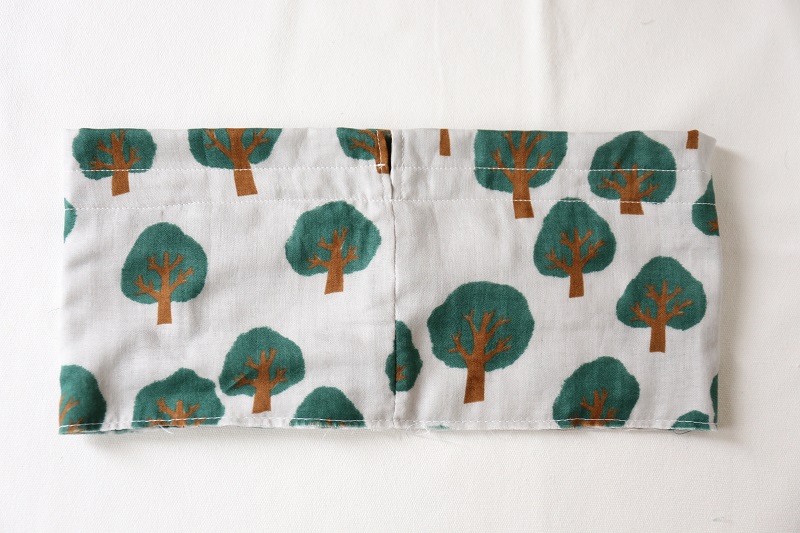
With the front sides facing outside, fold in half. Sew all the way around at 2cm and 4cm from the fold. For the bottom end, apply rough stitches.
5.
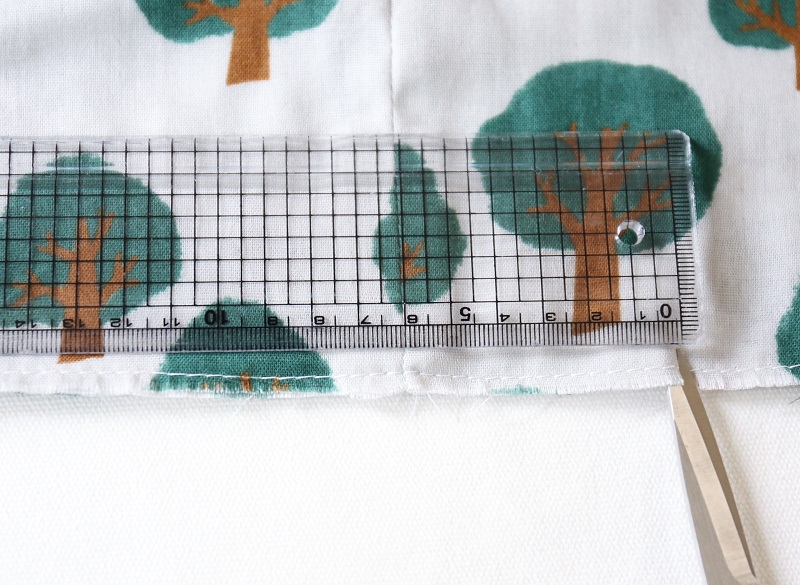
Cut 0.7cm slit at 6cm from the center on the bottom end.
6.
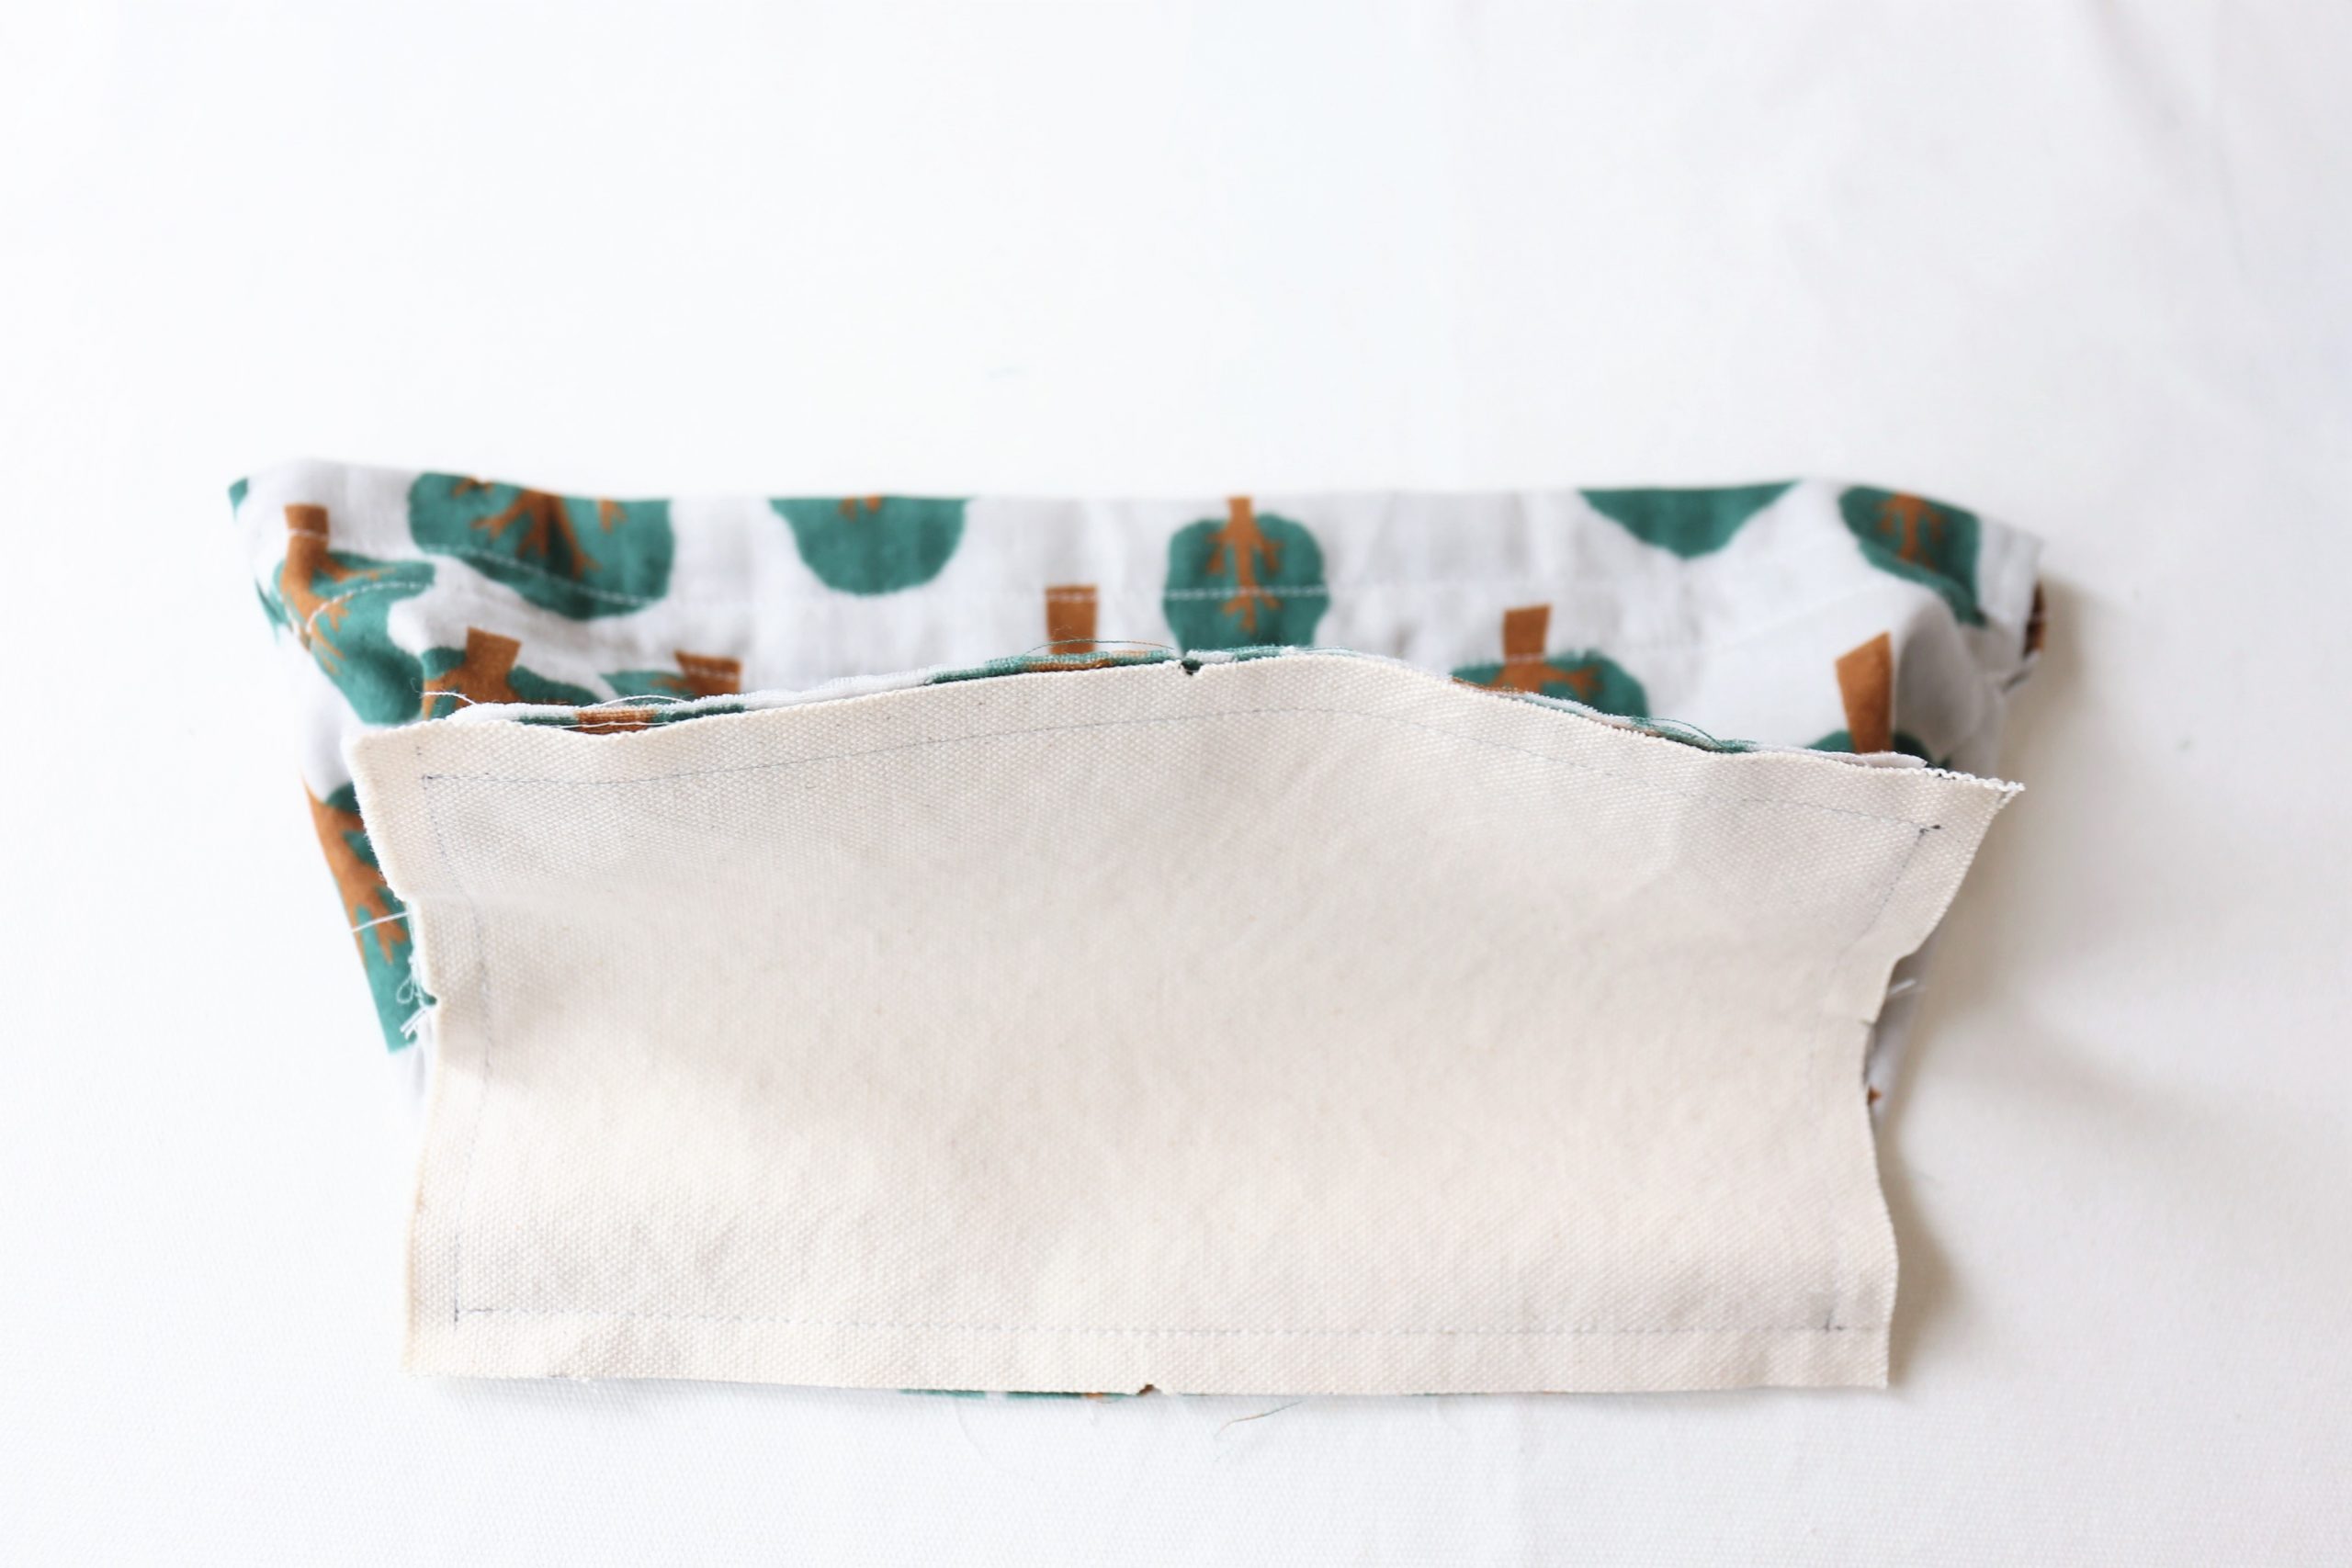
With the front sides facing each other, sew together the top and bottom fabrics together, placing the slit from Step 5 at the corner. Please be mindful of the direction of the pattern when sewing. The trees face downward on the lining side, while they face upward on the outer side.
7.
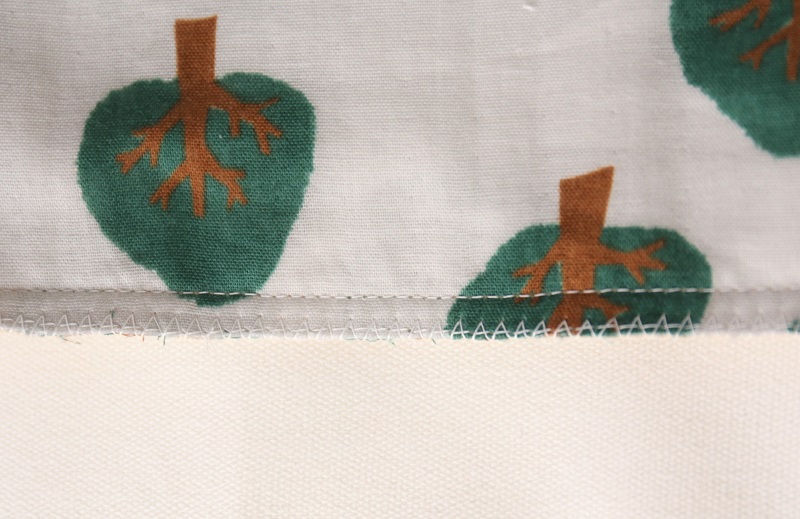
Apply zigzag stitches on the fabric edge.
8.
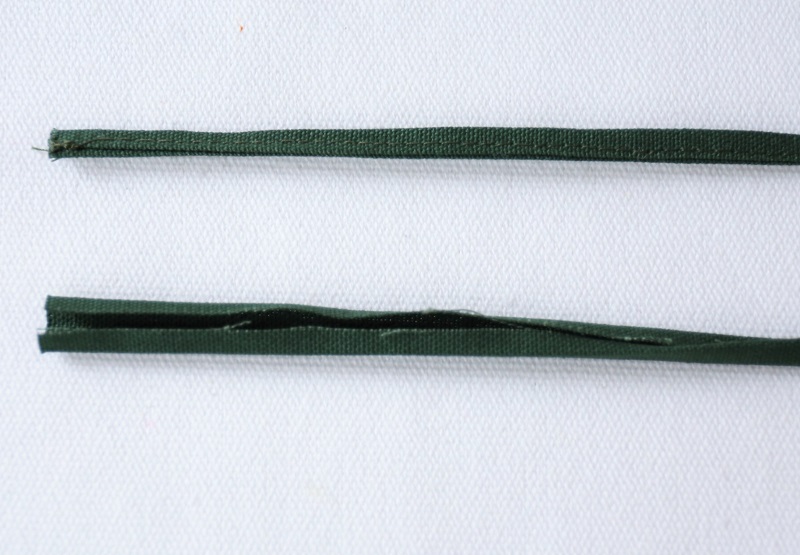
Fold the cord fabric in four and sew. Make two pieces.
9.
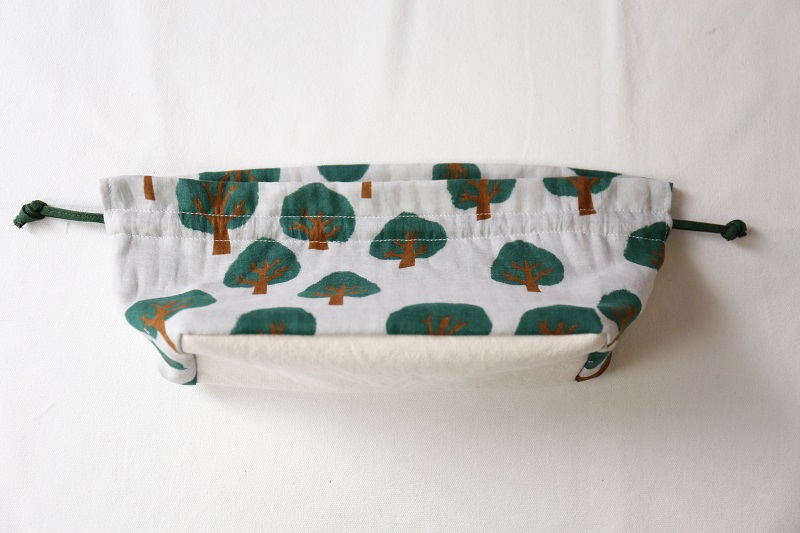

Turn the panels inside out. Insert the cords in an alternate manner and tie the ends.
10.
Finished.
◎Sewing Instructions (PDF format / A4 size)

 Three-piece Set Containing a Pleated Face Mask, Mask Case and Tissue Case – Made with Only 50cm of Fabric – Sewing Instructions
 Accessory Case
 Square Bag in Marine Motif Fabric – Sewing Instructions