
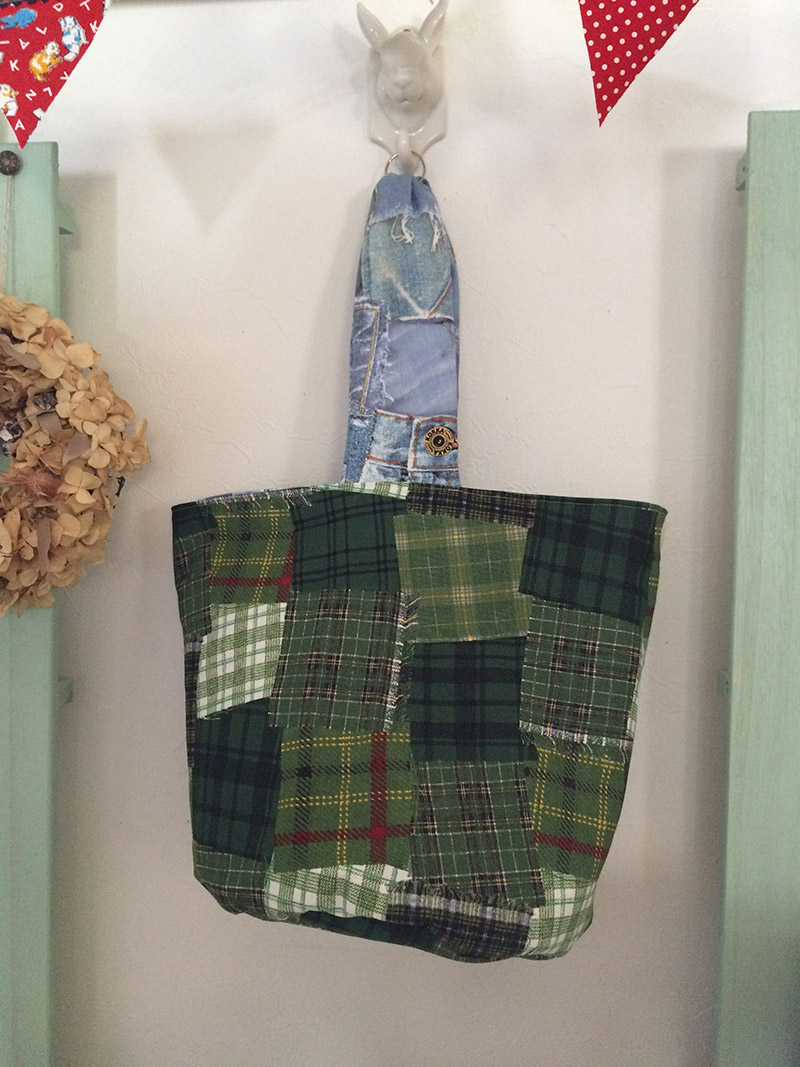
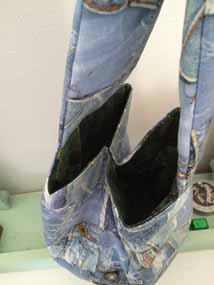
Today’s project is a bucket tote bag using a faux denim-style fabric in #10 canvas. With this fabric, you can enjoy a patchwork-feel made with vintage jeans. The creator is Masumi Saito, aka sinafuku. Her idea of using a blue outer fabric and a green canvas for the lining allows you to enjoy this reversible bag both inside and outside.
Fabric shown for this sample:(Outer fabric・Handle) H10100-100(A)
(Lining fabric)H10100-101(C)
Materials:
□ Fabric (Outer fabric, Handle): 100cm×40cm
(Lining fabric): 100cm×30cm
□ Quilt batting: 80cm x 60cm
□ Velcro: 2cm diameter

We interviewed Masumi about her creation:
Kokka Fabric (KF): What did you think of the fabric you used for this project?
The denim patchwork design had a stylish feel, so I picked a simple bag to make the design stand out.
KF: Can you tell us any special elements or ideas that you incorporated into this creation?
With quilt batting, the bag stands on its own and has some fluffiness.
Also, by pinching the center of the handle, it fits in your hand nicely and is easy to carry.
KF: What are some tips for making this bag?
As the bottom is round, you may find it difficult when sewing the bottom and main panel together. You can achieve a clean finish by adding slits on both the bottom and panel when aligning the fabrics.
KF: How should we use this bag in everyday situations?
It looks like denim, but is actually a canvas fabric. So it is softer than denim and lighter to carry. Velcro helps you to enjoy a rounder shape. With a small size Velcro, you can utilize the bag both inside and out.
KF: Thank you very much, Masumi! Here are sewing instructions along with step by step photos from her. Enjoy crafting!
Instructions
1. Prepare the materials.
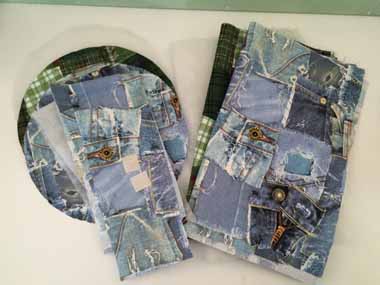
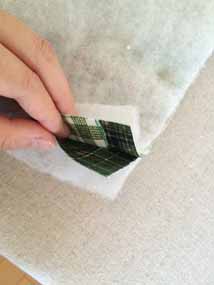
Bottom (23cm diameter) Outer fabric, Lining fabric, Quilt batting 1 piece each
Main body panel (30cm l x 74cm w) Outer fabric, Lining fabric, Quilt batting 1 piece each
Handle (10cm l x 50cm w) Outer fabric 2 pieces, Quilt batting 1 piece
Velcro (2cm diameter)
2. Make the handle.

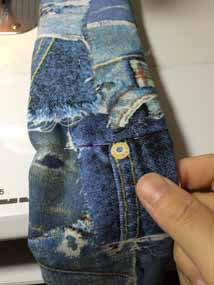
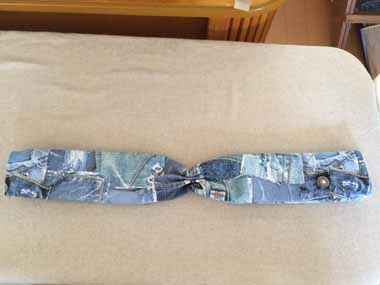
As shown, layer the fabrics and sew top and bottom ends, 1cm from the edge. Turn it inside out. Run rough stitches in the center and shrink a little as shown.
3. Make the main outer bag and lining bag.

With the front sides facing each other, sew together the outer bag on the sides at 1cm from the edge.
Repeat the process for the lining bag, this time placing the quilt batting with the fabric.
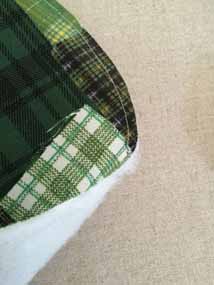
Cut a slit at every quarter location of the whole length.
4. Piece together the bottom and main panel.

First, baste the lining bag and quilt batting at 5mm from the edge.
As shown, fold the bottom in four and cut a slit in four locations.
Align the slit on the panel and bottom.
Pin them together, making sure they are aligned, and sew together at 1cm from the edge.
5. Sew together the outer and lining bags and attach the handle.

With the front sides facing each other, put together the pieces completed in Step 4. Sew them together at the top opening at 1cm from the edge.
Using the stitch line created in Step 3, mark the location to be unsewn for 10cm on both ends.
Turn it inside out from the opening. Insert the handle and sew it to the main bag as you sew the opening to close.
6. Attach the Velcro.
Attach the Velcro at opposing corners of the handle to finish!

 Kitty’s Bucket Shaped Organizer Bag
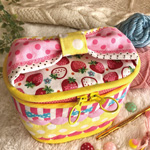 Patchwork Style Lovely Vanity Case – Sewing Instructions
 Travel Tote