
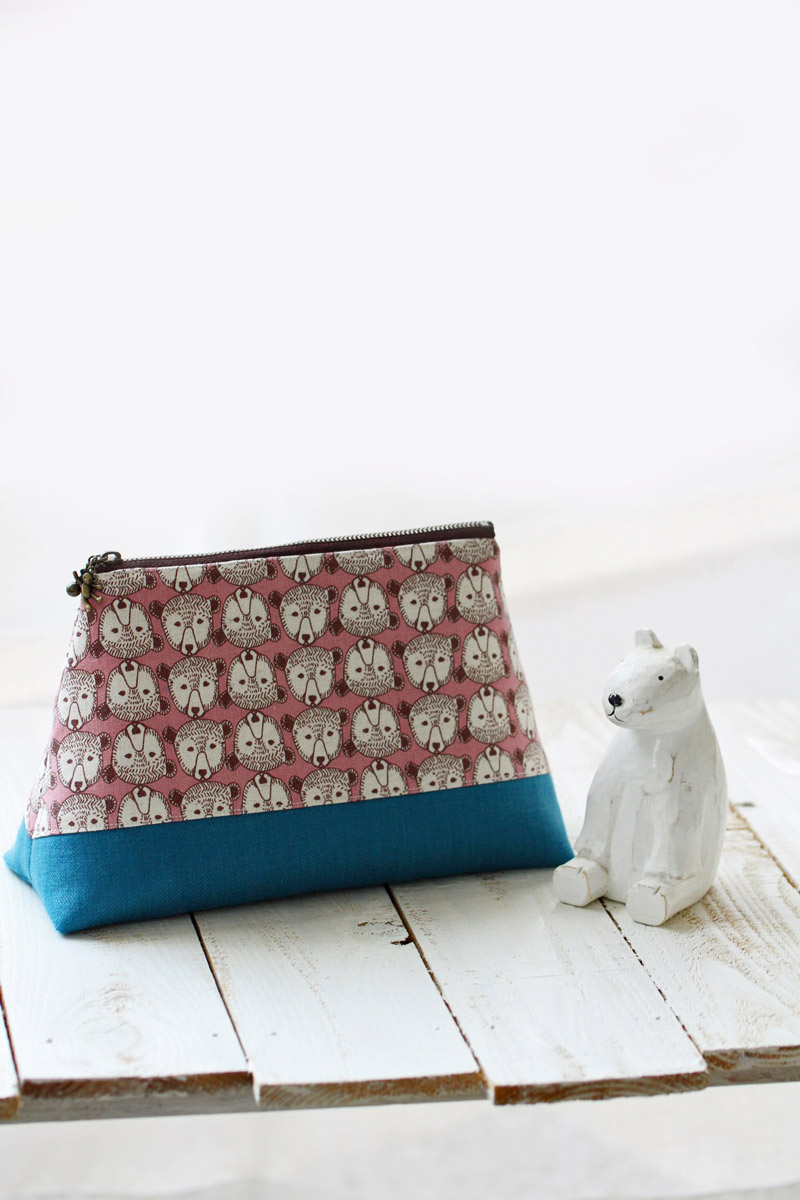
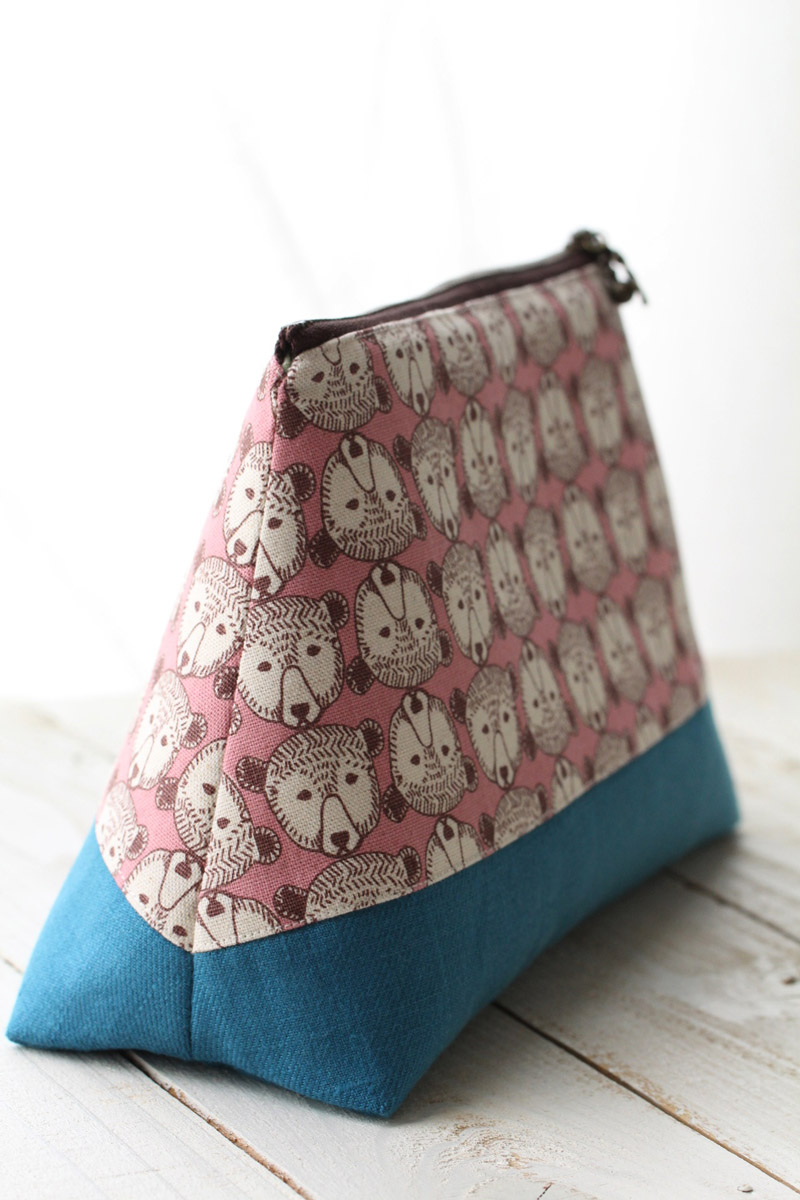
This pouch is made with a slightly thick cotton linen canvas fabric with Scandinavian-like animal motifs. A solid trapezoid shape keeps it from being too cute, and it is suitable for mature women. To carry various small makeup items, this pouch will be very convenient.
Fabric shown for this sample: Nordic Line P39400-401 (A)
Materials:
□ Fabric (Outer fabric a): 70cm×20cm
(Outer fabric b): 70cm×10cm
(Lining fabric): 70cm×20cm
□ Fusible quilt batting: 70cm x 20cm
□ Zipper: 1 piece x 18cm
□ Charm: 1 piece
□ Jump rings: 1 piece (0.5cm diameter)
We interviewed Kanae about her creation:
Kokka Fabric (KF): What did you think of the fabric you used for this project?
Like a character appearing in a Scandinavian fairy tale, the face of the bear looks just perfect. When looking at it from a distance, the pattern appears almost geometric. With this fabric, something with rounded corners could look a little childish, so I chose to create an item with square corners.
KF:KF: Can you tell us any special elements or ideas that you incorporated into this creation?
The accent is a gentle v-shaped line on the side along the transition. Choosing a color like brown for the transition could make it look dull, so I ventured to use an energetic turquoise color (linen) to create something unique.
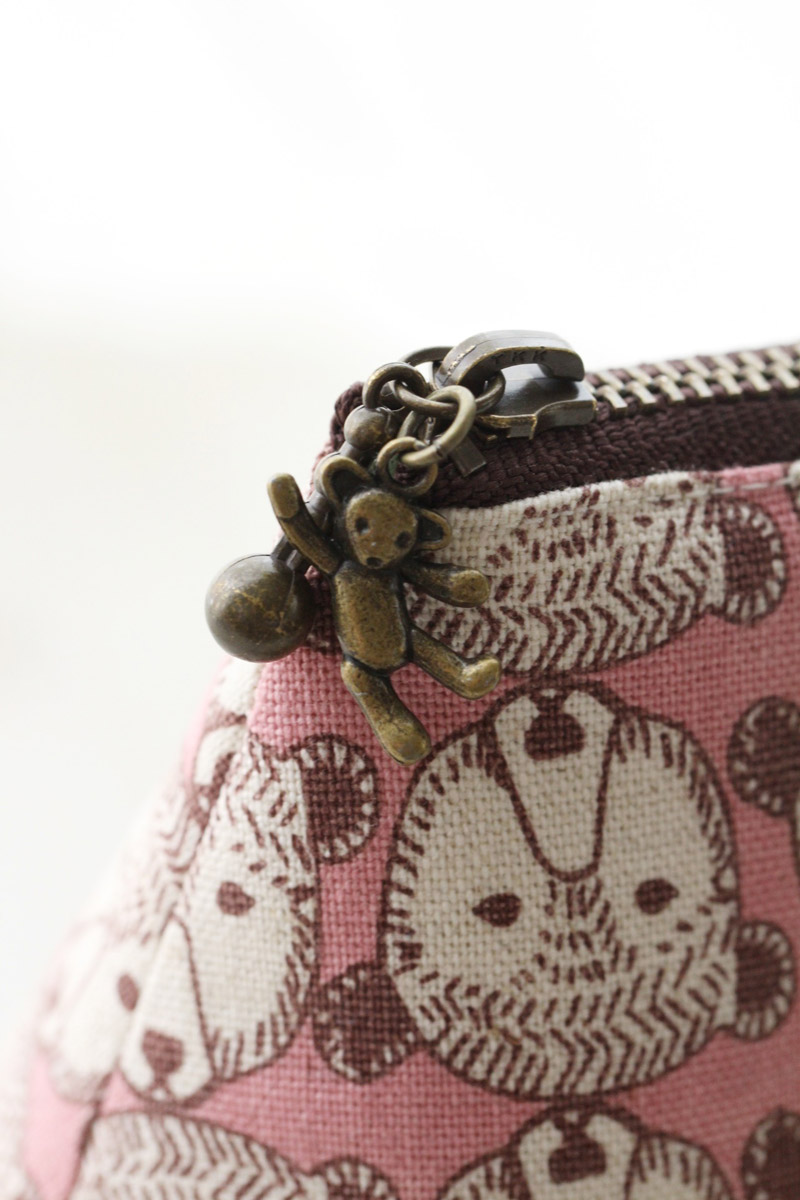
The bear charm on the zipper top will also add cuteness!
KF: What are some tips for making this pouch?
When attaching the zipper, fold the ends and secure them. By doing so, you can achieve a clean finish without rough stitch lines along the side. Also, when running stitches along the zipper edge, try to avoid the lining fabric for a clean finish.
KF: How should we use this pouch in everyday situations?
With a quilt batting in-between and wide bottom (8cm gusset), it can stand up straight. You can use it as a cosmetic case or carry it like a clutch bag.
KF: Thank you very much, Kanae! Here are sewing instructions along with step by step photos from her. Enjoy crafting!
Instructions
1. Prepare the zipper.
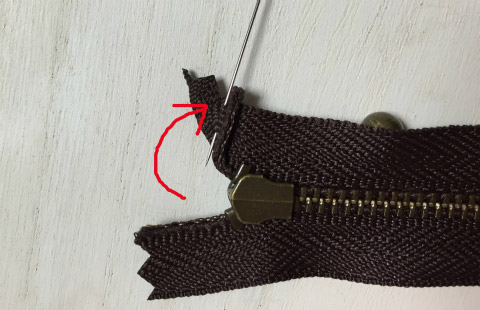
Place the zipper with the front side on the bottom. Fold the edge at a right angle.
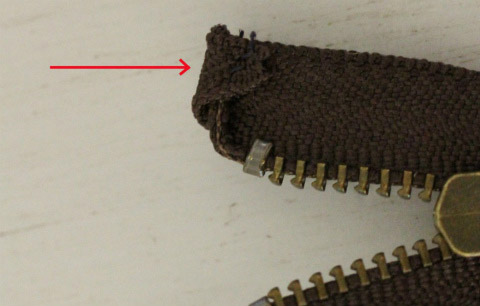
Fold the triangle tip and sew to secure. Apply the same treatment to all four edges.
2.Attach the zipper.

Place the zipper on the outer fabric with a slider on the left.
Align the center of the zipper and outer fabric (with the font sides facing each other)

With 5mm seam, sew them together. Place the lining fabric over it and sew together at 7mm from the edge.
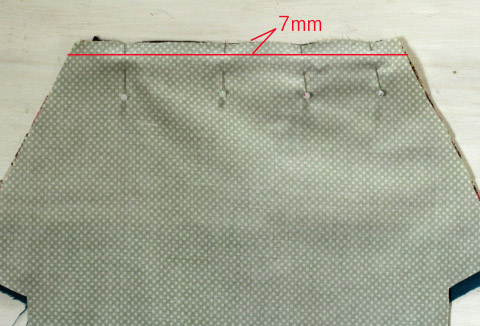

Open the lining fabric and run stitches along the zipper edge. (red line)
Repeat the process on the other side.

View from the lining fabric side. The stitch line along the zipper edge did not go over the lining fabric.
3.Sew the side of the outer fabric and bottom (red line)
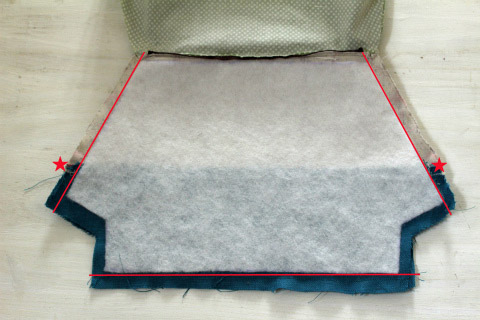
Make sure to align the transition locations (★) precisely.
Sew first around the transition and finish the rest to avoid misalignment.
When using different color fabrics, make sure to apply the thread color that matches the fabric.
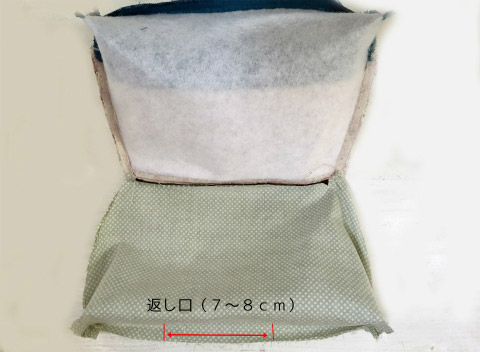
Repeat the process for the lining fabric side (Leave an opening for turning for 7-8cm)
6.Sew the gusset in four locations.
Align the stitch lines of the side and the bottom and sew at 1cm from the edge.
The side will look great when transition fabrics are well aligned.

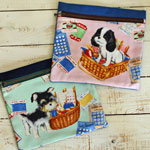 Puppy Pouch
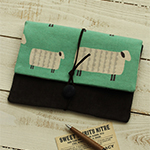 Sheep Shaped Pouch
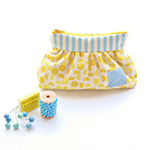 Zipper Pouch with Gathering