
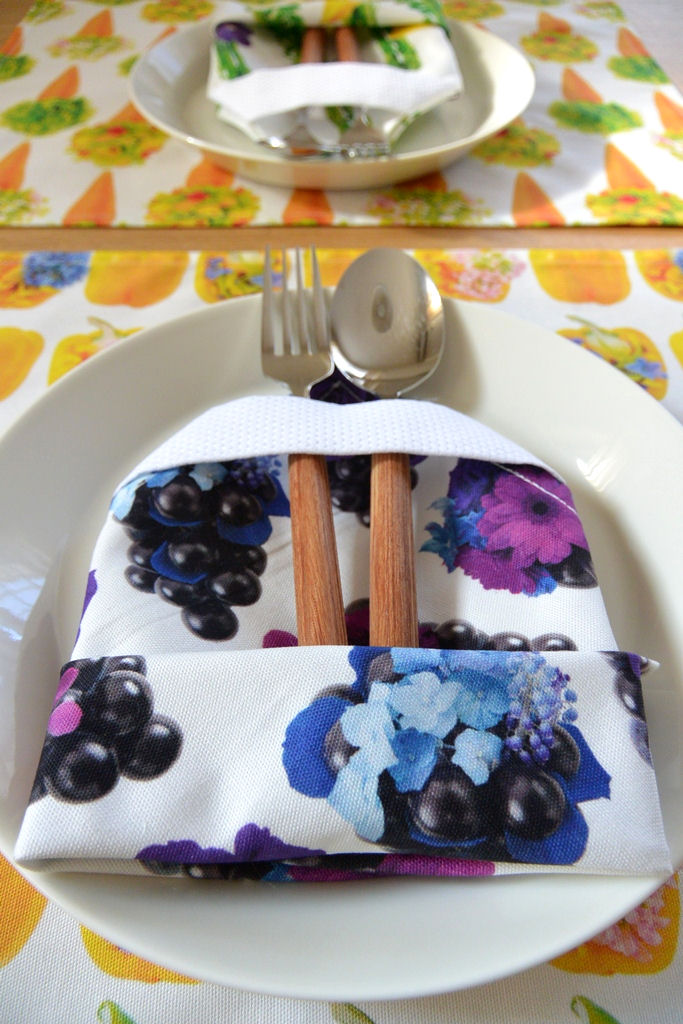
With flowers, fruit and vegetables as design motifs, colorful HANAg (Hanagram) fabric is perfect for making small items for dining occasions. Easy to make cutlery holder for forks and knives is a great item for table styling. Anriko is sharing her creative idea with us.
Fabric shown for this sample: HANAg JG50000-4A
Materials:
□ Fabric
(Main panel): 40cm×40cm
(Holder): 20cm×10cm
We interviewed Anriko about her creation:
Kokka Fabric (KF): What did you think of the fabric you used for this project?
I was fascinated with the realistic color tones of the inkjet printing. If placed on a dining table, this fabric will enhance the taste of an ordinary meal. With this design and texture, I thought it would be perfect to make small items for the kitchen and dining tables that require frequent washing.
KF: Can you tell us any special elements or ideas that you incorporated into this creation?
I call it a cutlery holder, and it came from this idea of how you set the cutlery on a napkin. Rather than making something to simply place or rest the cutlery, it is always fun to create an item with a special element!
KF: What are some tips for making this holder?
Cutting the fabric into a square, I had to think about the tiny misalignment of the weave and print. When cutting, follow the weave as much as possible, without messing up the design. This will create a clean finish and cause little twisting when washed.
KF: How should we use this holder in everyday situations?
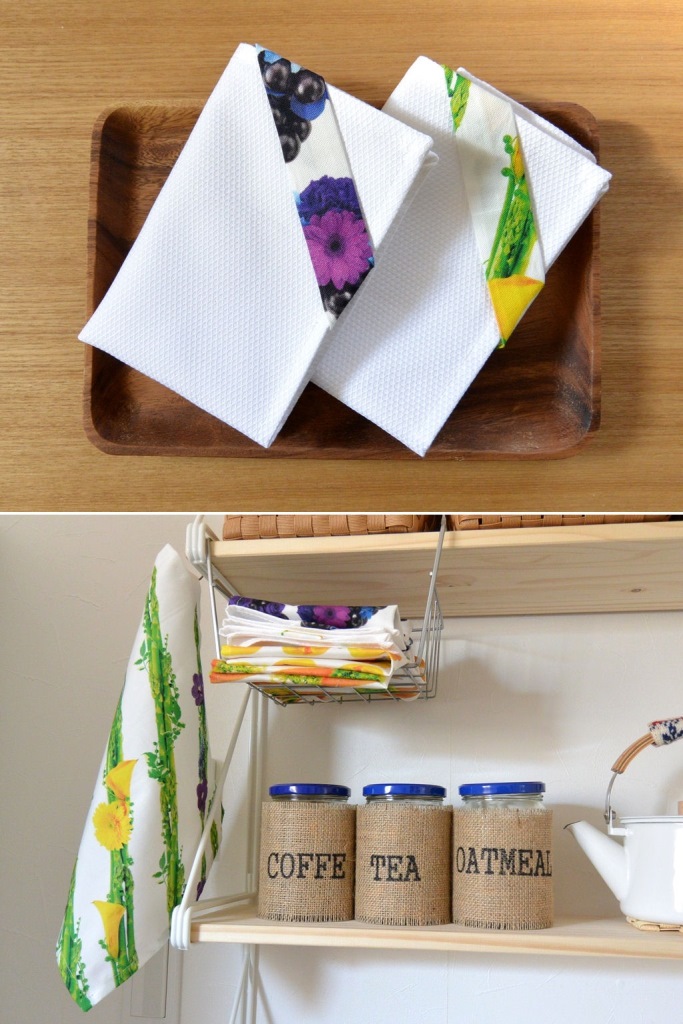
This fabric will look great as a main panel. In addition, I created a piece in a white cotton cloth with a holder using the remnant. Even a small piece can create an accent with its vibrant color. I also recommend adding the remnant to the kitchen towels that you are currently using.
KF: Thank you very much, Anriko! Here are sewing instructions along with step by step photos from her. Enjoy crafting!
Instruction for Cutlery Holder
1.
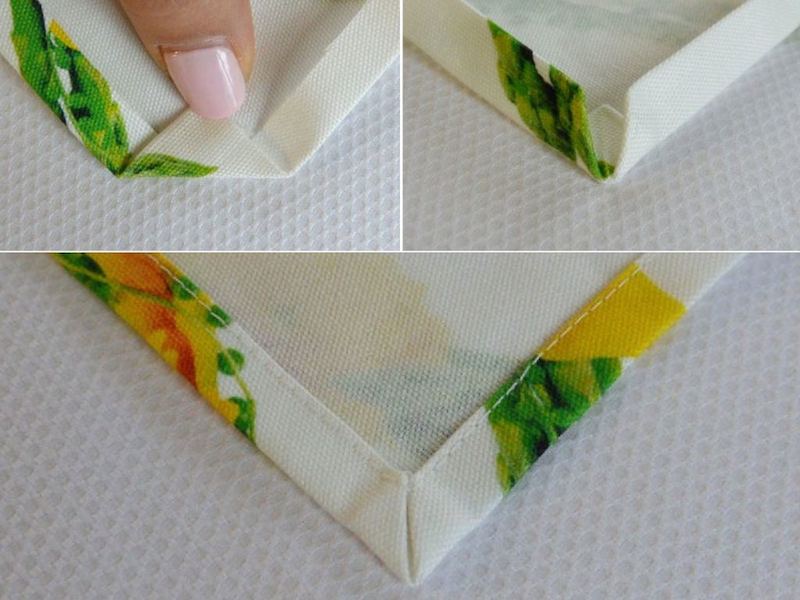
Finish the double folded corner. This is how I do it and I am sharing it for your reference, though there may be other professional ways to do this.
2.
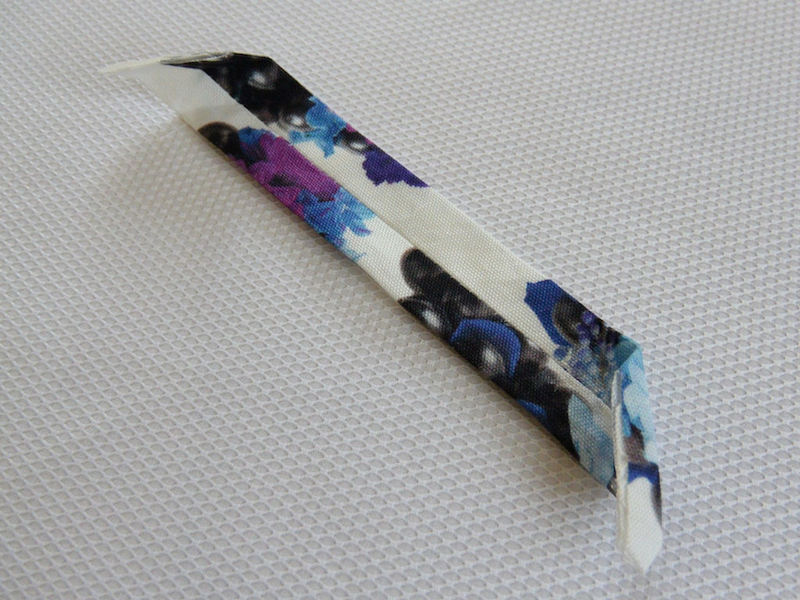
Sew the holder to make a tube. Before attaching it to the main part, score both ends. To make it easy, adjust the angle and length by placing it to the main fabric, rather than trying to stick to the measurement.
3.
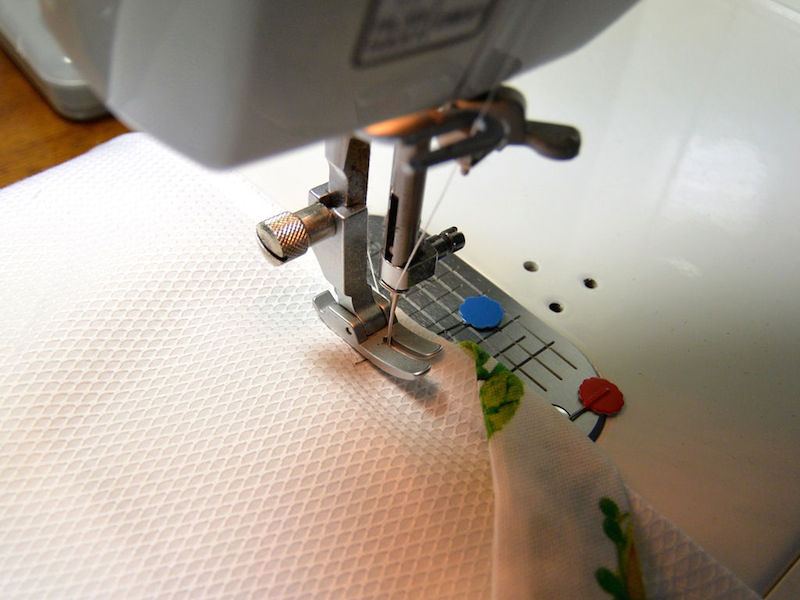
Attach the holder to the main part. You may find it a little difficult to sew. Mark the beginning and end of the sewing line using a pin. You can finish it clean by sewing from the front side, following the stitch marks on the main fabric.
4.
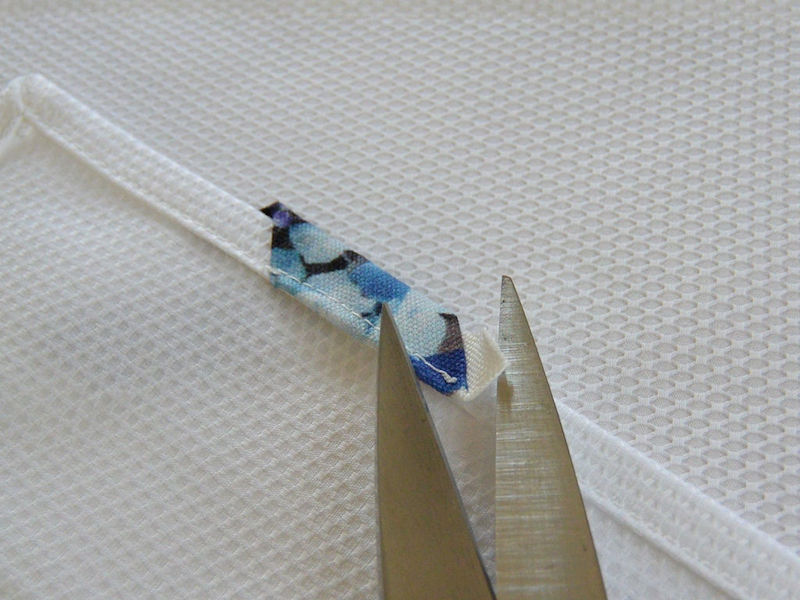
To finish, cut of the excess fabric on the holder on the reverse side.

 Pot Holder
 echino’s oven mitt
 Kitty’s Bucket Shaped Organizer Bag