
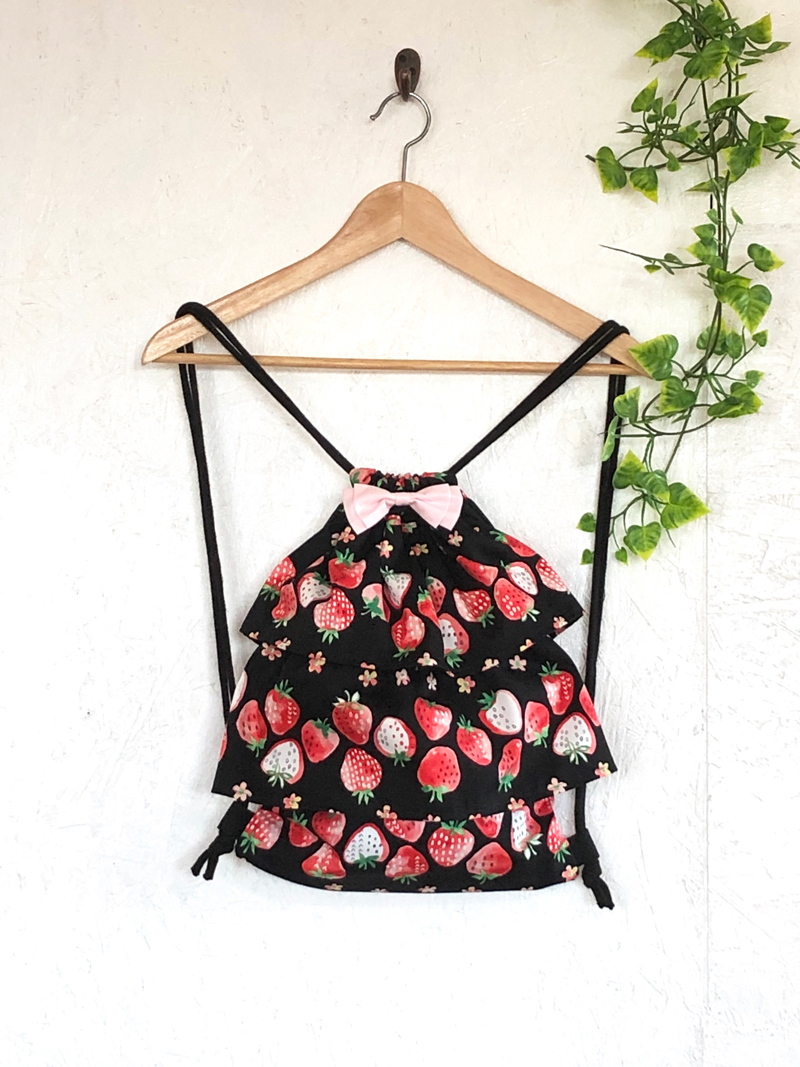
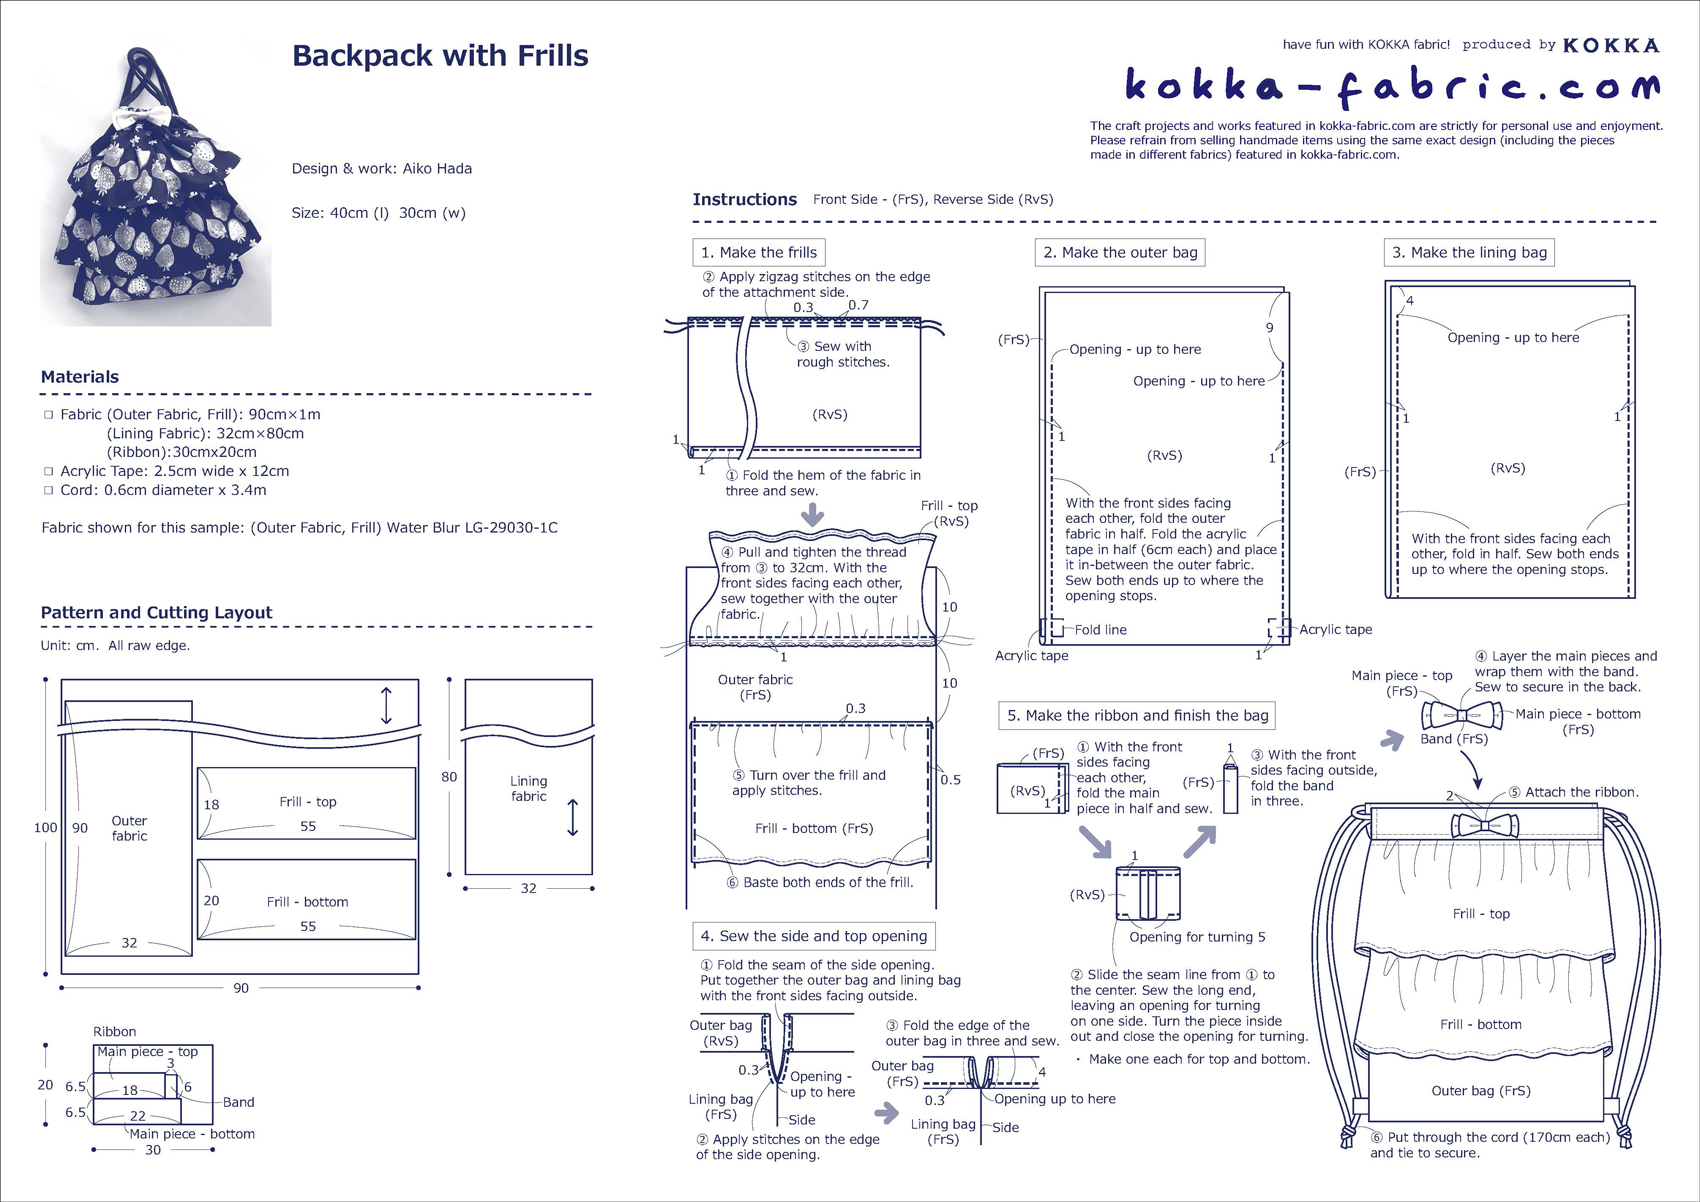
A very popular frilled backpack now comes as a drawstring backpack, perfect for school or everyday use! A lovely soft graphic strawberry print from the Water Blur series is featured. By adjusting the straps to be longer, kids can carry the bag over a Randoseru (Japanese style backpack), making it even more handy.
Fabric shown for this sample:Water Blur LG-29030-1C
Materials:
□ Fabric (Outer Fabric, Frill): 90cm×1m
(Lining Fabric): 32cm×80cm
(Ribbon):30cmx20cm
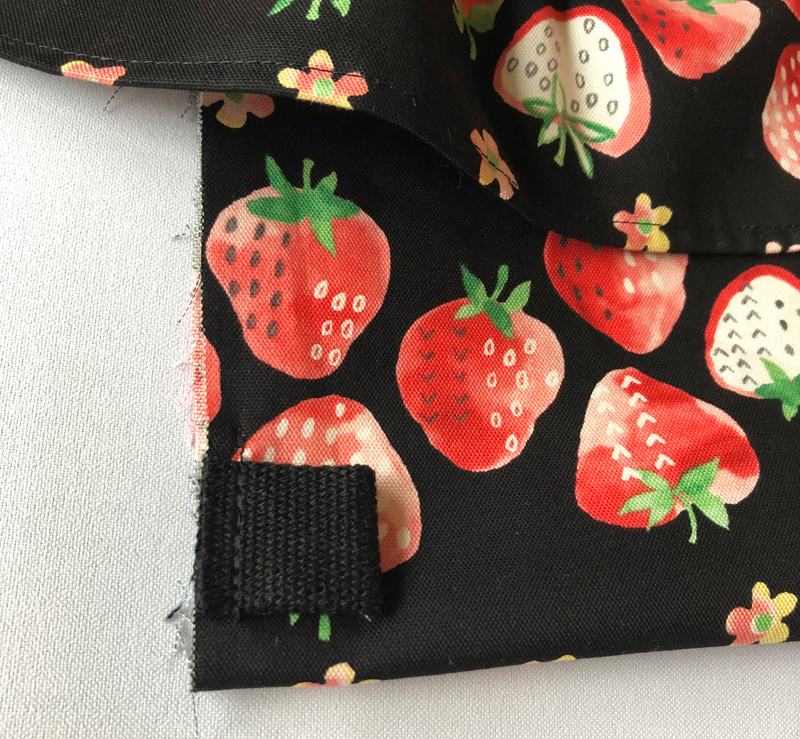
□ Acrylic Tape: 2.5cm wide x 12cm
□ Cord: 0.6cm diameter x 3.4m
Size: 40cm (l) 30cm (w)
We interviewed Aiko about her creation:
KF (Kokka Fabric (KF): What did you think of the fabric you used for this project?
The juicy looking fresh strawberries in watercolor tones looked really delicious. The size of the strawberries is almost real like a large piece, about 4cm.
KF: Can you tell us any special elements or ideas that you incorporated into this creation?
When you tighten the straps, this drawstring backpack creates a lovely shape like a frilled skirt. I paid attention to have a balanced look in both width and length. Imagining the finished look, entertaining different color combinations for the ribbon and strap was fun.
KF: What are some tips for making this bag?
When attaching the gathered piece, align the center and the bag fabric, then spread it little by little for a uniform look. If you are worried, baste it first for a clean finish.
KF: How should we incorporate this bag into one’s styling?
everyday use. When taking it to school, extend the strap so that the kids can carry it over a Randoseru (Japanese style backpack). Why not create one to make it your kid’s favorite?
KF:Thank you very much, Aiko! Here are sewing instructions along with step by step photos from her. Enjoy crafting!
1.
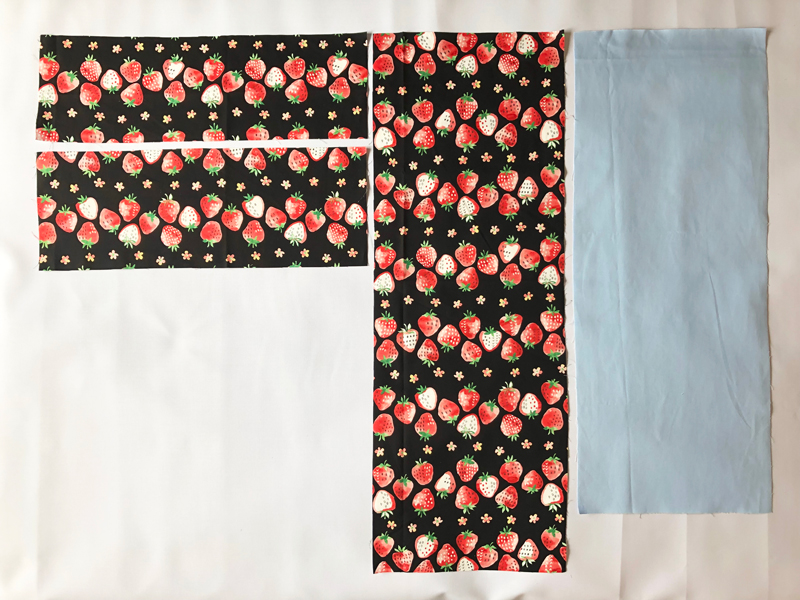
Cut outer fabric and lining fabric per the specified measurement.
2.
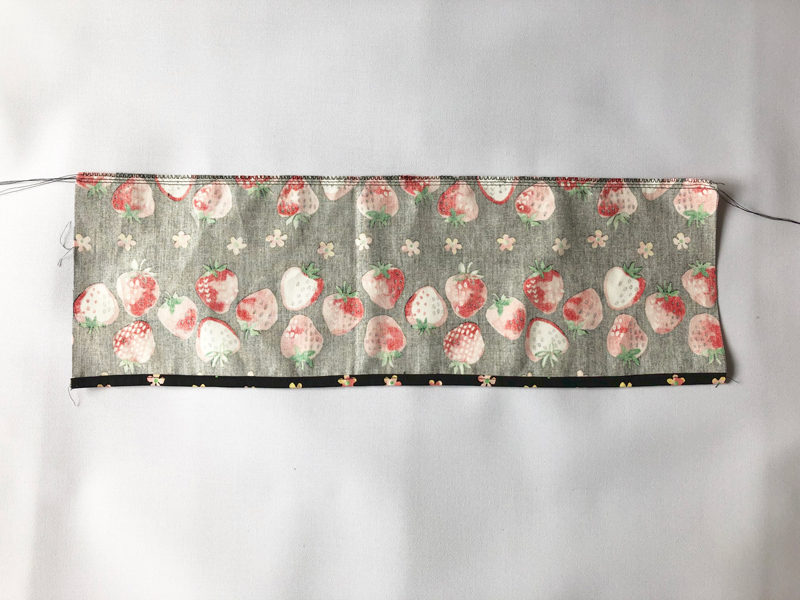
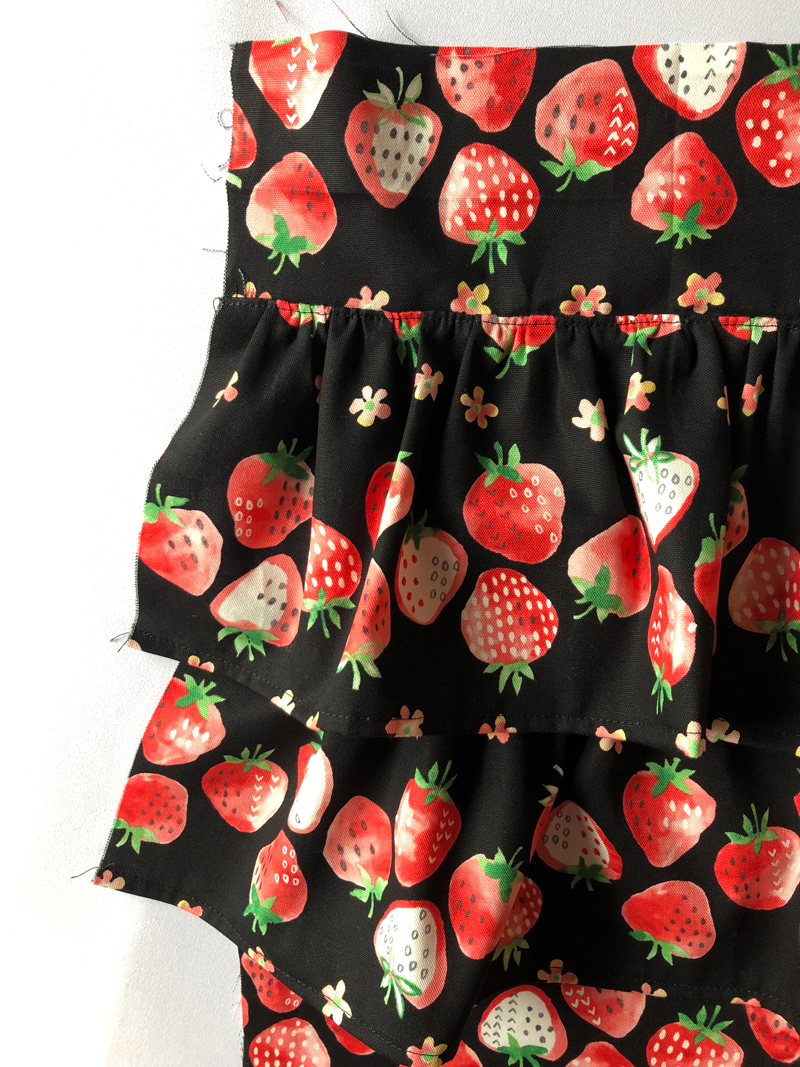
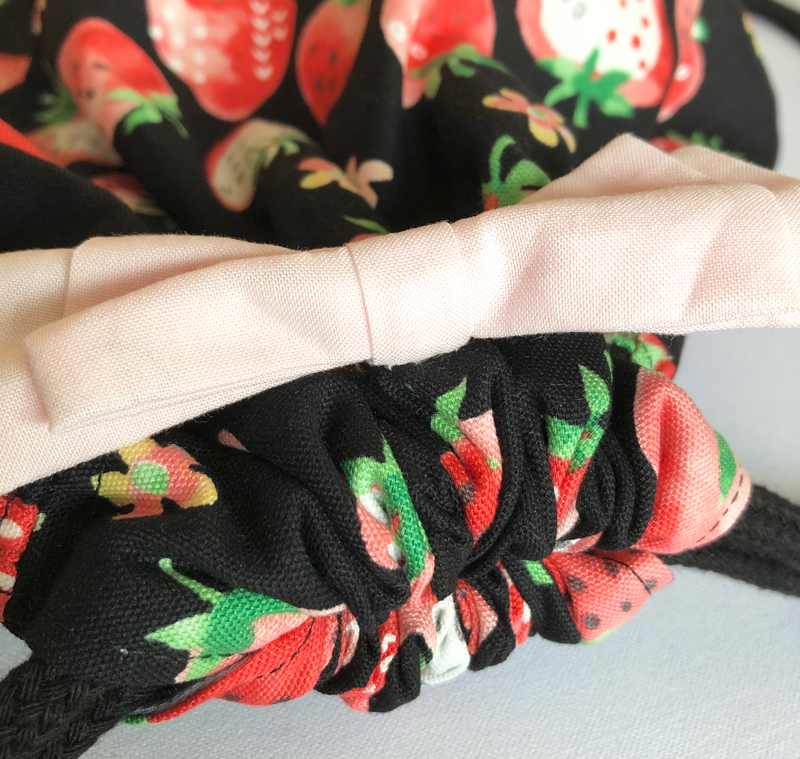
Fold the hem of the frill in three to 1cm seam and sew. Apply zigzag stitches on the edge of the attachment side.
3.
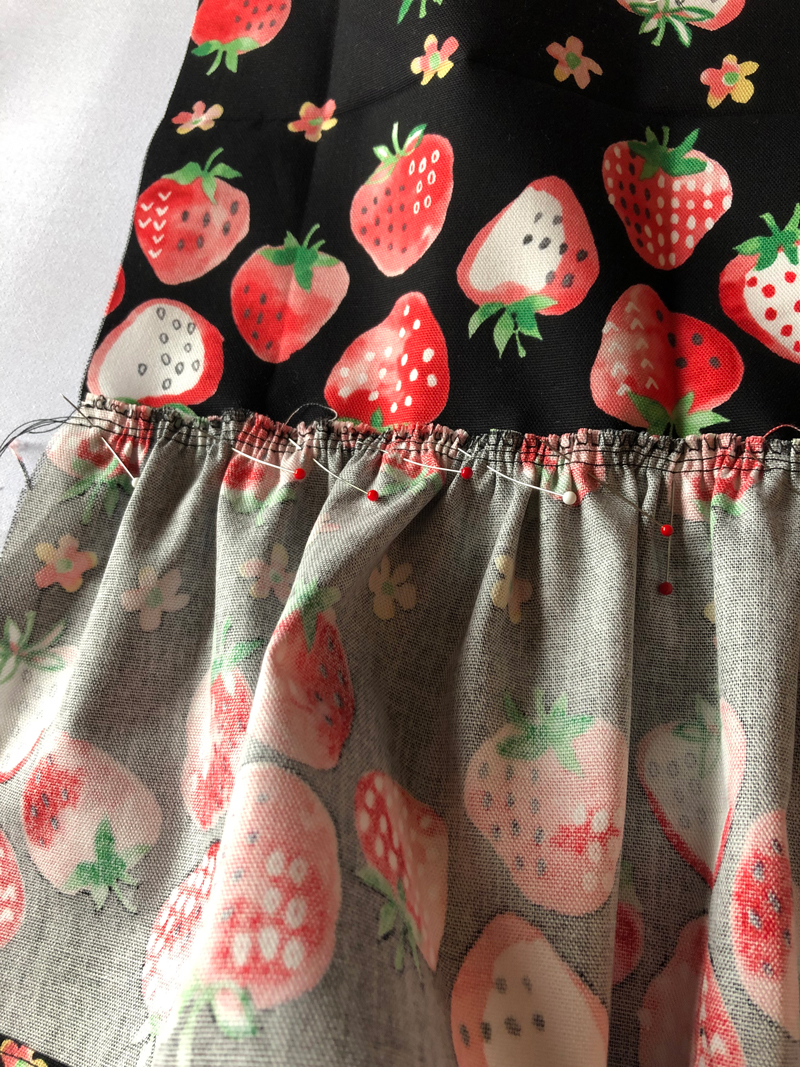
Score the location where the frill is attached. Align the scored line and edge of the frill fabric to adjust the gathering.
4.
 g
g
Turn over the frill and apply stitches.
5.
Before sewing both ends, baste the frills to avoid misalignment.
6.
 g
g
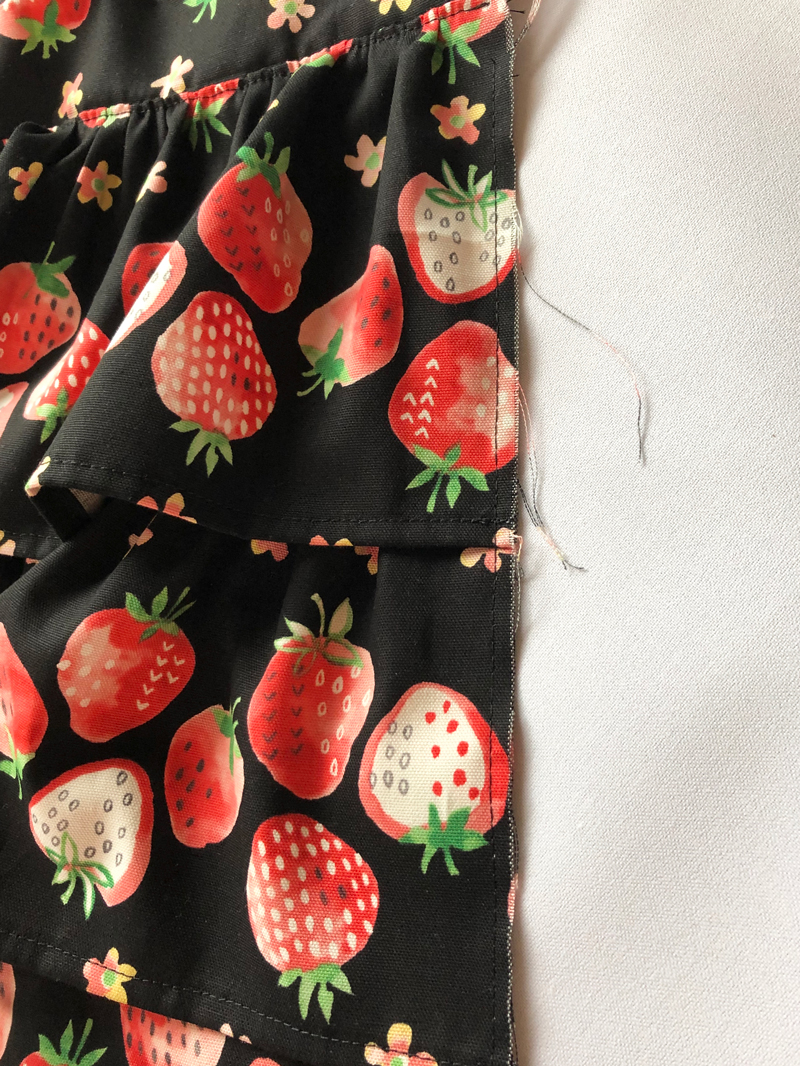
Fold the acrylic tape (for the cord) in half. Baste it at about 1cm above the top of the folded hem. With the front sides facing each other, fold the outer fabric in half and sew both ends.
7.

Once both ends of the lining fabric are sewn, iron the cord opening on the outer fabric and align the fabric edge. Fold the seam of the cord opening and apply stiches to prevent fraying. Sew together the outer and lining fabrics.
8.

Fold the cord opening in three and sew.
9.
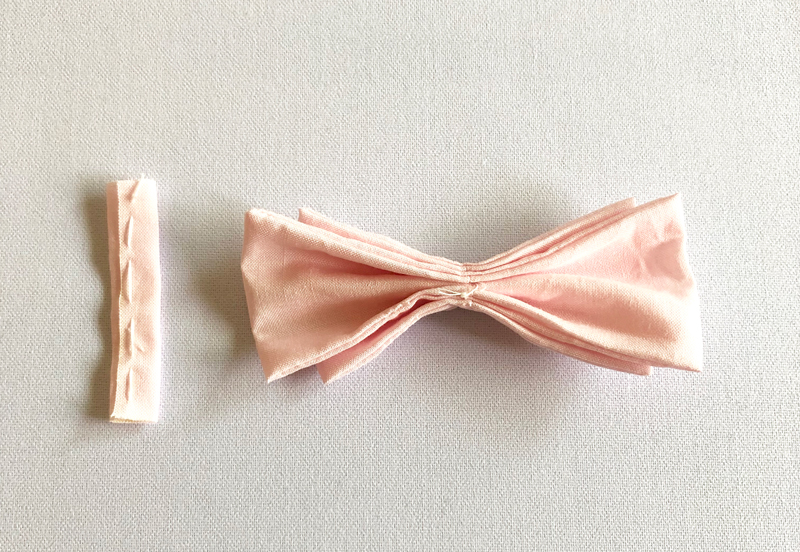
Cut the ribbon and gather the double-layer ribbon.
10.
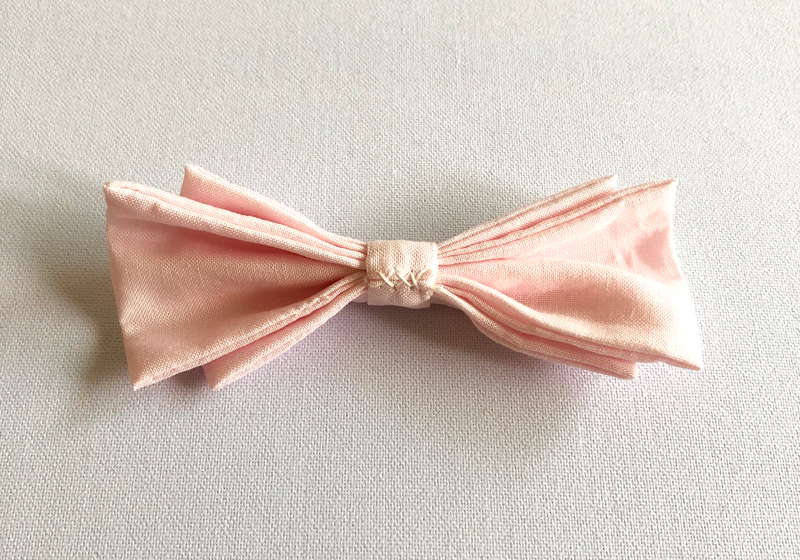
With the front sides facing outside, fold the center band piece in three. Wrap the ribbon with the band and sew to secure in the back. Picture shows the backside after the band is sewn.
11.
Attach the ribbon in the center. Please be careful not to accidentally sew together the inner portion of the cord opening. Put through the cord to finish.
◎Sewing Instructions (PDF format / A4 size)

 Backpack Sewing Instructions
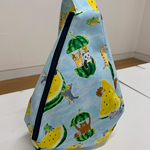 Body Bag – Sewing Instructions
 Two-Way Cross-Body Bag – Sewing Instructions