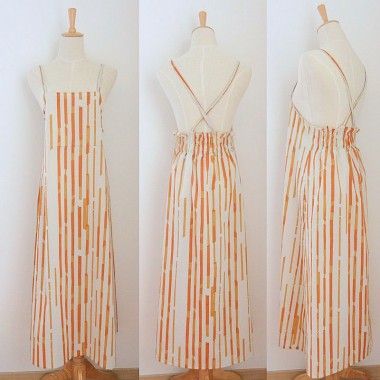
The featured project is a saloppete (overall) skirt in stick from the 3min. 2017ss collection that was also introduced in the textile story column.
This skirt proves that you can create something cool and stylish with an easy sewing that doesn’t require a zipper or buttons. The adjustable shoulder strap gives you a flexibility to enjoy it as a short tunic, styled with a pair of pants.
Fabric shown for this sample:3min. JGA20060-1D
Materials:
□ Fabric: 110cm wide x 2.1m
□ Double fold bias tape: 12.7mm wide x 1.5m
□ Elastic tape: 0.4cm wide x 90cm
We interviewed Anriko about her creation:
Kokka Fabric (KF): What did you think of the fabric you used for this project?
It has a very nice feel to the touch and it allows you to wear it directly against your skin. So I came up with a piece that can be enjoyed from spring to summer.
KF:Can you tell us any special elements or ideas that you incorporated into this creation?
It is one size fits all, but I paid special attention to create a slim silhouette. Without using a zipper or buttons, easy sewing process was my focus.
KF:What are some tips for making this skirt?
The model is wearing as a size 158cm9AR (size 4 US equivalent). When you make it larger, allow for a longer elastic used for shirring. If you want to make it smaller, depending on the size, try to make the overall size smaller rather than shortening the elastic length.
KF: How should we use this skirt in everyday situations?
It is a thin material so you need to wear something underneath. While this sample is made in a longer length, it will look cute in a shorter length when worn with a pair of pants.
KF: Thank you very much, Anriko! Here are sewing instructions along with step by step photos from her. Enjoy crafting!
Instructions
1.
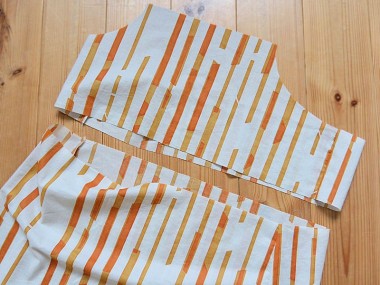
The sides of the body and skirt are pieced together (as shown). No tuck or gathering is used. Once you sew together these two tubed pieces, you will see what the finished skirt will look like.
2.
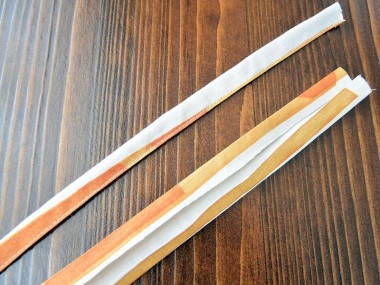
With this fine fabric, the shoulder strap is thin and frail. Rather than turning over the sewn pieces, the fabric will be folded (ironed) and the stitches are applied on top. Adjust it to match your height. (The pattern shows a longer measurement.)
3.
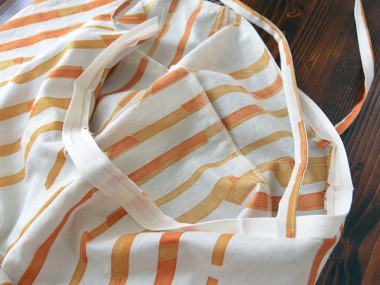
Instead of using a straight tape or facing, a store bought double fold bias tape is used for an easy sewing. Start with the back side of the shoulder strap by placing it in-between and finish the sides and the back.
4.
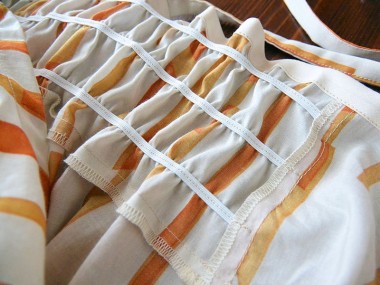
Thin flat elastic tape (often used for underwear) is applied here. To make it more decorative, a simple shirring technique is used. When you attach the elastic, you need to stretch it as you sew. Try to mark a halfway point so that you can evenly distribute the elasticity.
5.
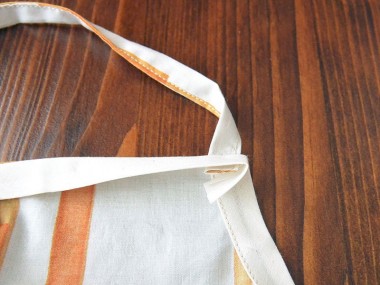
Try it on first to determine the length of the shoulder strap. Place the front part of the strap in-between and finish the front edge with a bias tape. Cut the tape with some allowance and finish it with a fold as shown in the picture for a clean look.



 Reversible Skirt
 Gathered Skirt with a Ribbon Accent
 Camisole Dress- Sewing Instructions