
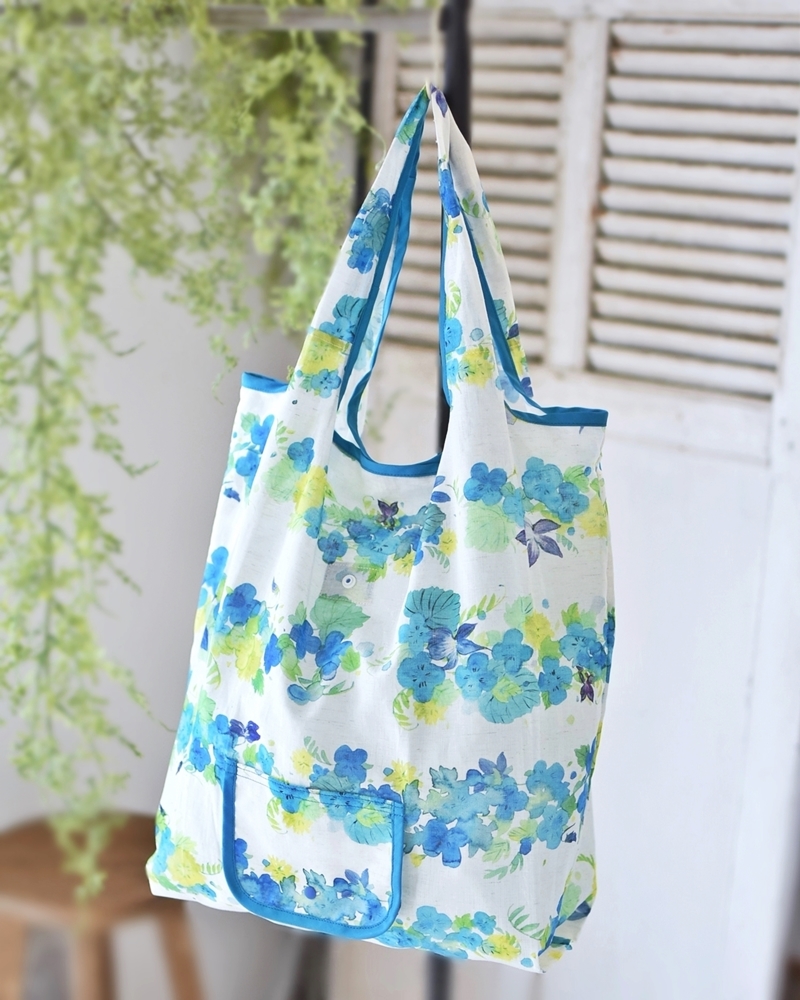
Eco bags have become a standard item to carry around when going out. It has also become important that a bag is compact and foldable yet stylish. The featured bag has a flap with piping. Sewing the piping is actually easy to do, and it creates a beautiful finish.
The fabric used is “haru saku ao” from the “yui” series. It is the textile brand of Ayano Ichiyanagi who is a painter and designer. Since it is inkjet printed, the colors are very attractive. This thin cotton linen compass material is perfect for shopping bags.
Fabric shown for this sample:EGXA-6408-1A
Materials:
□ Fabric (Main Portion, Flap, Handle, Patch Fabric): 110cm wide × 50cm
(Flap Lining Fabric): 14cm × 11cm
□ Fusible Interfacing: 6 x 3cm
□ Bias Binding Tape: 2cm wide x 2.6m
□ Plasnap Button: One Pair (0.9cm diameter)
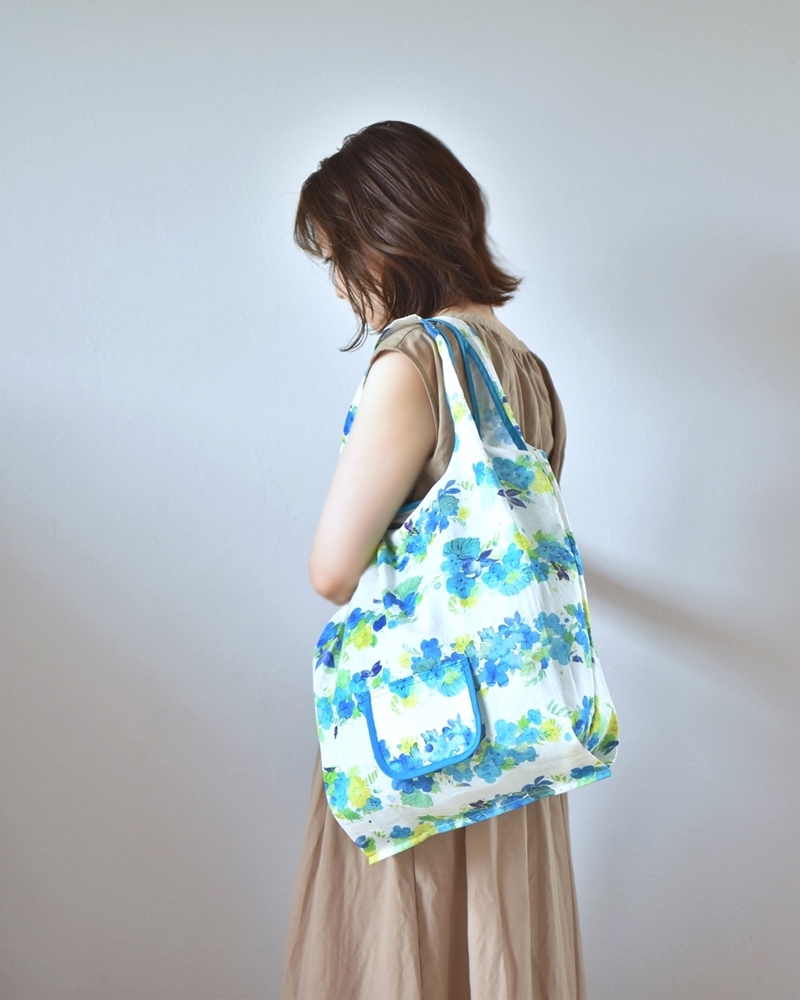
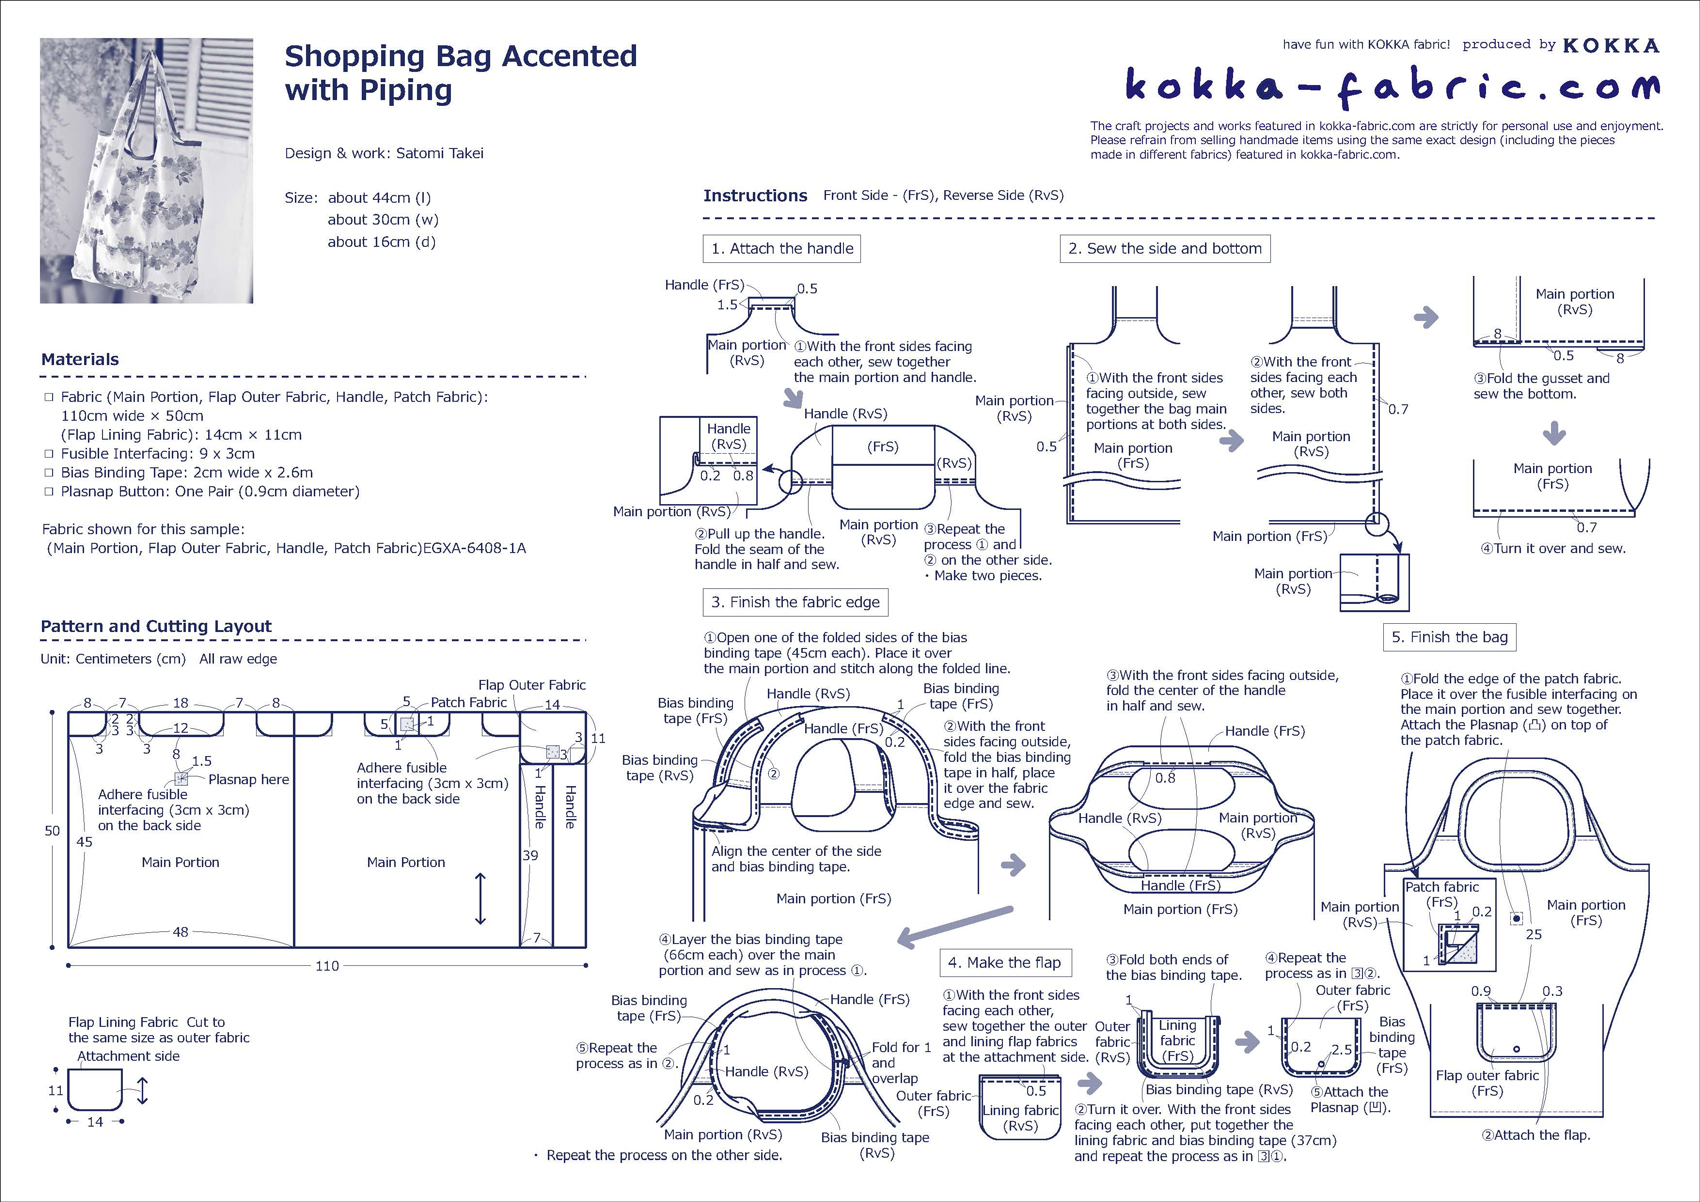
Size: about 44cm (l) about 30cm (w) about 16cm (d)
We interviewed Satomi about her creation:
Kokka Fabric (KF): What did you think of the fabric you used for this project?
It has a wonderful floral pattern like a painting. To make use of this beautiful design, I came up with a large shopping bag that is perfect for summer.
KF: Can you tell us any special elements or ideas that you incorporated into this creation?
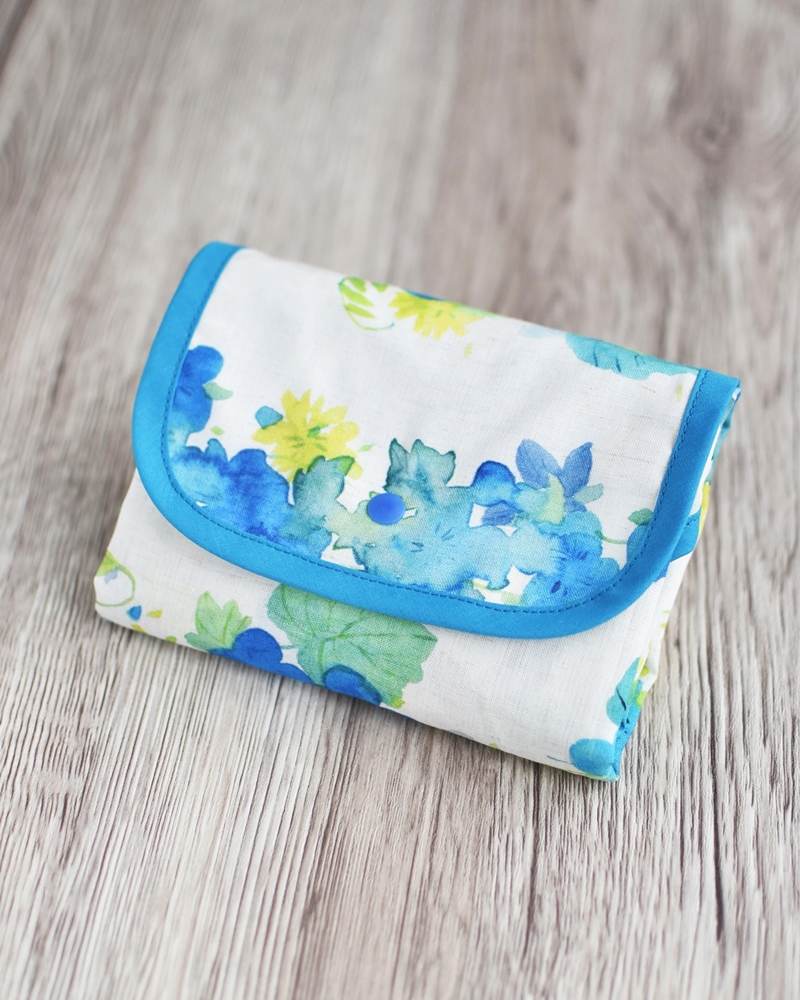
I have gotten into the habit of carrying a reusable bag or shopping bag when going out. When doing so, I tend to choose one that is compact and stylish when folded. The flap finished with piping has a beautiful appearance with an elegant look.
KF: What are some tips for making this bag?
Many people find sewing piping tape challenging, but it is actually easy to handle. The finish is more beautiful than the folded edge treatment, especially around the curves. For the curved part, sew the piping tape slowly along the main portion.
KF: How should we use this bag in everyday situations?
The shopping bags you use every day should be made of washable cloth for convenience. The use of piping helps to reinforce the handles made of this light and easy-to-dry thin fabric. In addition, it creates and enhances the beautiful appearance. To appreciate a different look, you can change the colors of the fabric and bias binding tape. Make your shopping even more enjoyable with your handmade shopping bag.
KF: Thank you very much, Satomi! Here are sewing instructions along with step by step photos from her. Enjoy crafting!
Instructions
1.
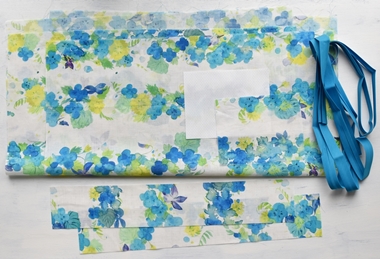
Prepare the fabric and bias binding tape.
2.
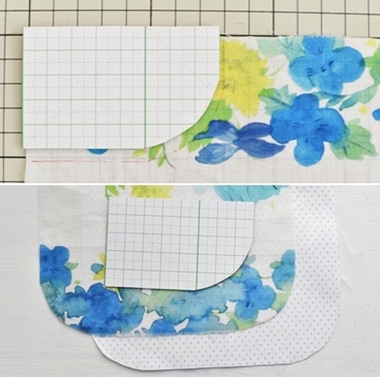
Cut the main portion and flap fabric as shown. Use a cut out of the construction paper (as shown) for a consistent and clean look of the curve.
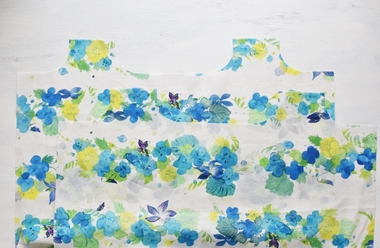
The curved corners of the main portion is cut.
3.
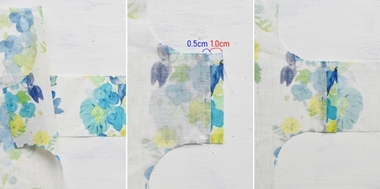
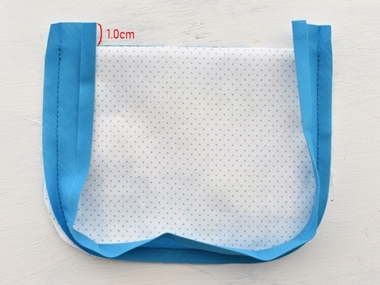
With the front sides facing each other, sew together the main portion and handle fabric. Layer the main portion over the handle fabric, leaving 1cm of the handle uncovered. Sew at 0.5cm from the fabric edge.
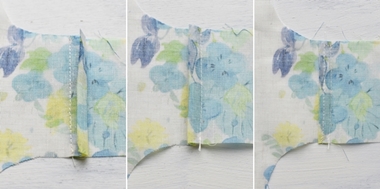
Open the handle and fold the seam as shown, pressing it down to the main portion side and apply stitches.
This is called the flat-felled seam. Repeat the same process for the remaining portions of the handles.
4.
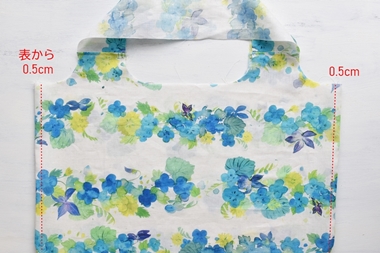
Sew together the sides from the front side first at 0.5cm from the edge.
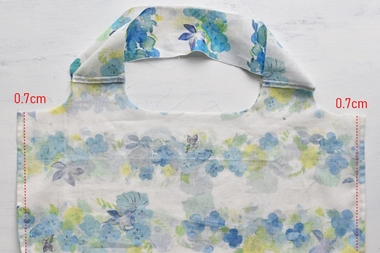
Turn it over to the lining side. Press the fabric using an iron and sew at 0.7cm from the edge.
5.
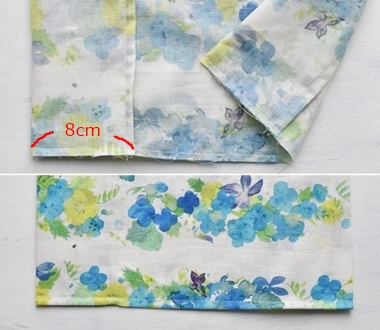
Fold the right and left side of the bottom for 8cm and sew. The key is to fold the left side to the outer side, and the right side to the lining side.
6.
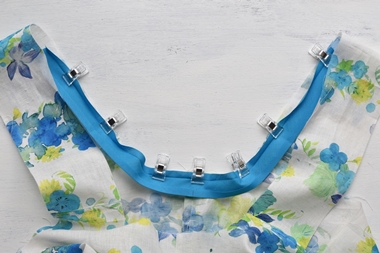
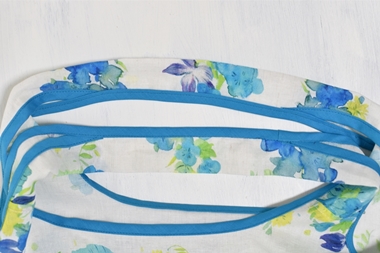
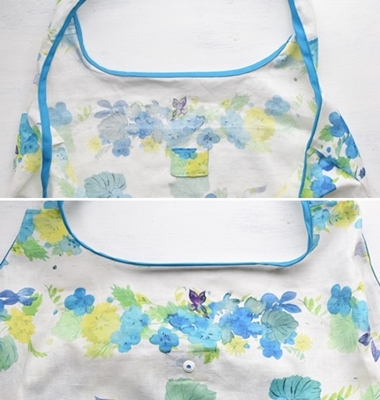
Attach the bias binding tape on the outer side of the handle. Align the center of the bias binding tape and the side of the main portion.

Fold the bias binding tape to wrap the main portion. Apply stitches from the outer side to secure.
7.
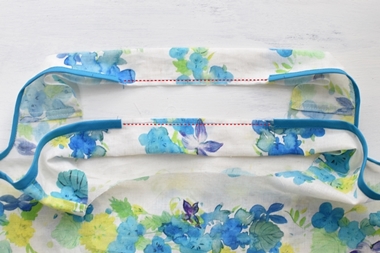
Once the bias binding tape is sewn onto the outer portion of the handle, fold only the center portion of the handle in half and sew together.
8.
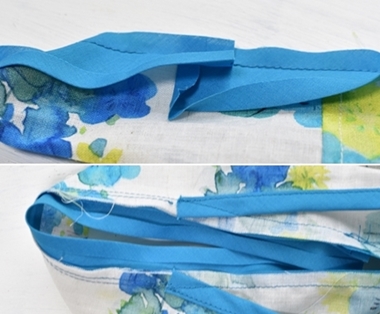
Attach the bias binding tape all the way around of the inner side of the handle. Spread the handle little by little when sewing the area where the tape overlaps with the tape from the outer portion. Concealing the edge of the binding tape on the outer side creates a clean look, but you do not need to worry too much as the inner side does not show much.
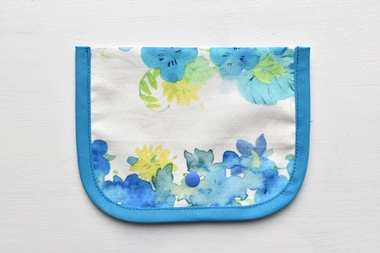
The bias binding tape is now sewn as an attractive piping.
9.
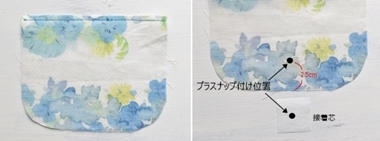
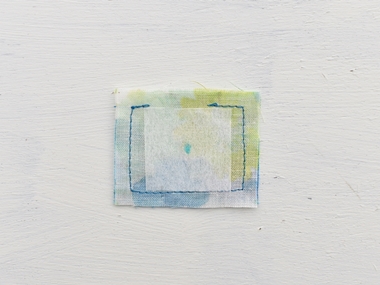
Make the flap. With the front sides facing each other, sew together the pieces at 0.5cm from the top edge. To reinforce the area for the Plasnap, attach the fusible interfacing with an iron on the center where the snap will be placed.
10.
Attach the bias binding tape from the lining side. Leave about 1cm extra at both ends.
11.
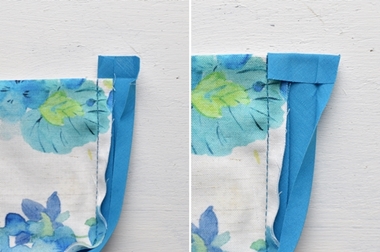
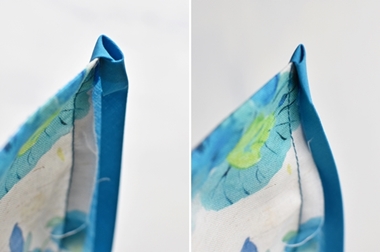
Fold the ends carefully as shown. Apply stitches from the outer side to secure. Attach the Plasnap.
12.
Make the patch fabric piece for Plasnap attachment. You could use a remnant from Step 2. For a stronger piece, adhere fusible interfacing.
Sew the patch fabric on the main portion where the Plasnap is placed. Attach the Plasnap from the outer side.
13.
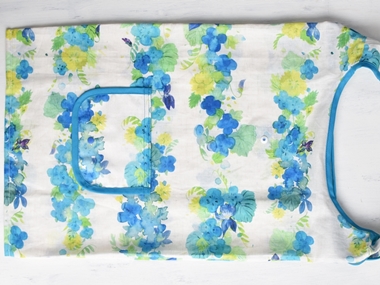
Using double stitches, attach the flap. Finished!
14.
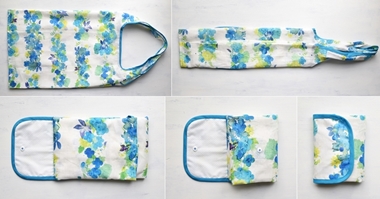
Place the bag with the flap side down and fold.
◎Sewing Instructions (PDF format / A4 size)

 Patchwork Style Lovely Vanity Case – Sewing Instructions
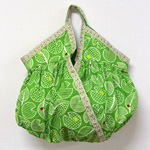 Gathered “Cashe coeur” Bag
 Multi-Purpose Case – Sewing Instructions