
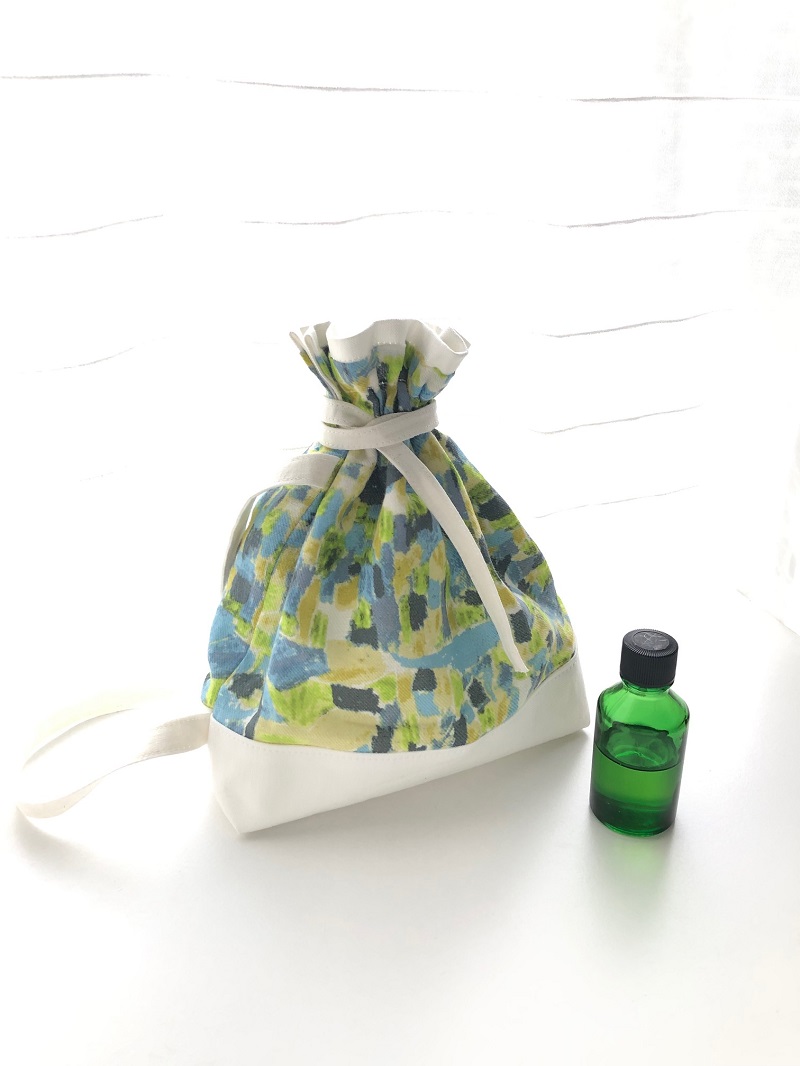
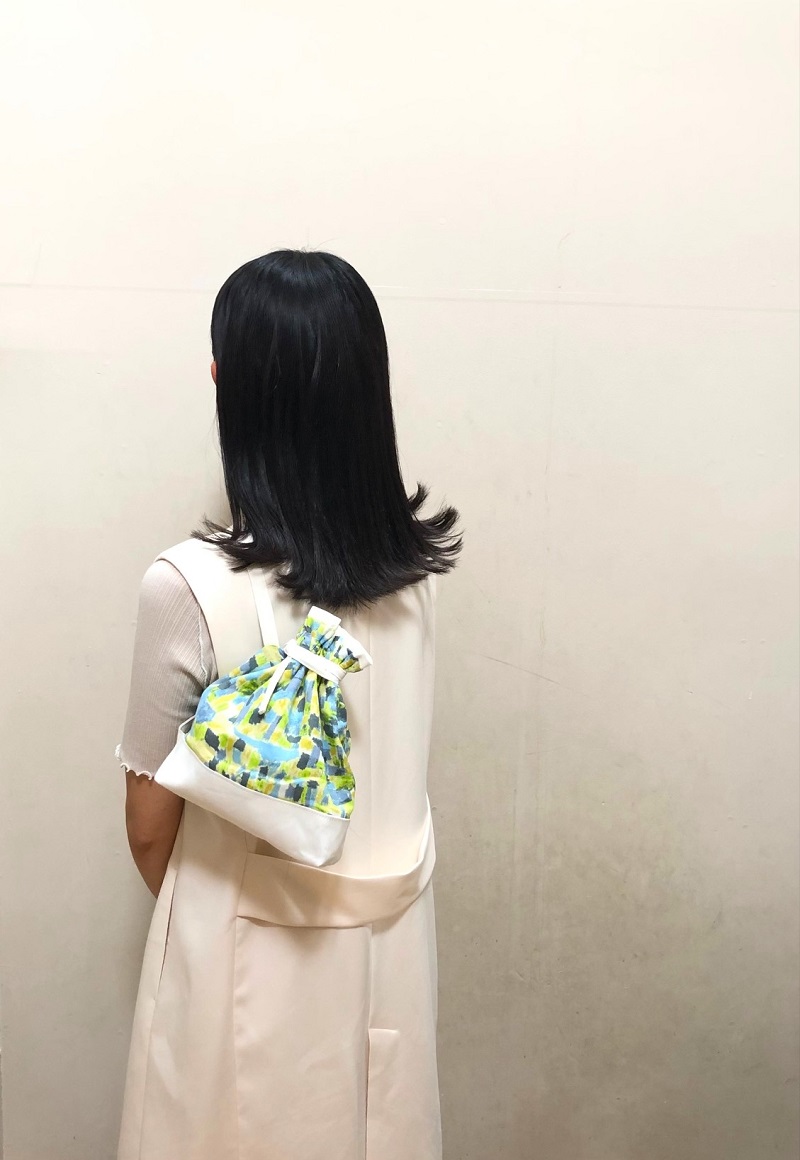
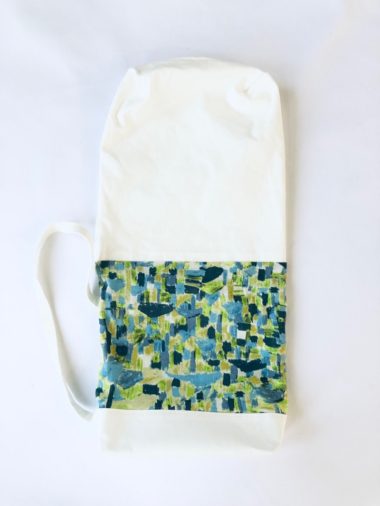
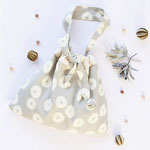
This is a convenient bag with a shoulder strap, a unique feature for a drawstring bag. The fabric used, [MOUNTAIN] from the “KESHIKI” series, showcases patterns of a town lined with buildings and a mountain landscape. The motifs are lined up without gaps in the design, so you can make the items without worrying about matching the patterns or how you cut the fabric. The soft and silky cotton linen viyella fabric is suitable for making clothing such as dresses and skirts.
Fabric shown for this sample:EWX-4020-1B
Materials:
□ Fabric (Bag Panel Outer Fabric): 52cm x 21cm
(Bottom Outer Fabric, Shoulder Strap, Cord, Lining Fabric): 70cm x 70cm
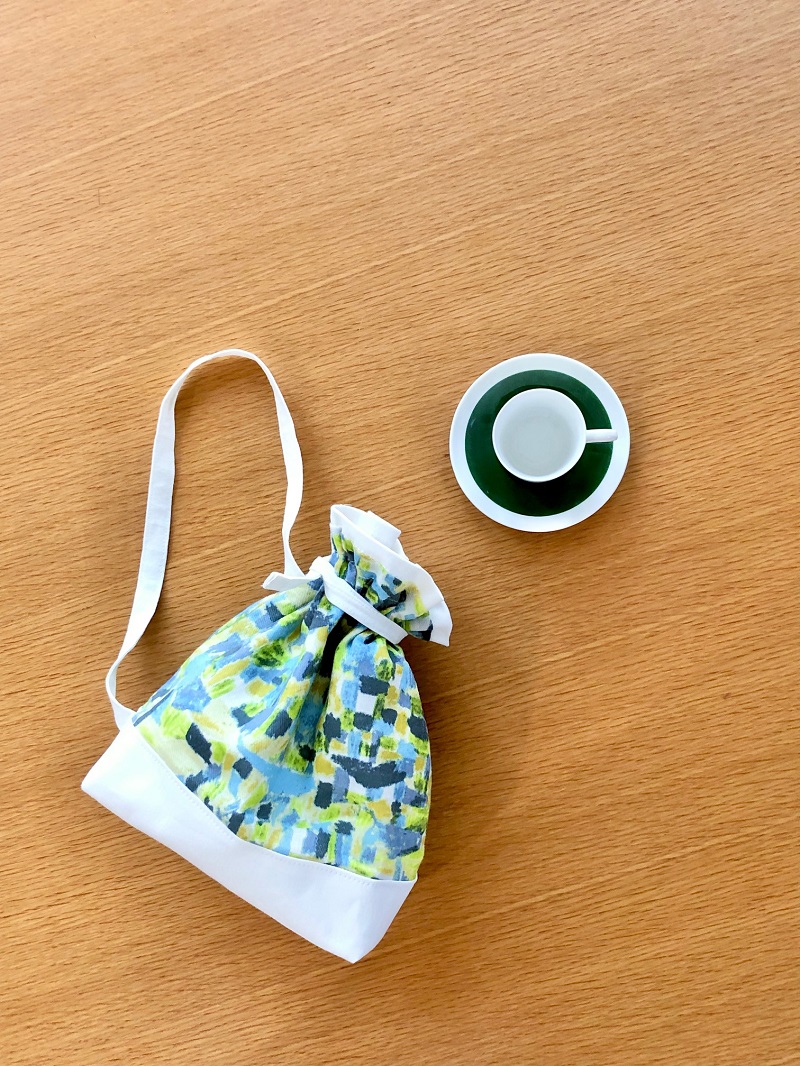
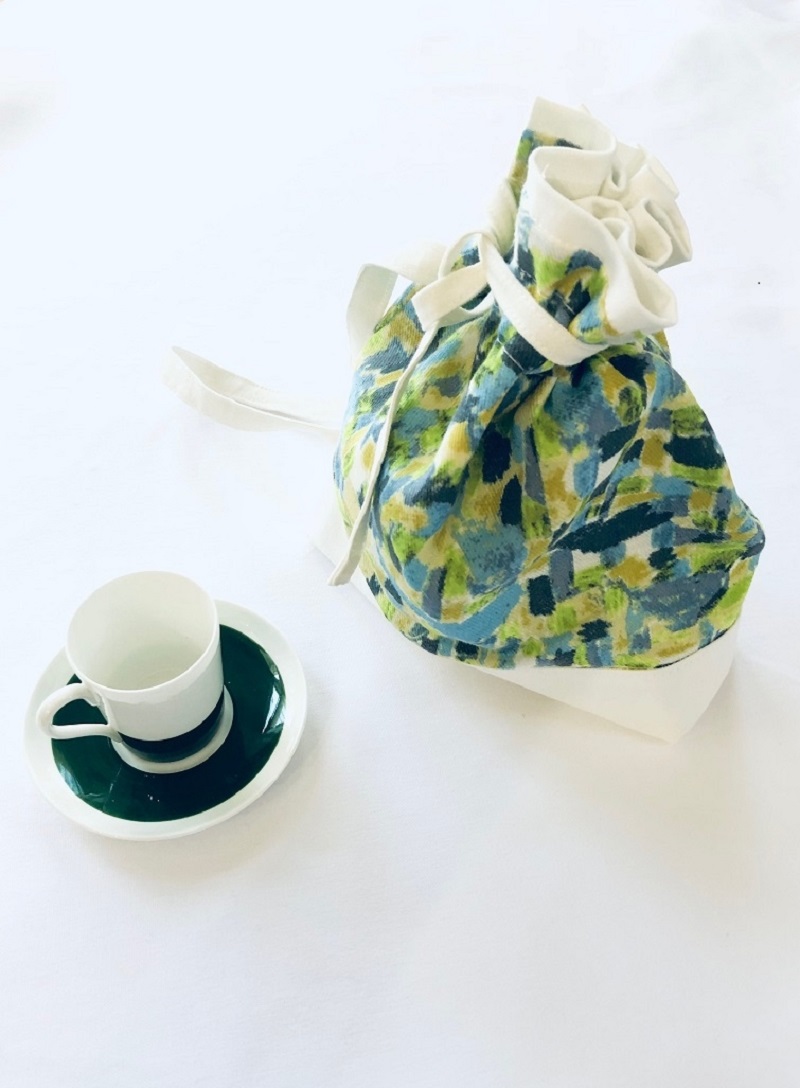
Size:25cm (l) 25cm (w – at opening) 19cm (bottom) 6cm (gusset)
We interviewed Mioko about her creation:
Kokka Fabric (KF): What did you think of the fabric you used for this project?
It is a fabric that looks like a refreshing and pleasant scenery is painted all across. The design is suitable for both small and large items. In order to take advantage of soft and smooth feel of the cotton linen viyella fabric, I created a drawstring bag.
KF: Can you tell us any special elements or ideas that you incorporated into this creation?
As if it was a cut out from a photo of a landscape, I tried to bring the beautiful colors and patterns to life by placing white at the top and bottom. It is designed to be completed even without using hardware or cords, so you can start working on it as soon as you decide to make it!
KF: What are some tips for making this bag?
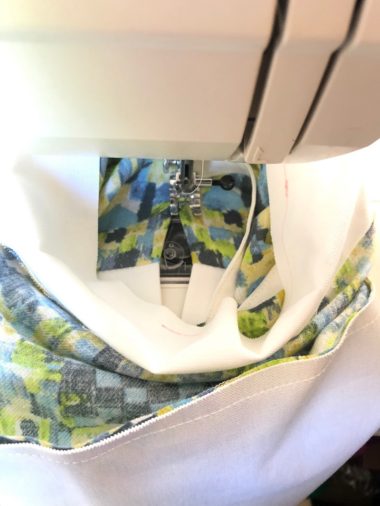
When sewing around the location where it serves both as an opening for turning and for the drawstring cord, the inside of the bag’s tubular body fabric should be facing out, and then slip the presser into the opening part. Loosely hold together the upper portion of the tube so that the opening is clearly visible as you sew.
KF: How should we incorporate this bag into one’s styling?
After the cord is tied, the excess should be wrapped around and tied to secure. It is stylish to leave the cord hanging long by wrapping it around once, or make it compact and neat with two wraparounds. The beautiful color and pattern add a great accent when wearing simple plain outfit.
KF:Thank you very much, Mioko! Here are sewing instructions along with step by step photos from her. Enjoy crafting!
Instructions
Preparation

Prepare the materials. Cut the fabrics according to specified dimensions.
1.
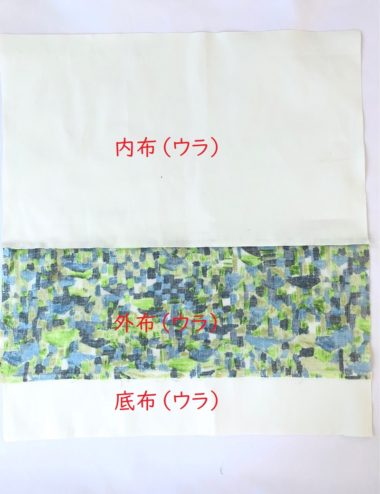
Piece together the upper portion and lower portion of the outer fabric with lining fabrics respectively.
2.
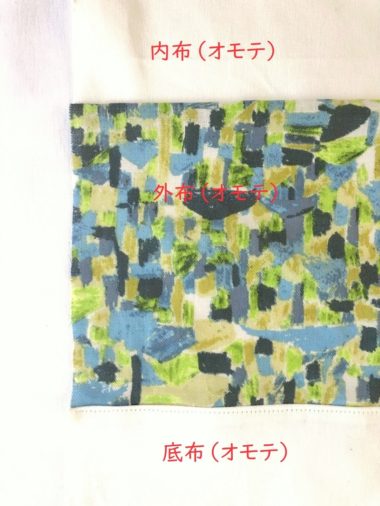
Press down the seam of the outer fabric and bottom fabric to the bottom fabric side and apply stitches.
3.
Fold the shoulder strap in four and sew.
4.
Place the shoulder strap as shown, and fold in half with the front sides facing each other.
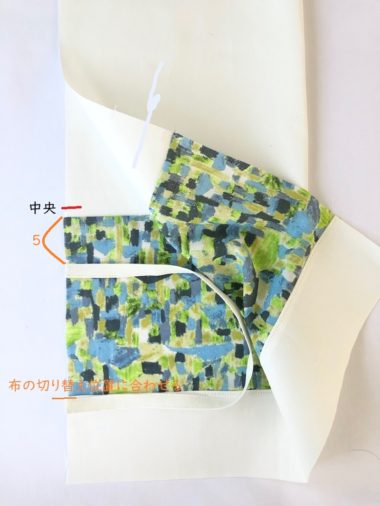
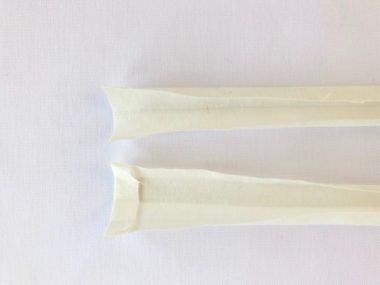
5.
Sew the center of the vertical end, with 10cm unsewn, being careful not to sew all the way to the end.
6.

Press the seam open. Apply stitches around the unsewn area.
7.
Sew top and bottom ends.
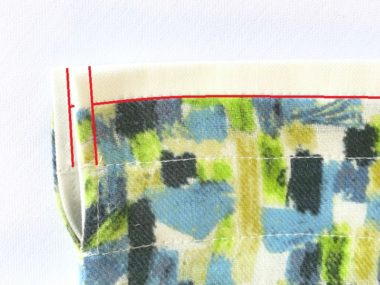
8.
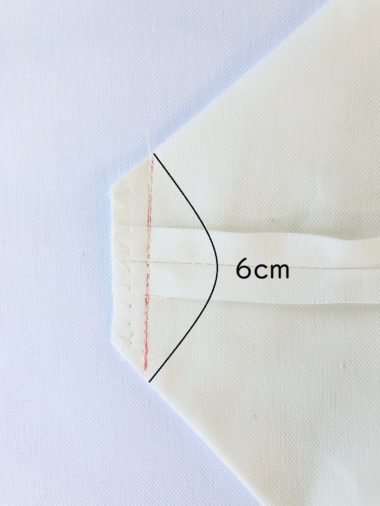
Sew a 6cm gusset. Cut off the end, leaving 1cm seam. Finish the edge with zigzag or rough stitches.
9.
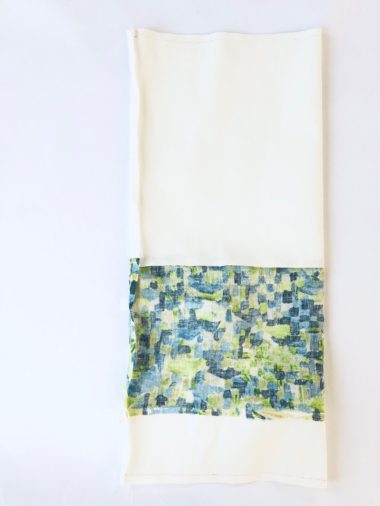
Turn it inside out. Place the lining fabric into the outer fabric (right at the half point of the opening.)
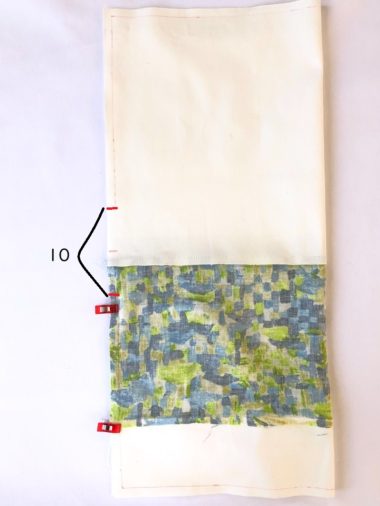
10.
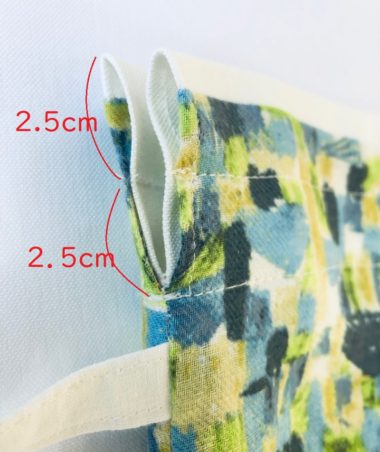
Sew all the way around the top at 2.5cm and 5cm from the top.
11.
From the top, apply vertical stitches for 2.5cm and sew all the way around at the fabric transition.
12.
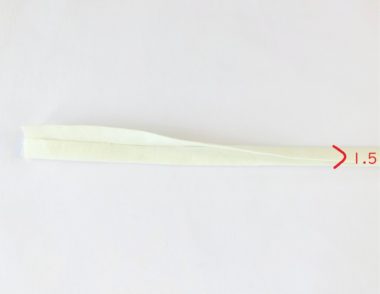
Fold the end of the fabric cord for 1cm, then fold in four and sew.
13.
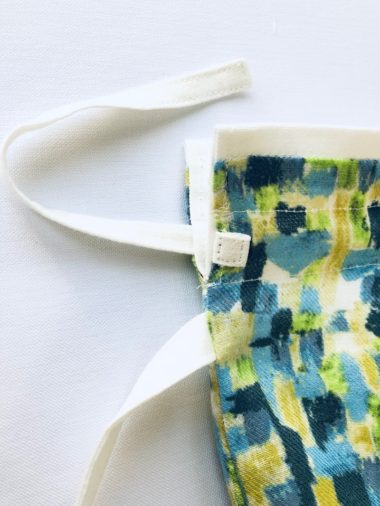
Insert the cord from the folded side. Fold in three to a 1cm square and attach it to the bag body.

◎Sewing Instructions (PDF format / A4 size)

 Drawstring Bag – Sewing Instructions
 Structured Design Nicely Displays The Printed Pattern♪ – Oval Bottom Drawstring Bag – Sewing Instructions
 Frilled Drawstring Backpack Sewing Instructions