FREE SEWING TUTORIALS
Carpenter Tool Tote Bag in #9.5 Canvas – Sewing Instructions
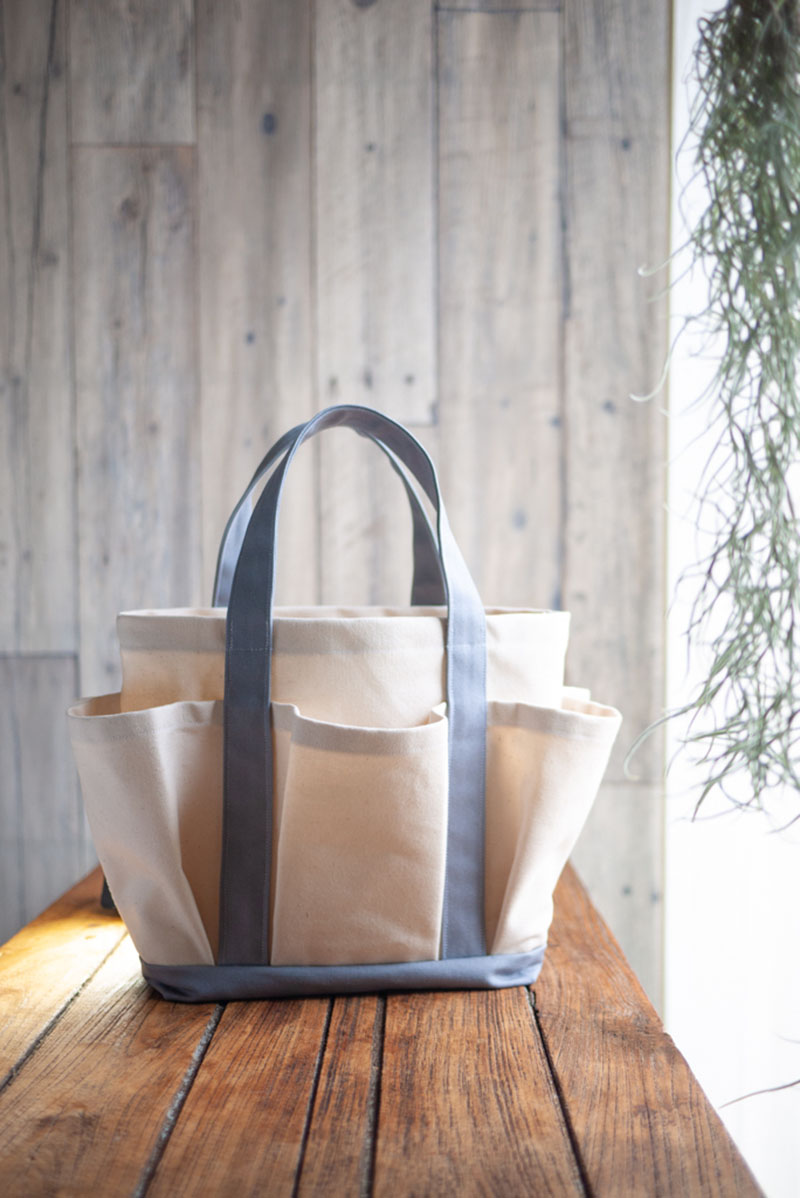
With handy outer pockets all around the exterior, this tote bag comes in a #9.5 canvas from the NUNO TO MONO series. The thickness of the #9.5 material is positioned between the #8 and #11 canvases. The appealing character is that the material’s thickness is enough to support the bag to hold its shape. Besides ecru beige, it features seven colors including gray, khaki and navy. By incorporating different hues of the same #9.5 canvas for the bottom and handle, you can play with color combinations.
Fabric shown for this sample:(Bag Body・Pocket)YK-530 1A (Bottom Fabric・Handle)YK-530 1G
Materials:
□Fabric (Bag Body・Pocket):100cm×50㎝
(Bottom Fabric・Handle):60cm×80cm
Size: 23cm(l) 32cm(w-at the top) 22cm(bottom) 10cm(d)
We interviewed Yui about her creation:
Kokka Fabric (KF): What did you think of the fabric you used for this project?
I was looking forward to the release of Kokka’s canvas fabric. The unique thickness of the #9.5 canvas is very firm! Since the material’s thickness is enough to support the bag to hold its shape, I came up with an exceptionally functional carpenter tool tote bag. Also with some softness, this fabric is easy to sew and has a wonderful texture.
KF: Can you tell us any special elements or ideas that you incorporated into this creation?
While it can hold many items, the bag is not too big. A lovely shape is achieved with outer pockets that spread out. A different color of the bottom and handle create a two-tone look. This #9.5 canvas comes in a variety of colors. It is nice that you can enjoy multiple color combinations.
KF: What are some tips for making this bag?
During the making process, it will create some areas with extra thickness. When the difference in thickness is significant, please insert some support like a thick paper under the presser foot in order to avoid the presser foot tilting and operate the machine slowly.
KF: How should we use this bag in everyday situations?
The look is simple and versatile to use. It is a perfect piece for an elegant casual styling. It could also work well as a stylish interior décor accessory.
KF: Thank you very much, Yui! Here are sewing instructions along with step by step photos from her. Enjoy crafting!
Instructions
1.
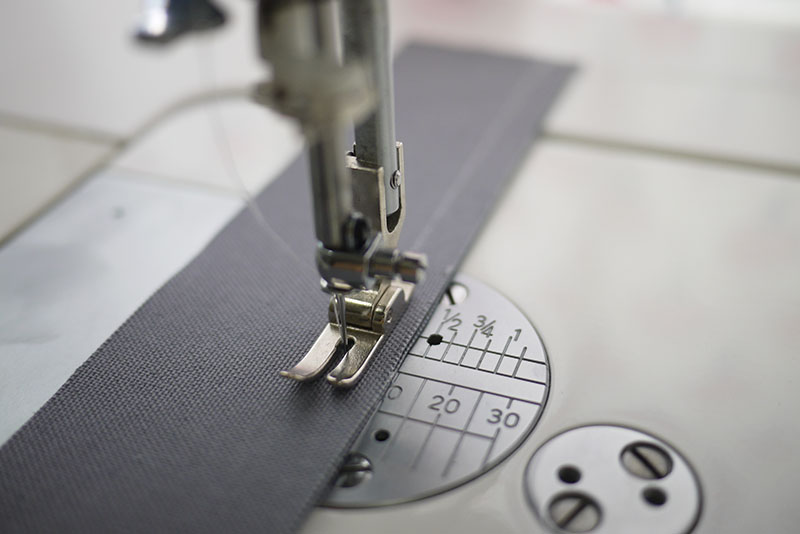
Make the handles. With the front sides facing each other, sew together the one side of the long end with 1cm seam.
2.
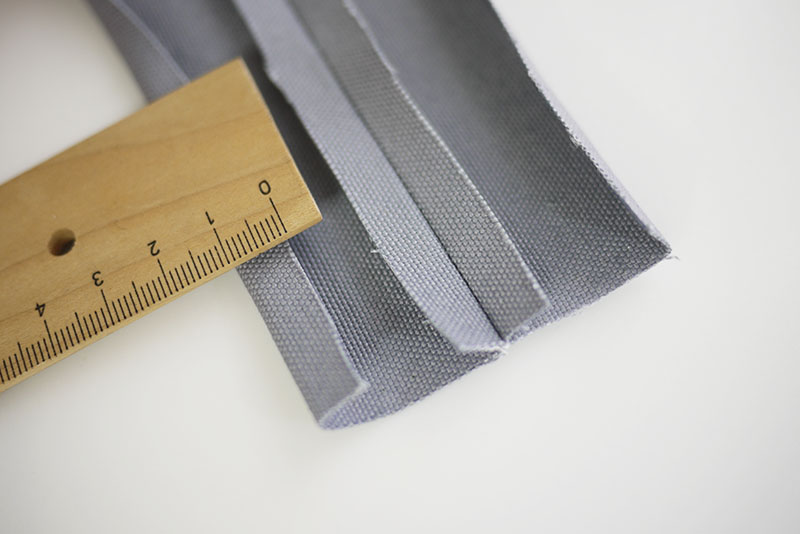
Spread the pieces. Press the seam open. Fold both long ends for 1cm.
3.
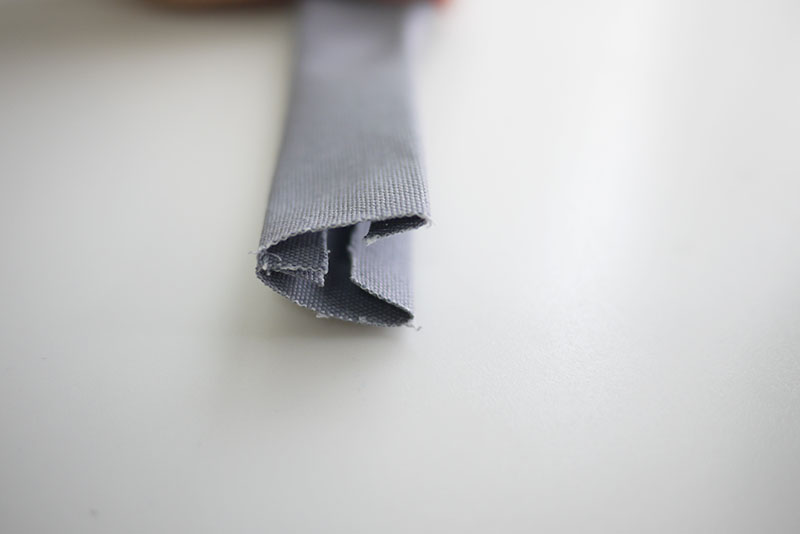
With the front sides facing outside, fold in half. Apply stitches at 2mm from the edge of the long ends on both sides. Leave about 20cm (from both ends of the pieces) unsewn to avoid creating multiple finish stitch lines. This is the portion to be attached to the bag. ※Make two pieces.
4.
Fold the pocket opening in three and apply stitches. Put matchmarks on the bag body and pocket.
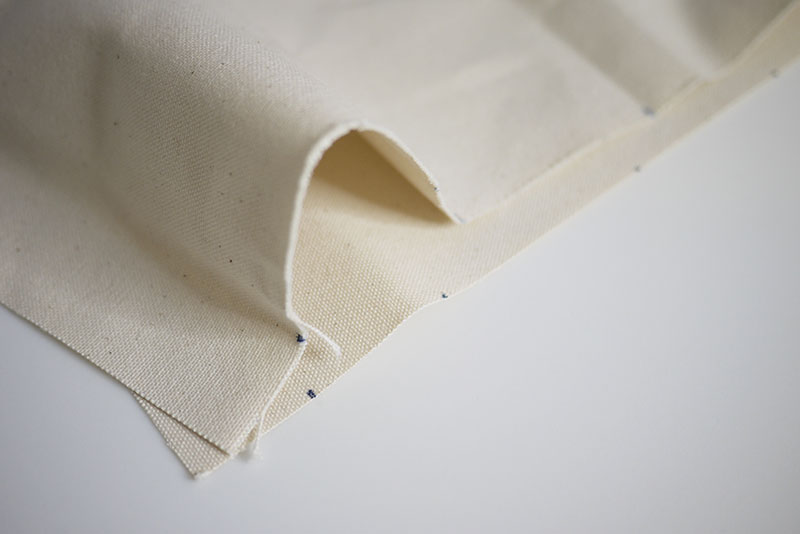
5.
Fold the pocket gusset and baste the piece.
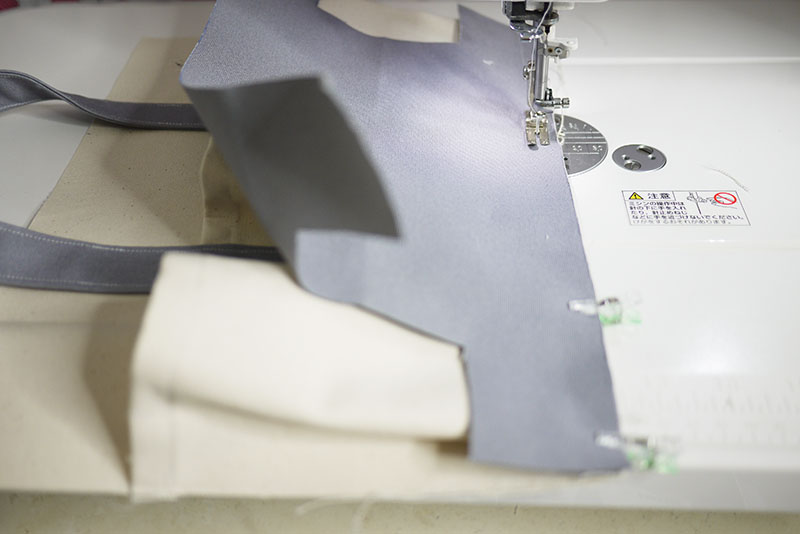
6.
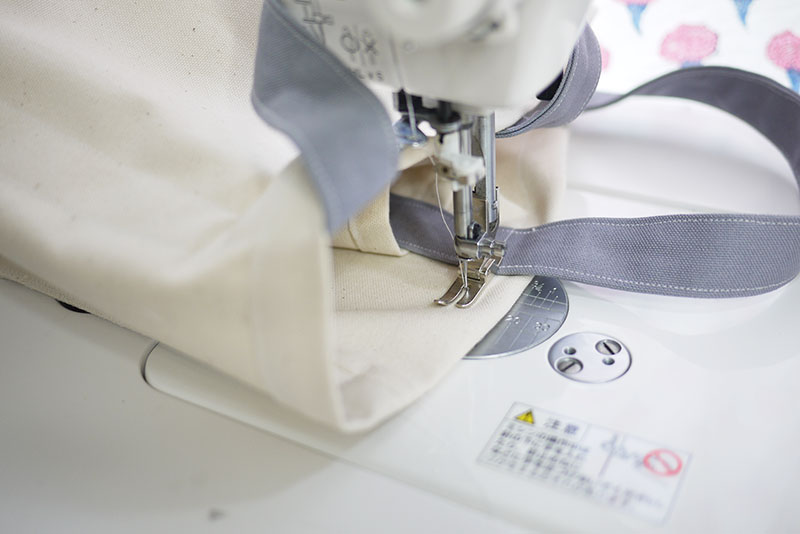
Attach the handle.
7.
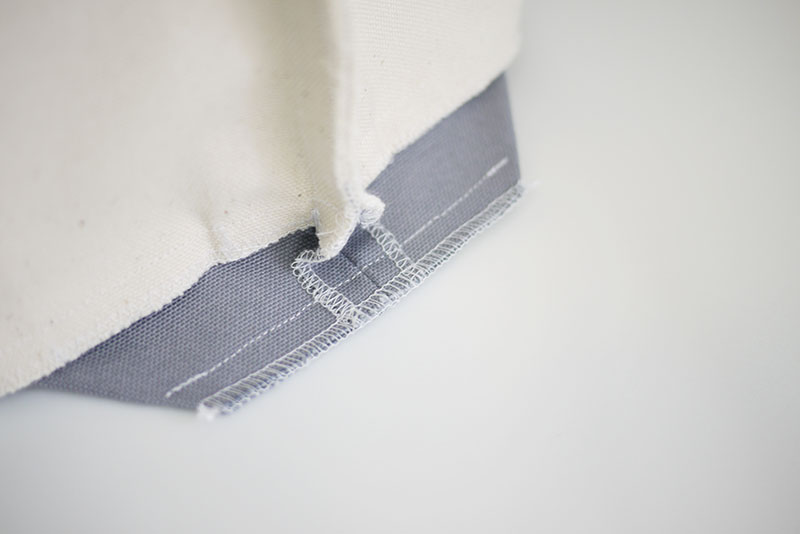
Repeat the same process for both the front and back portions of the bag body and piece together the bottom. With the front sides facing each other, sew together the bag body and bottom fabric. Serge or apply zigzag stitches on the edge. Press down the seam to the bottom side.
8.
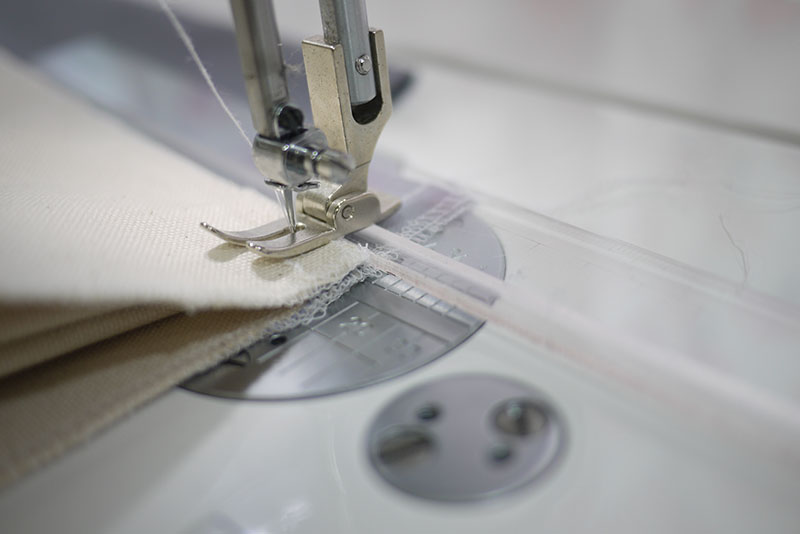
Either serge or apply zigzag stitches on both sides. With the front sides facing each other, fold in half and sew together both sides. Where there is a significant difference in thickness, insert some support like a thick paper to keep the presser foot parallel for even stitches.
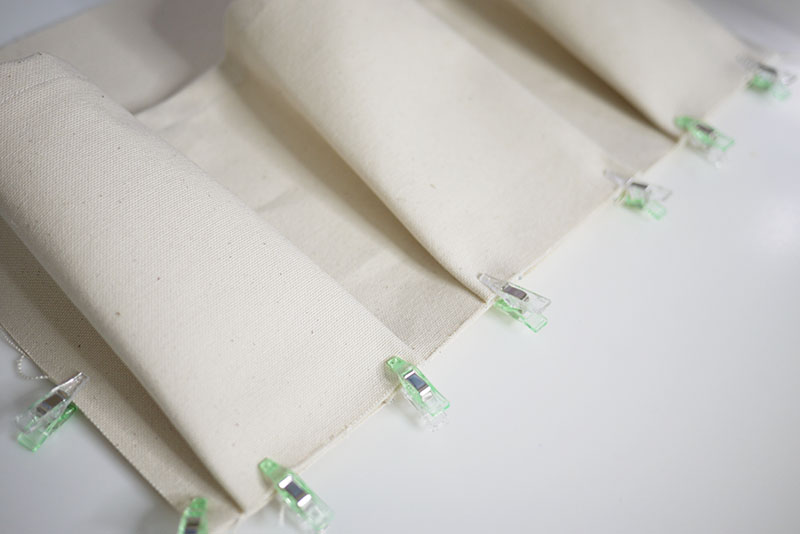
9.
Fold the gusset and sew. Finish the edge.
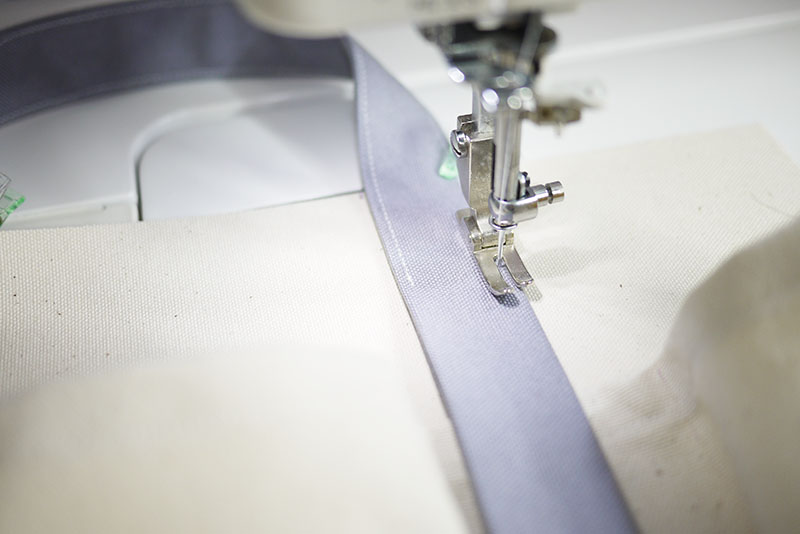
10.
Fold the top opening in three. Apply stitches from the front to finish.
◎Sewing Instructions

◎Sewing Instructions (PDF format / A4 size)