
The featured project is a stylish tote bag with a look of recycled denim fabric. An oxford denim-like print is from the POINT DENIM series. The denim fabric at the top and for the handles adds a feel of repurposed denim. The safety zipper at the opening hides the contents completely, creating a clean design when carrying the bag. This tote is fun to make and completely satisfies what you expect from a tote bag.
Fabric shown for this sample: (Outer fabric, Pocket) YTA99000-2A
Materials:
□ Fabric (Outer fabric, Pocket): 110cm×50cm
(Opening fabric, Belt, Bottom fabric, Handle, Belt loop, Lining fabric): 110cm×60cm
□ Zipper: 1 piece (35cm long)
□ Double fold bias binding tape: 30cm (1.2cm wide)
□ Patch of your choice

*All Rights Reserved. Please refrain from the unauthorized use of project photos.
We interviewed Anriko about her creation:
Kokka Fabric (KF): What did you think of the fabric you used for this project?
It is an oxford fabric, but the print looks like denim with a pop and fun space-themed design. The pockets and stitches are tactfully used to create a varied look and enhance the design.
KF: Can you tell us any special elements or ideas that you incorporated into this creation?
Overall, it is a convenient tote with a large gusset and ample room despite its look. In any event, a pocket is a must, so I became totally playful with the denim-like print design to create a bag made from repurposed denim pants.
KF: What are some tips for making this bag?
The denim fabric is used in place for the pieces where you normally need fusible interfacing. In this way I was able to skip the interfacing process that people often do not favor. Also, attaching the square bottom on the looped top is not easy, so I came up with a process to attach the square bottom at the end.
KF: How should we use this bag in everyday situations?
The belt loop is created as more of a design feature, but you can attach bag charms (as shown in the photo) or tie the pass case or key case to the center loop so that you can conveniently place them in the pocket. It is handy to have this loop, as you can avoid dropping or having to look for something by tying the items.
KF: Thank you very much, Anriko! Here are sewing instructions along with step by step photos from her. Enjoy crafting!
Instructions
1.
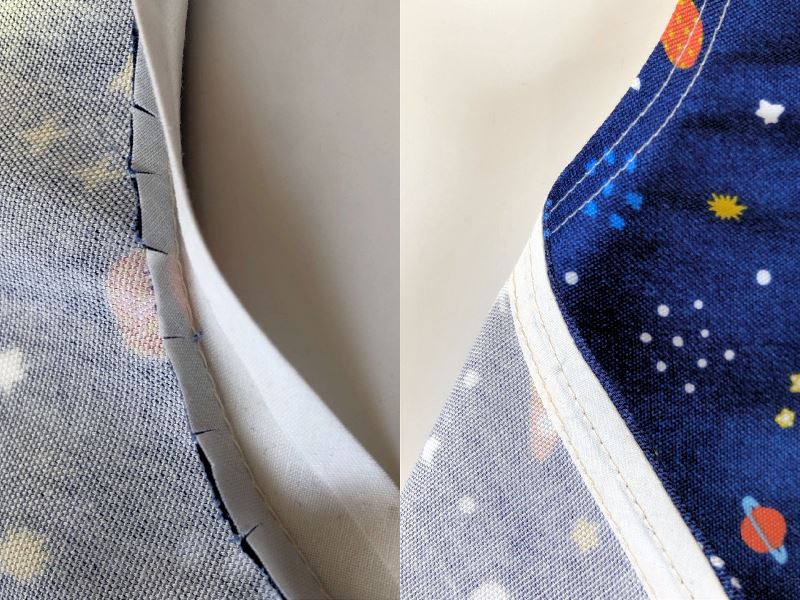
The curve of the front pocket uses the bias binding tape to strengthen the opening. As shown on the left photo, make small notches and sew the tape at 5mm from the edge. Before attaching the other side to the back, stretch the unsewn tape first by hand.
2.
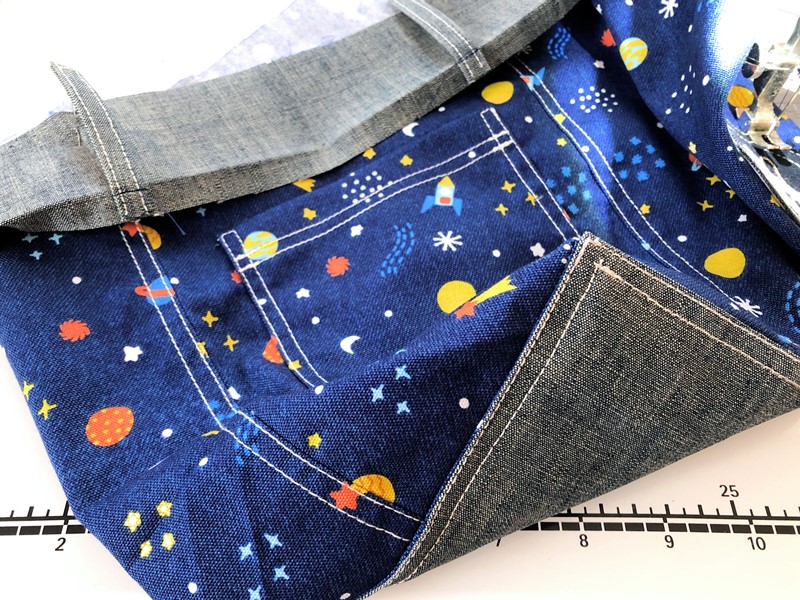
It is fun to attach a patch of your choice. If attaching it to the pocket, do so before sewing the pocket to the bag. After attaching the pocket, make a tube with the bag portion. The belt is attached next. The belt loops are basted first, so put them in a place where you like.
3.
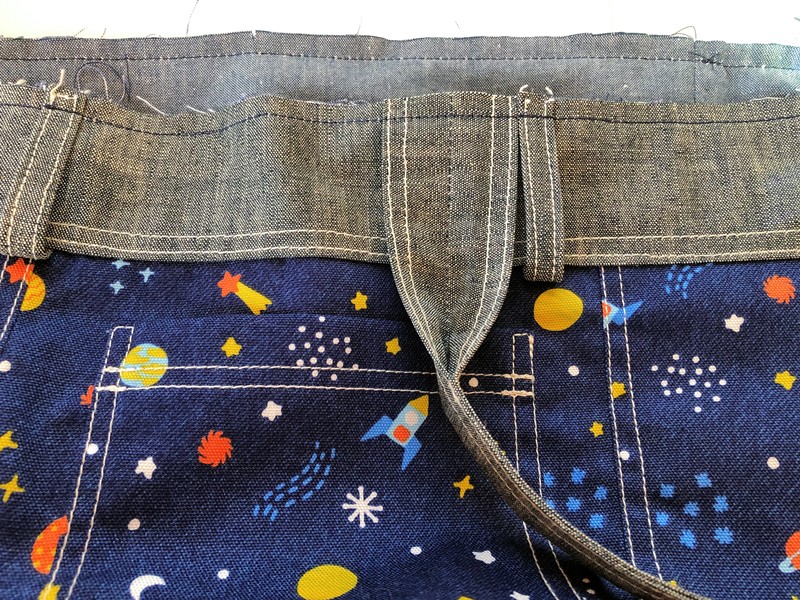
Attach the bottom end of the belt. Before attaching the opening fabric, secure the lining fabric and handle and baste all the way around. If you are used to doing this process, you may skip the basting.
4.
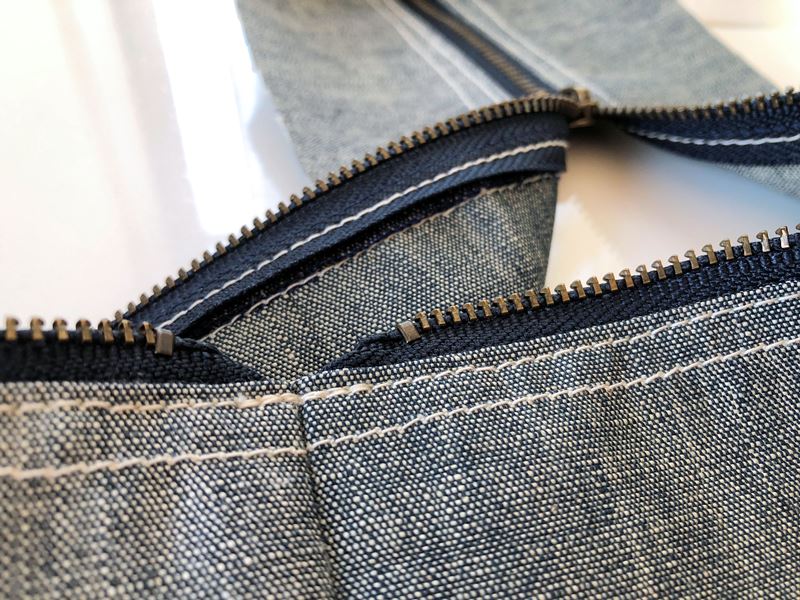
The zipper is attached to the opening fabric. Based on this design, you will hardly see the end of the zipper when you are carrying this bag. If you fold the end for about 1-2mm as shown, it will create a clean look.
5.
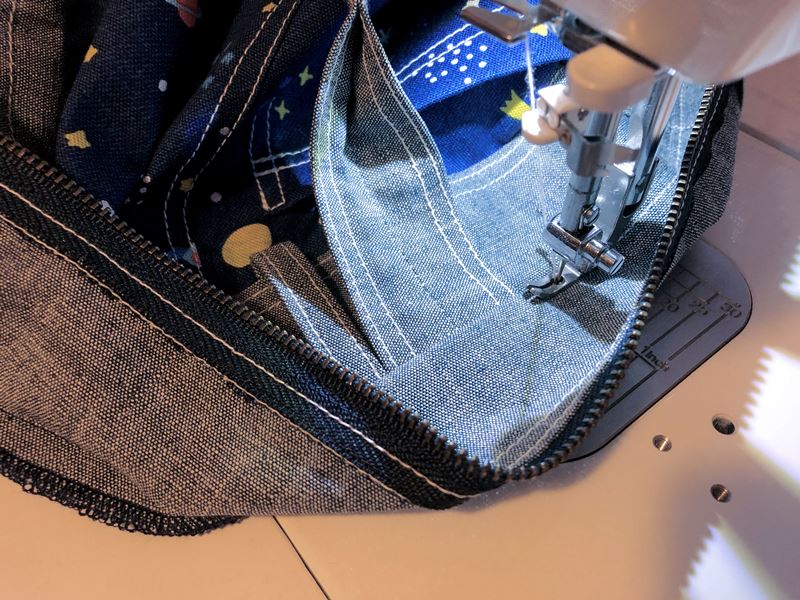
The opening fabric and bag are pieced together with the front sides facing each other, so the seam will not be visible. Just apply zigzag stitches to avoid fraying. You may want to apply edge stitches. The pieces are rather sick, so it may be difficult to do so with a household sewing machine. For this bag, only opening fabric and seam are secured.
6.
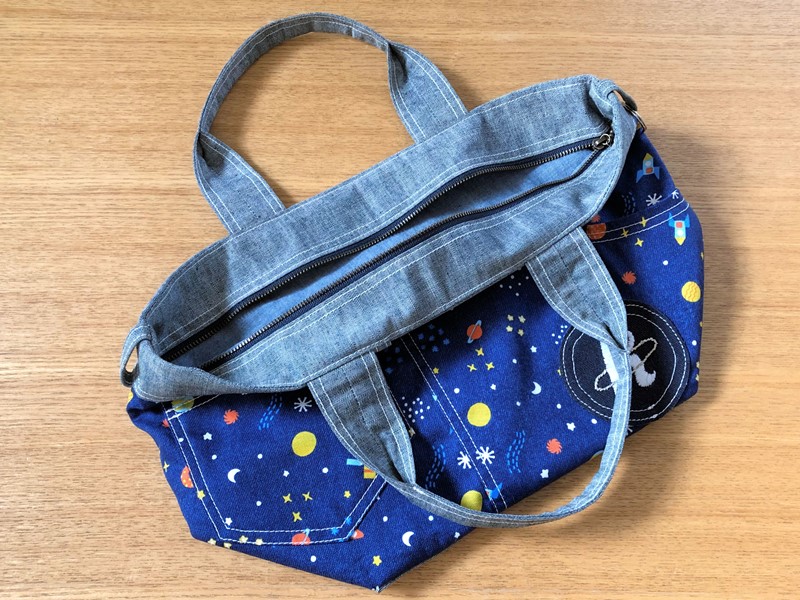
Finished. The opening fabric is contained in the inner part, creating a clean look. The gusset at the opening allows for more room inside the bag.

 Recycled Denim-Style Bucket Bag Sewing Instruction
 TOTE Bag with a Mini Pouch
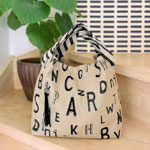 Flat Handle Tote